
Claim Programs allow users to claim for specific credits linked to assignments, certificates, or seminars they have completed. You can adjust which credits are added to your Program, how many credits can be claimed and even add forms to gain feedback on Claimer experience.
To set up a Claim Program:
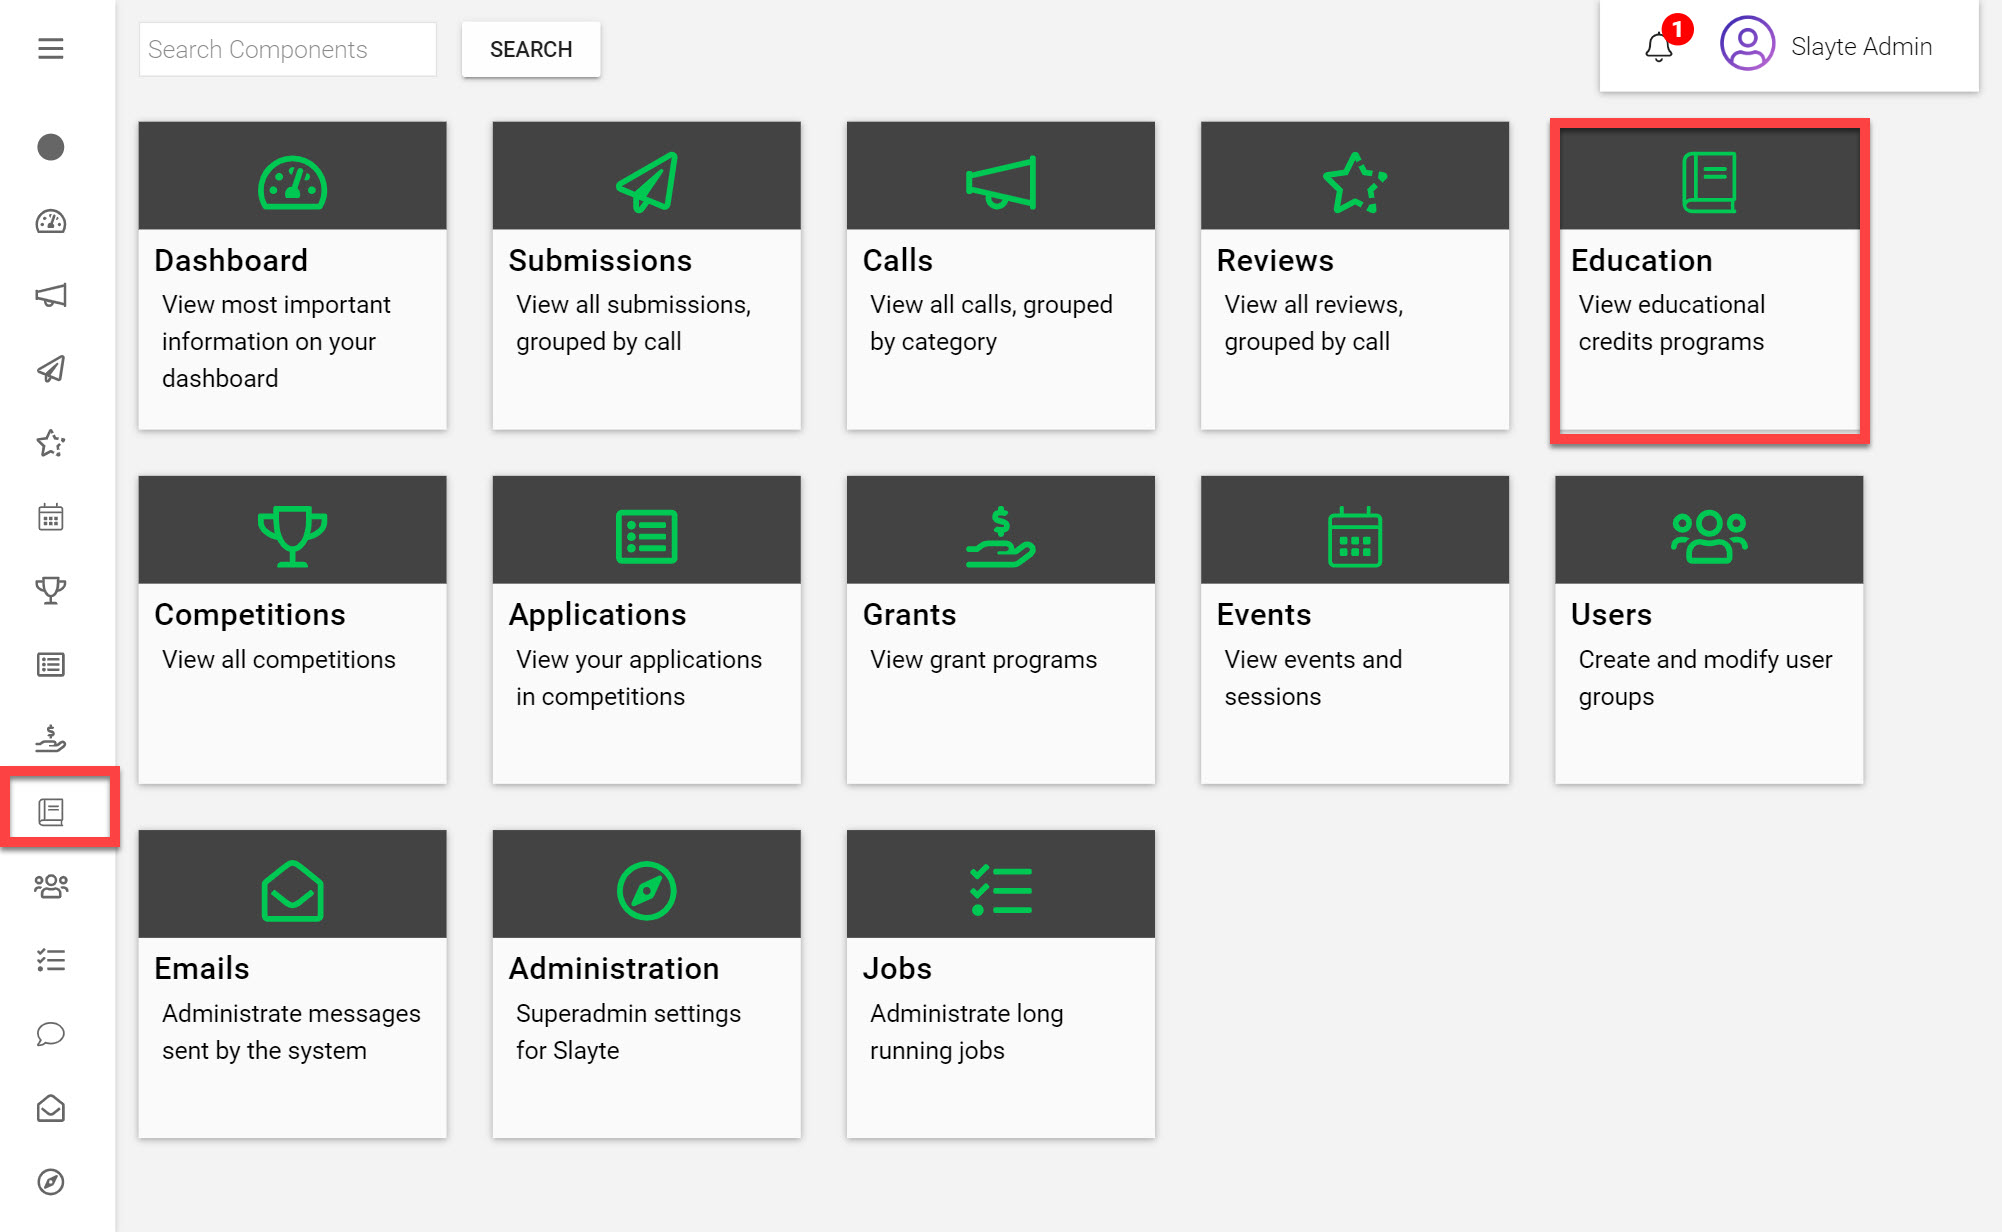
Go to the Homepage and click on Education
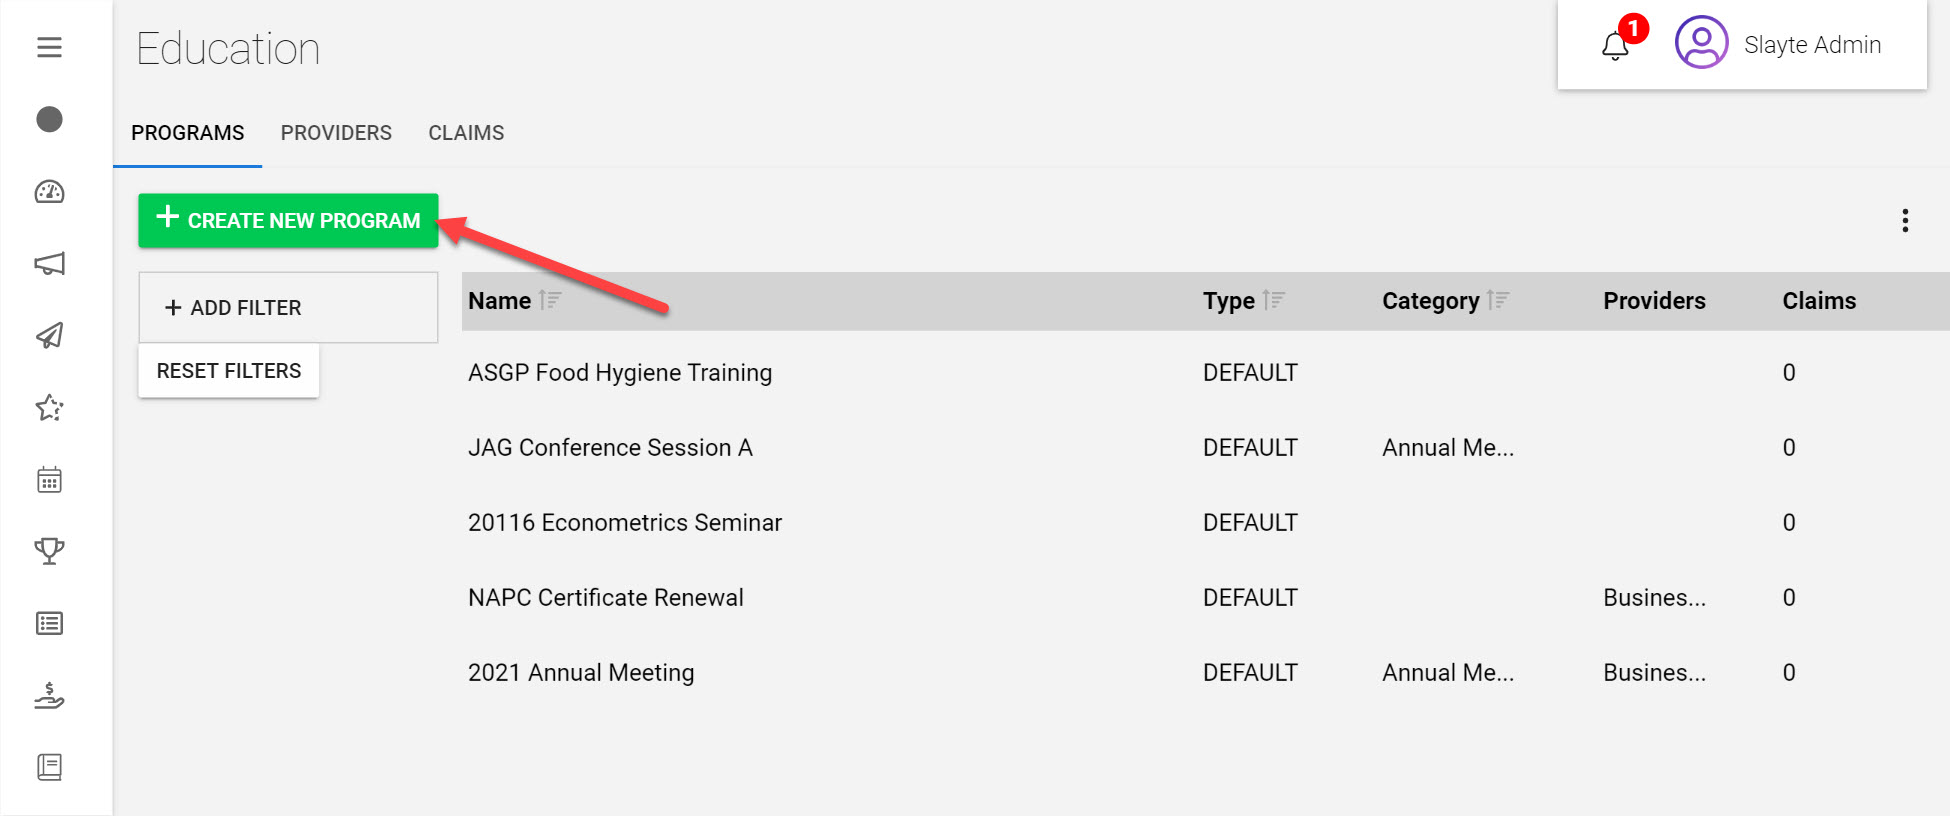
Click Create New Program on the top left and click Custom
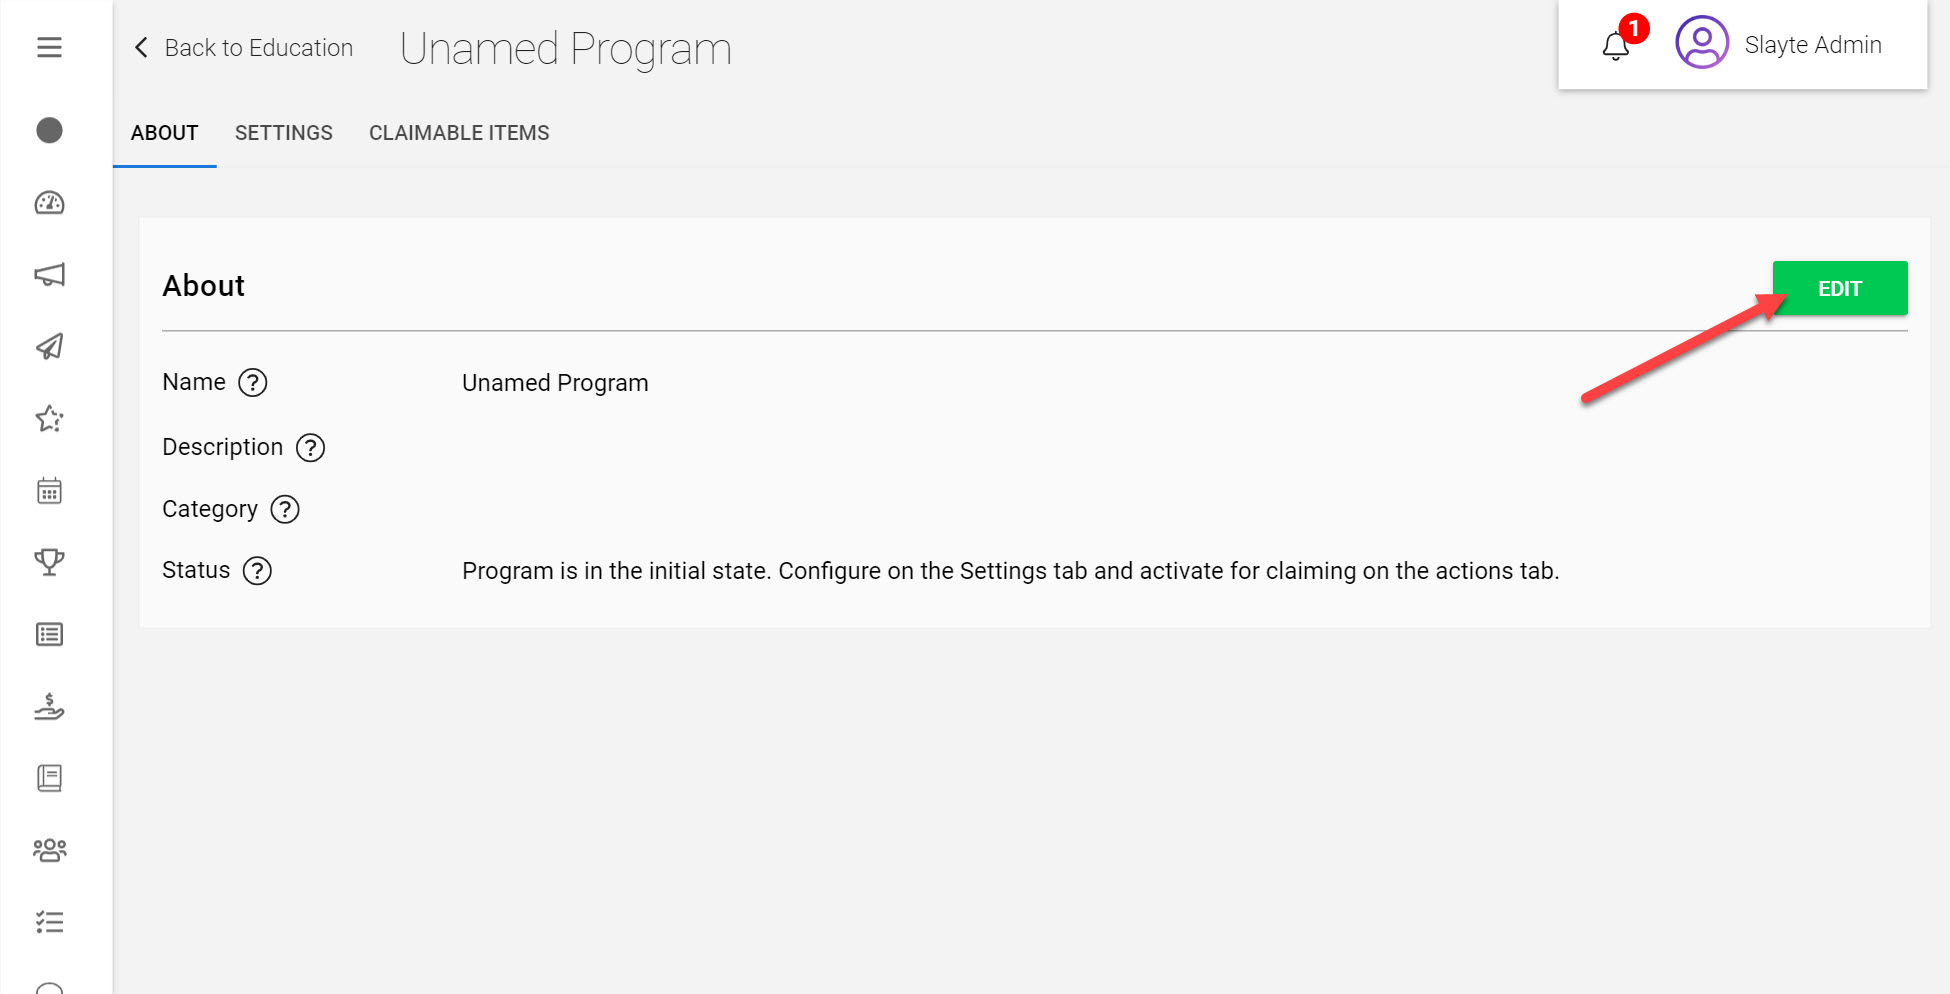
Click Edit on the top right
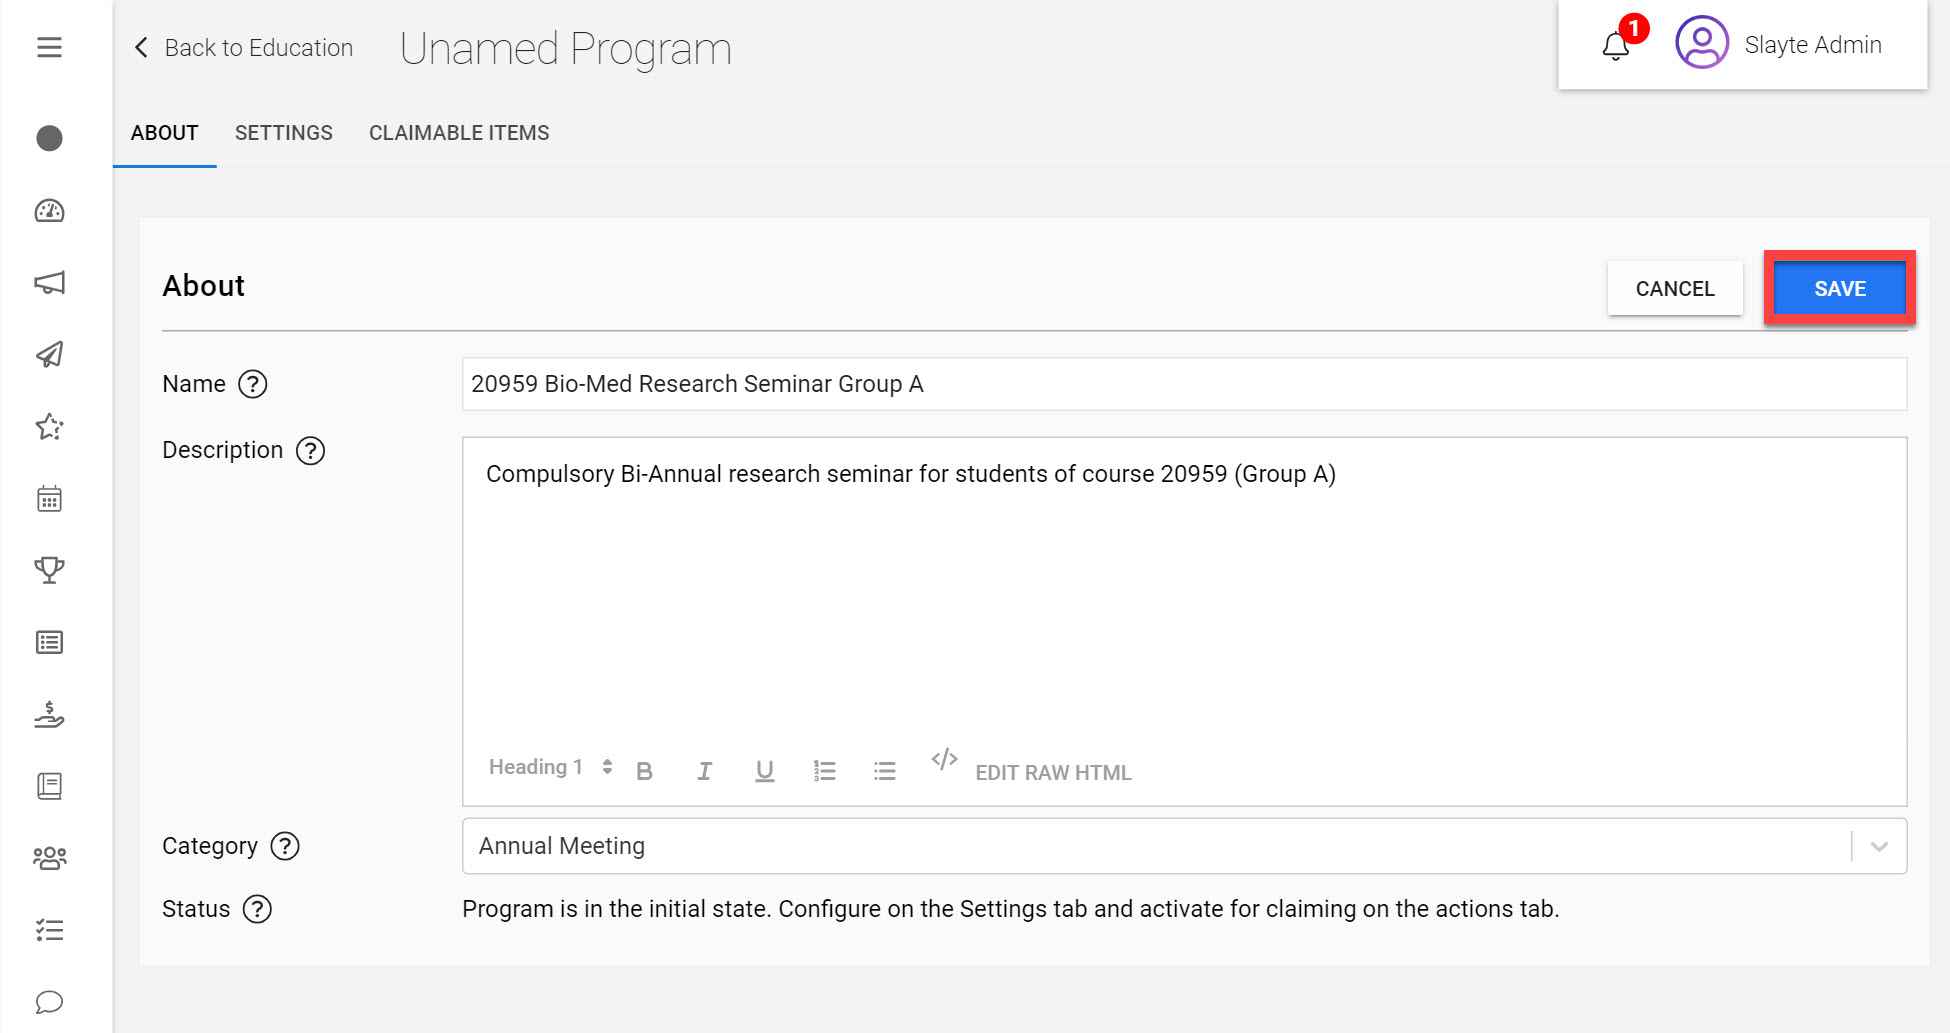
Input a Name and Description for your Claim Program
Choose a Category
Click Save
Now that you have created your Claimable Program with a basic setup, you can customize a few settings to decide which credits should be claimable and how to verify completion.
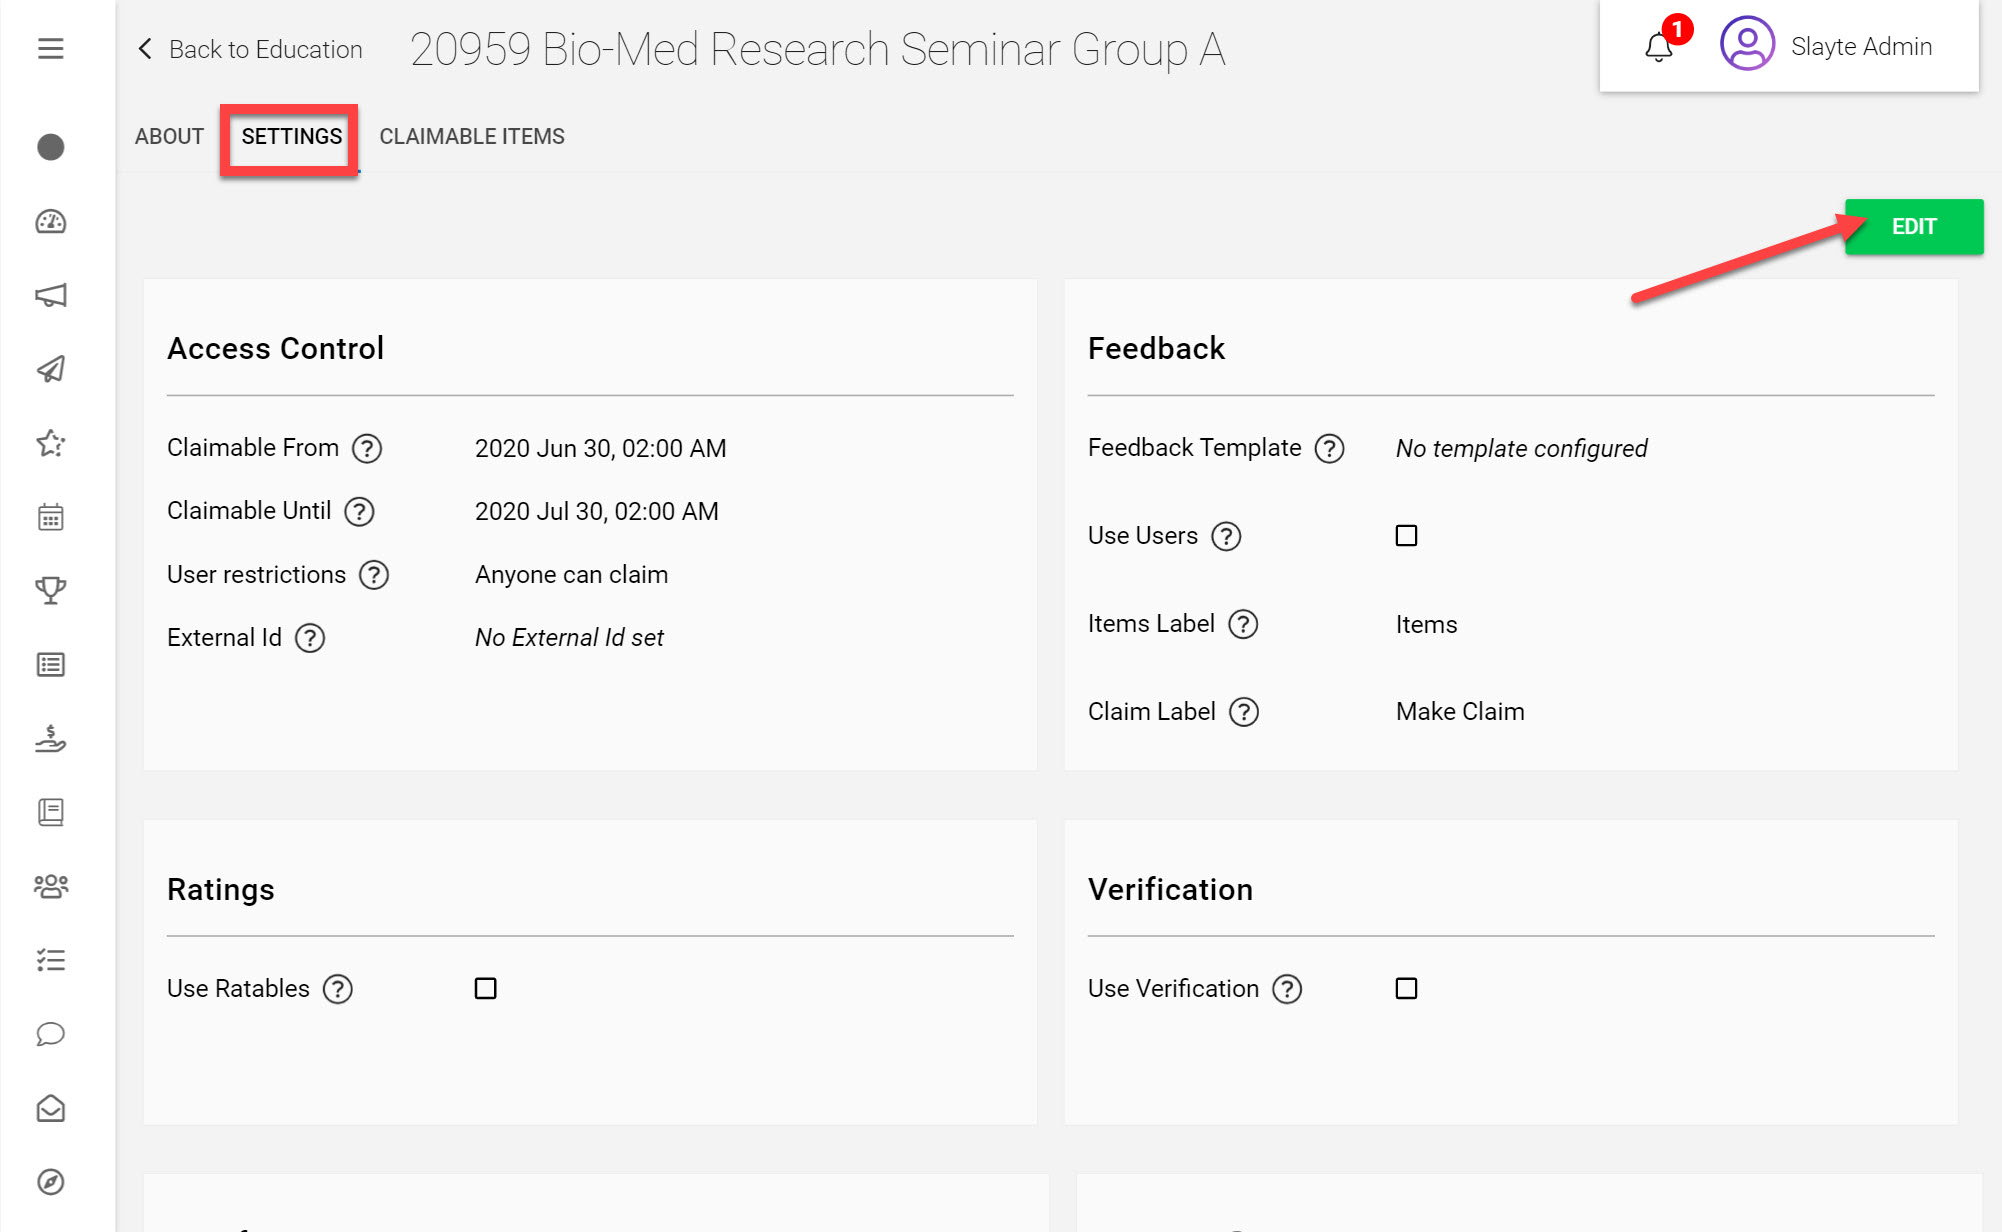
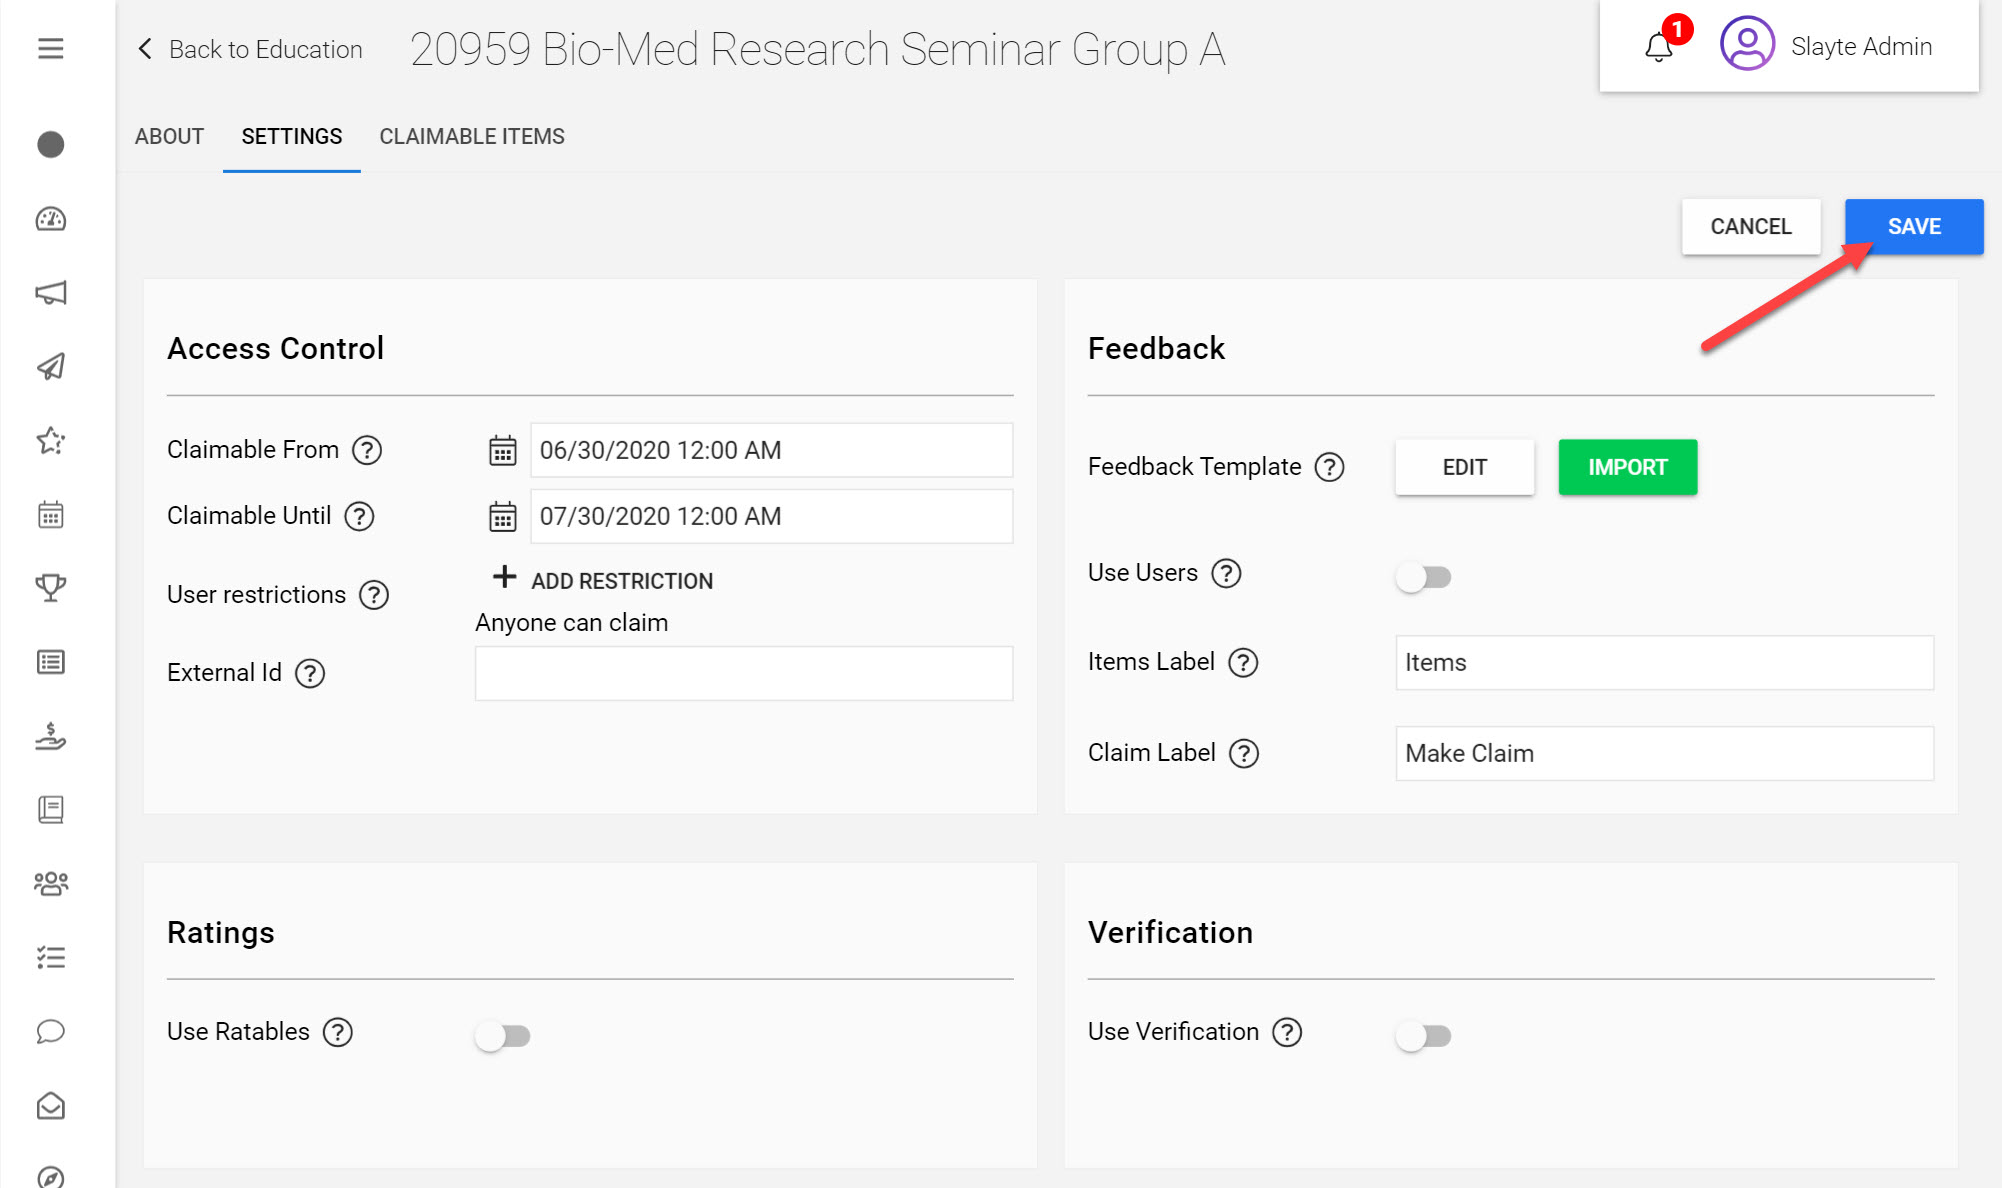
Click on the Settings tab
This page controls how users can access the Claim Program and which information they will need to complete the claim.
Click Edit on the top right
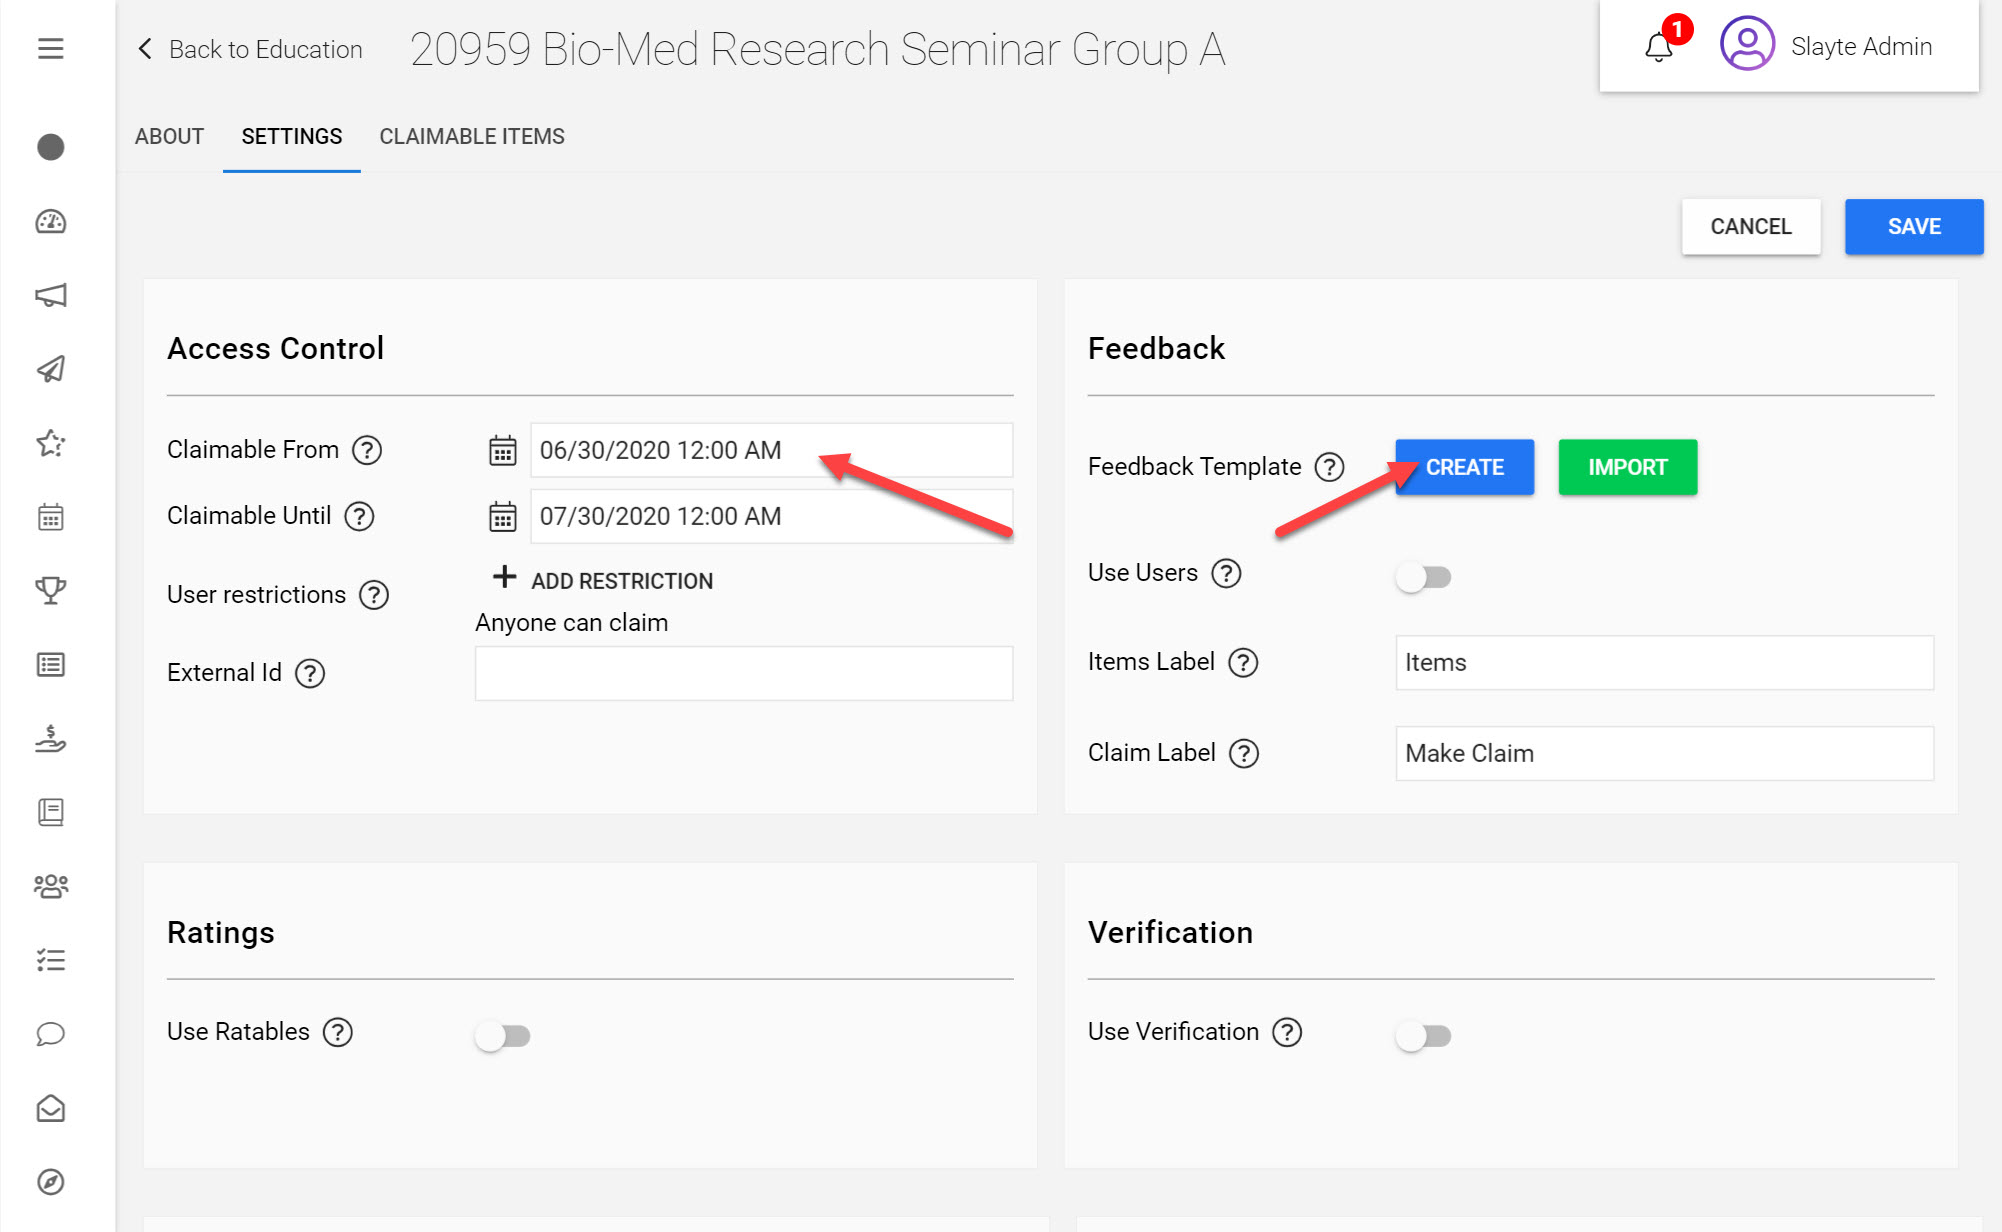
Choose Begin and End dates for your Claim Program
Feedback Template
Feedback Templates will be filled in by users to complete their Claim for credits. These can be as simple or complex as required, but at least one must be added to your Claim Program for users to claim credits.
To create a Feedback Template:
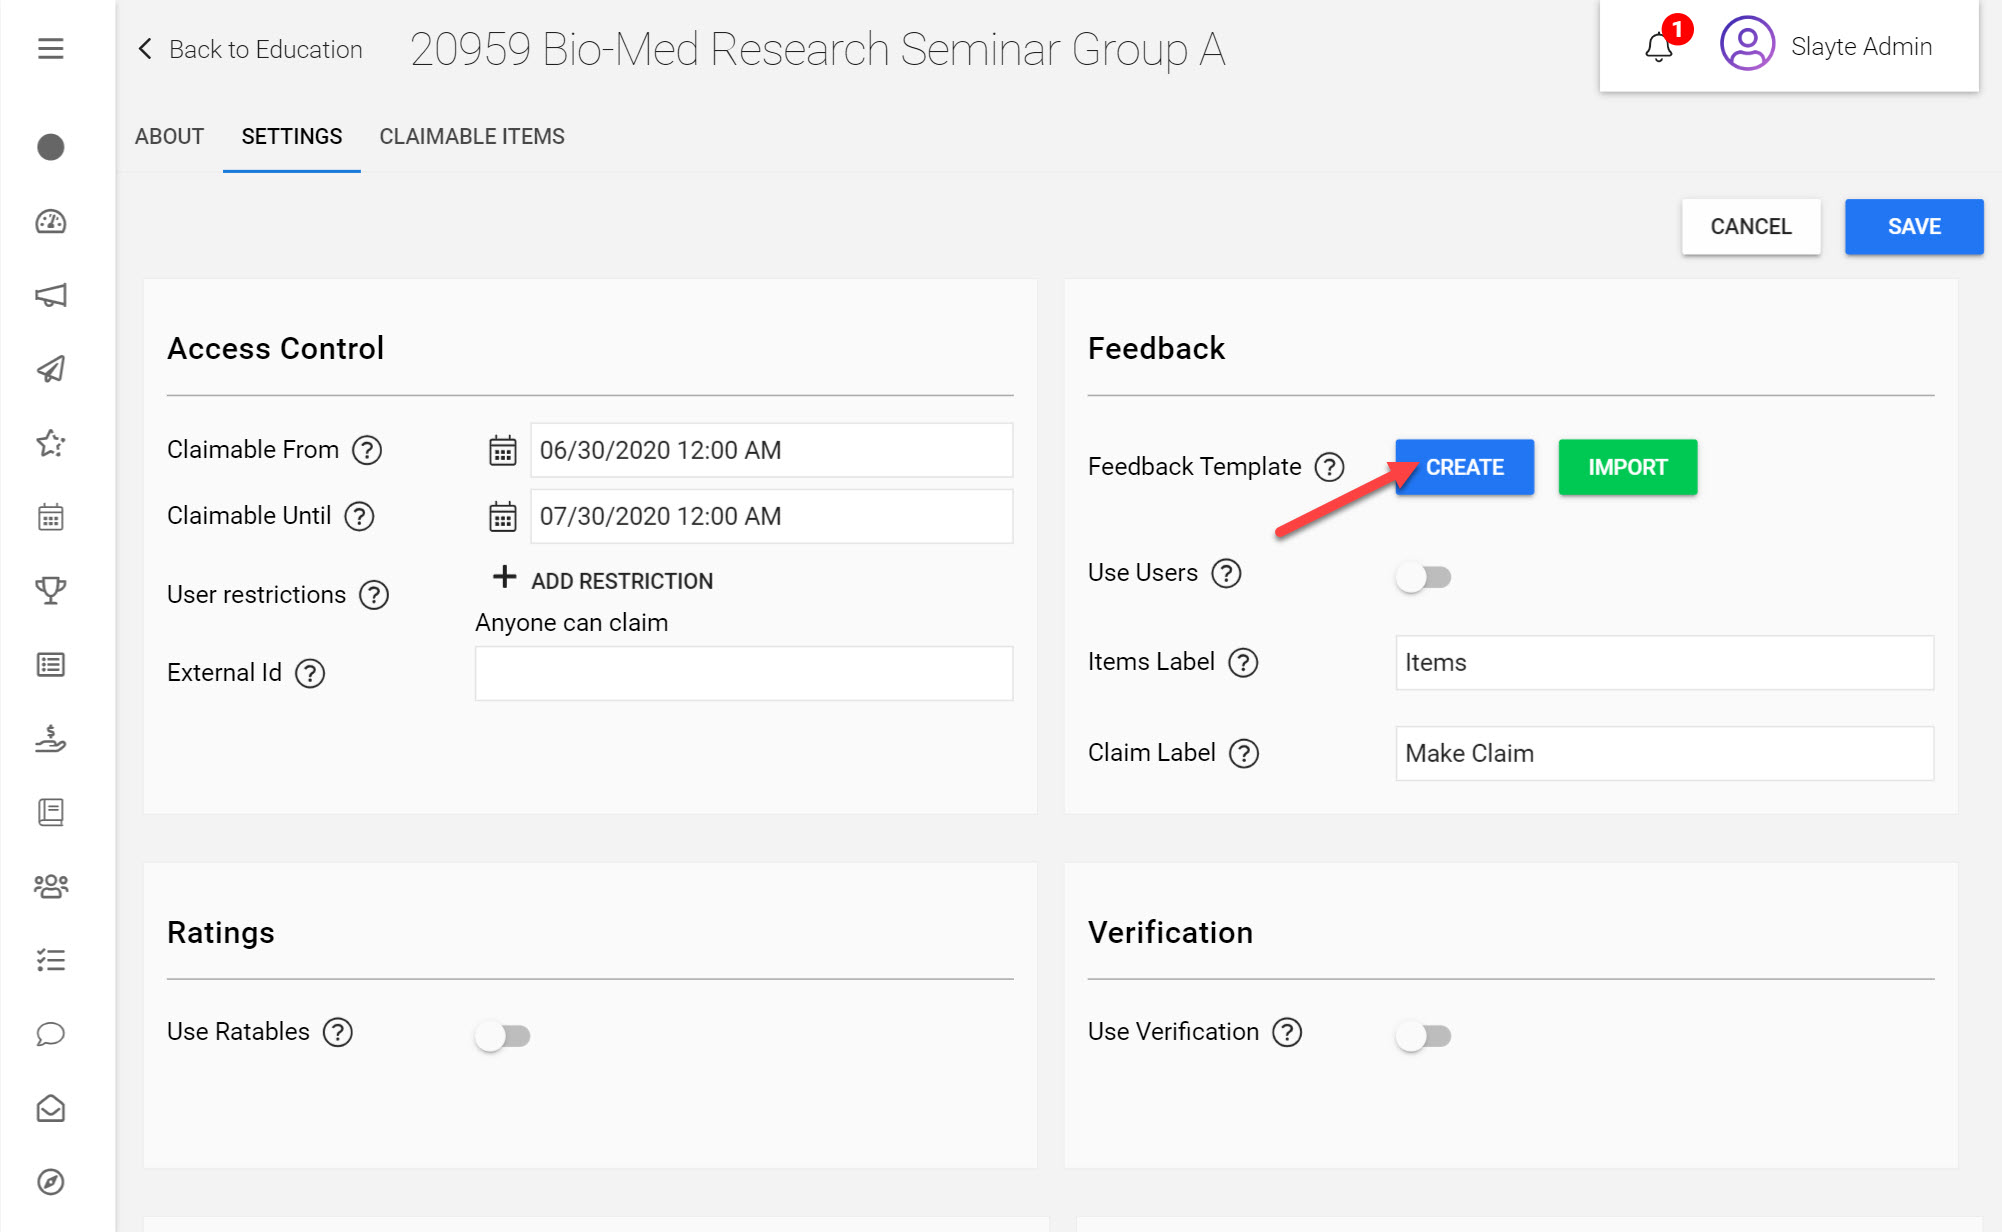
Click Create next to Feedback Template
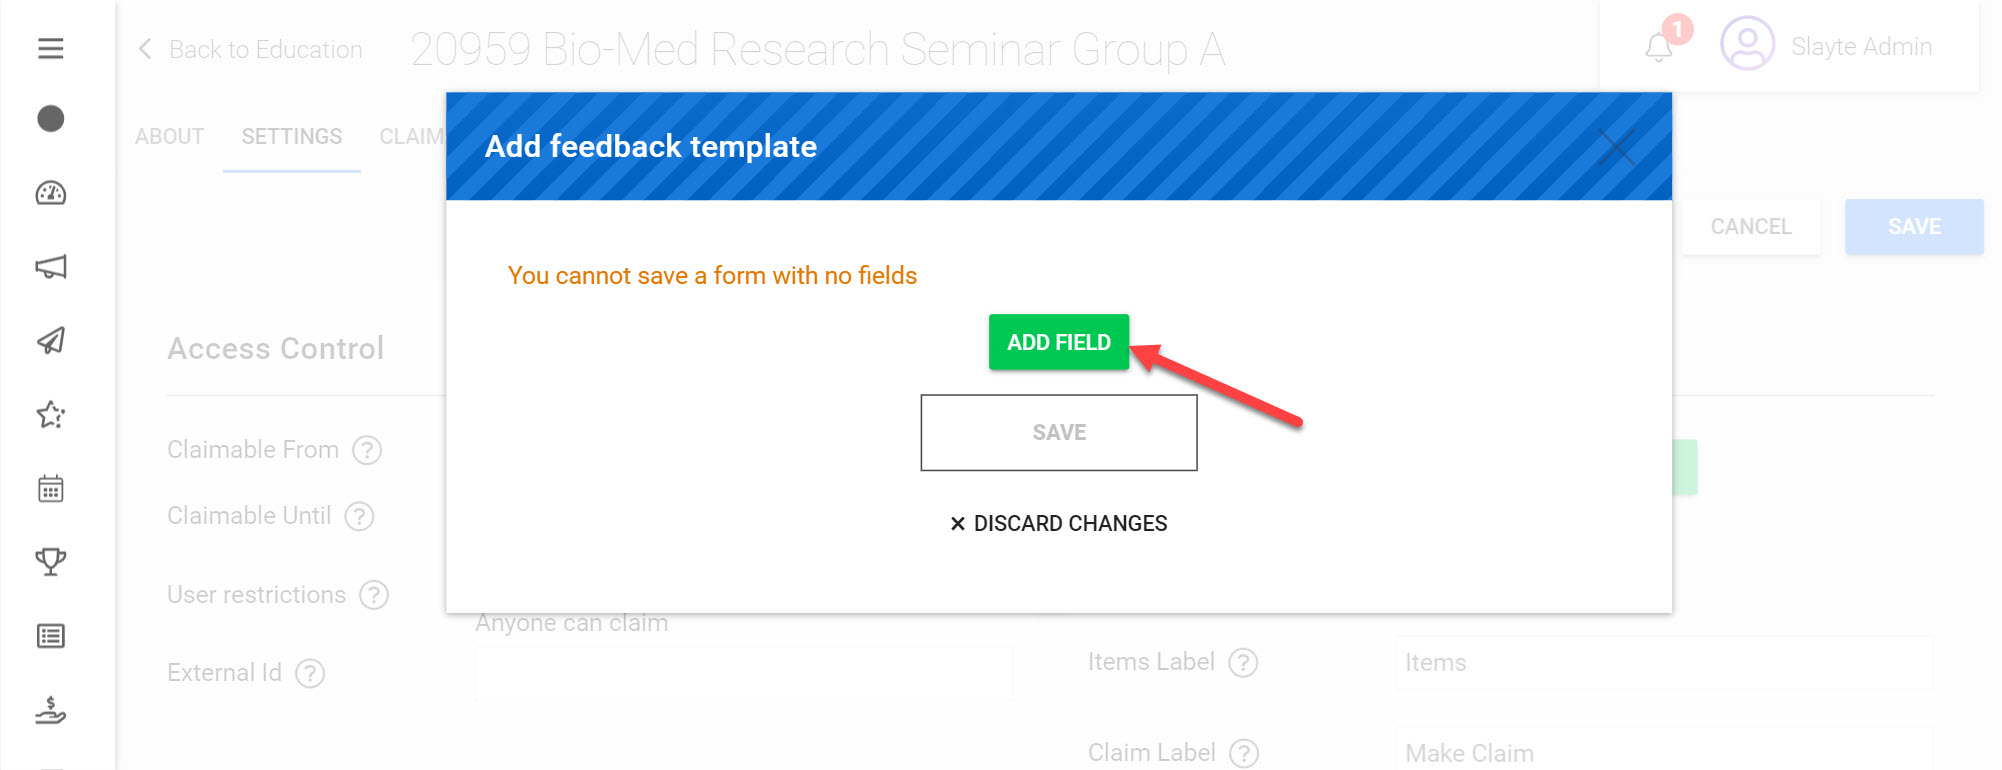
Click Add Field
Fields allow you to add custom questions to the Claim form that users will fill in. This article goes into more detail on which Fields are available and provides examples on how to use them.
For this example we will add a few basic Fields.
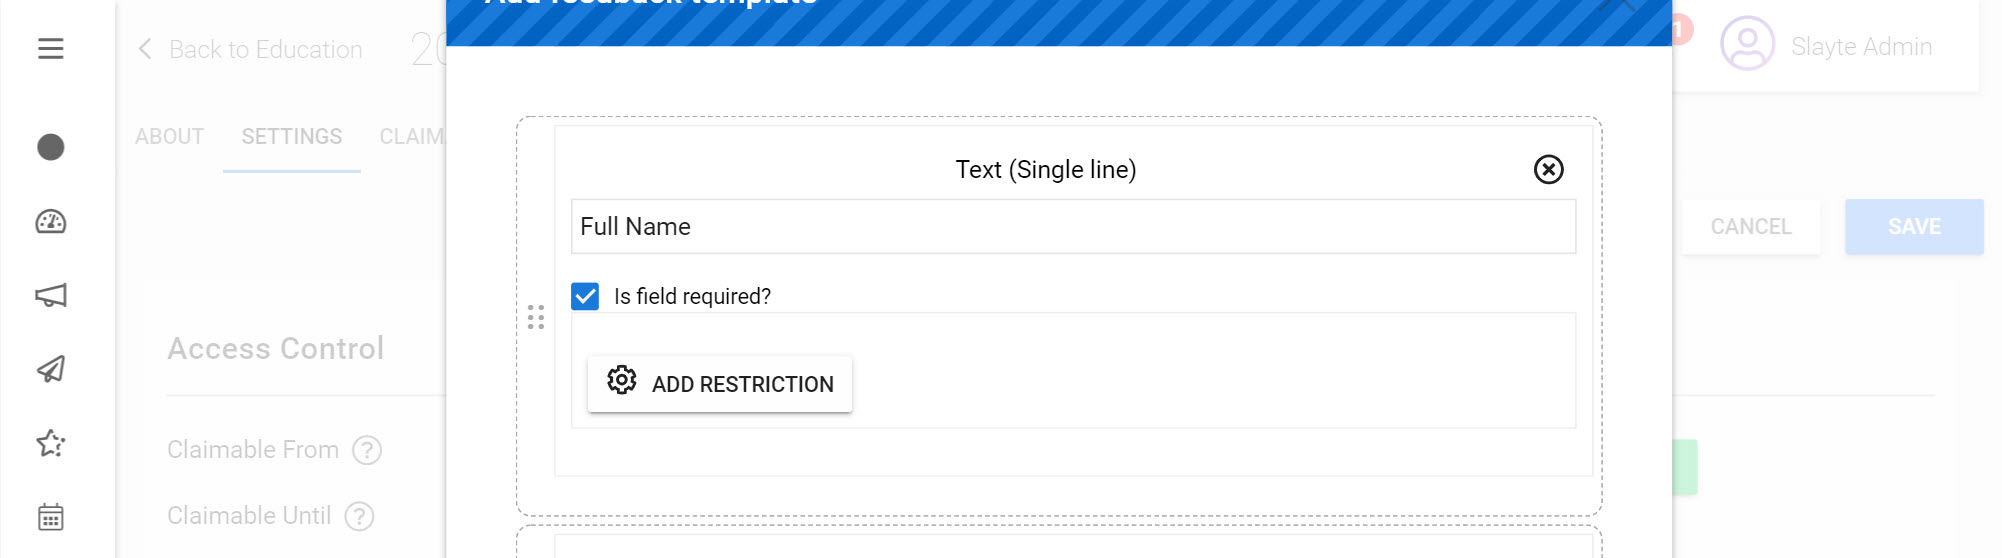
Click Text (Single line) and type in ‘Full Name’ as the label
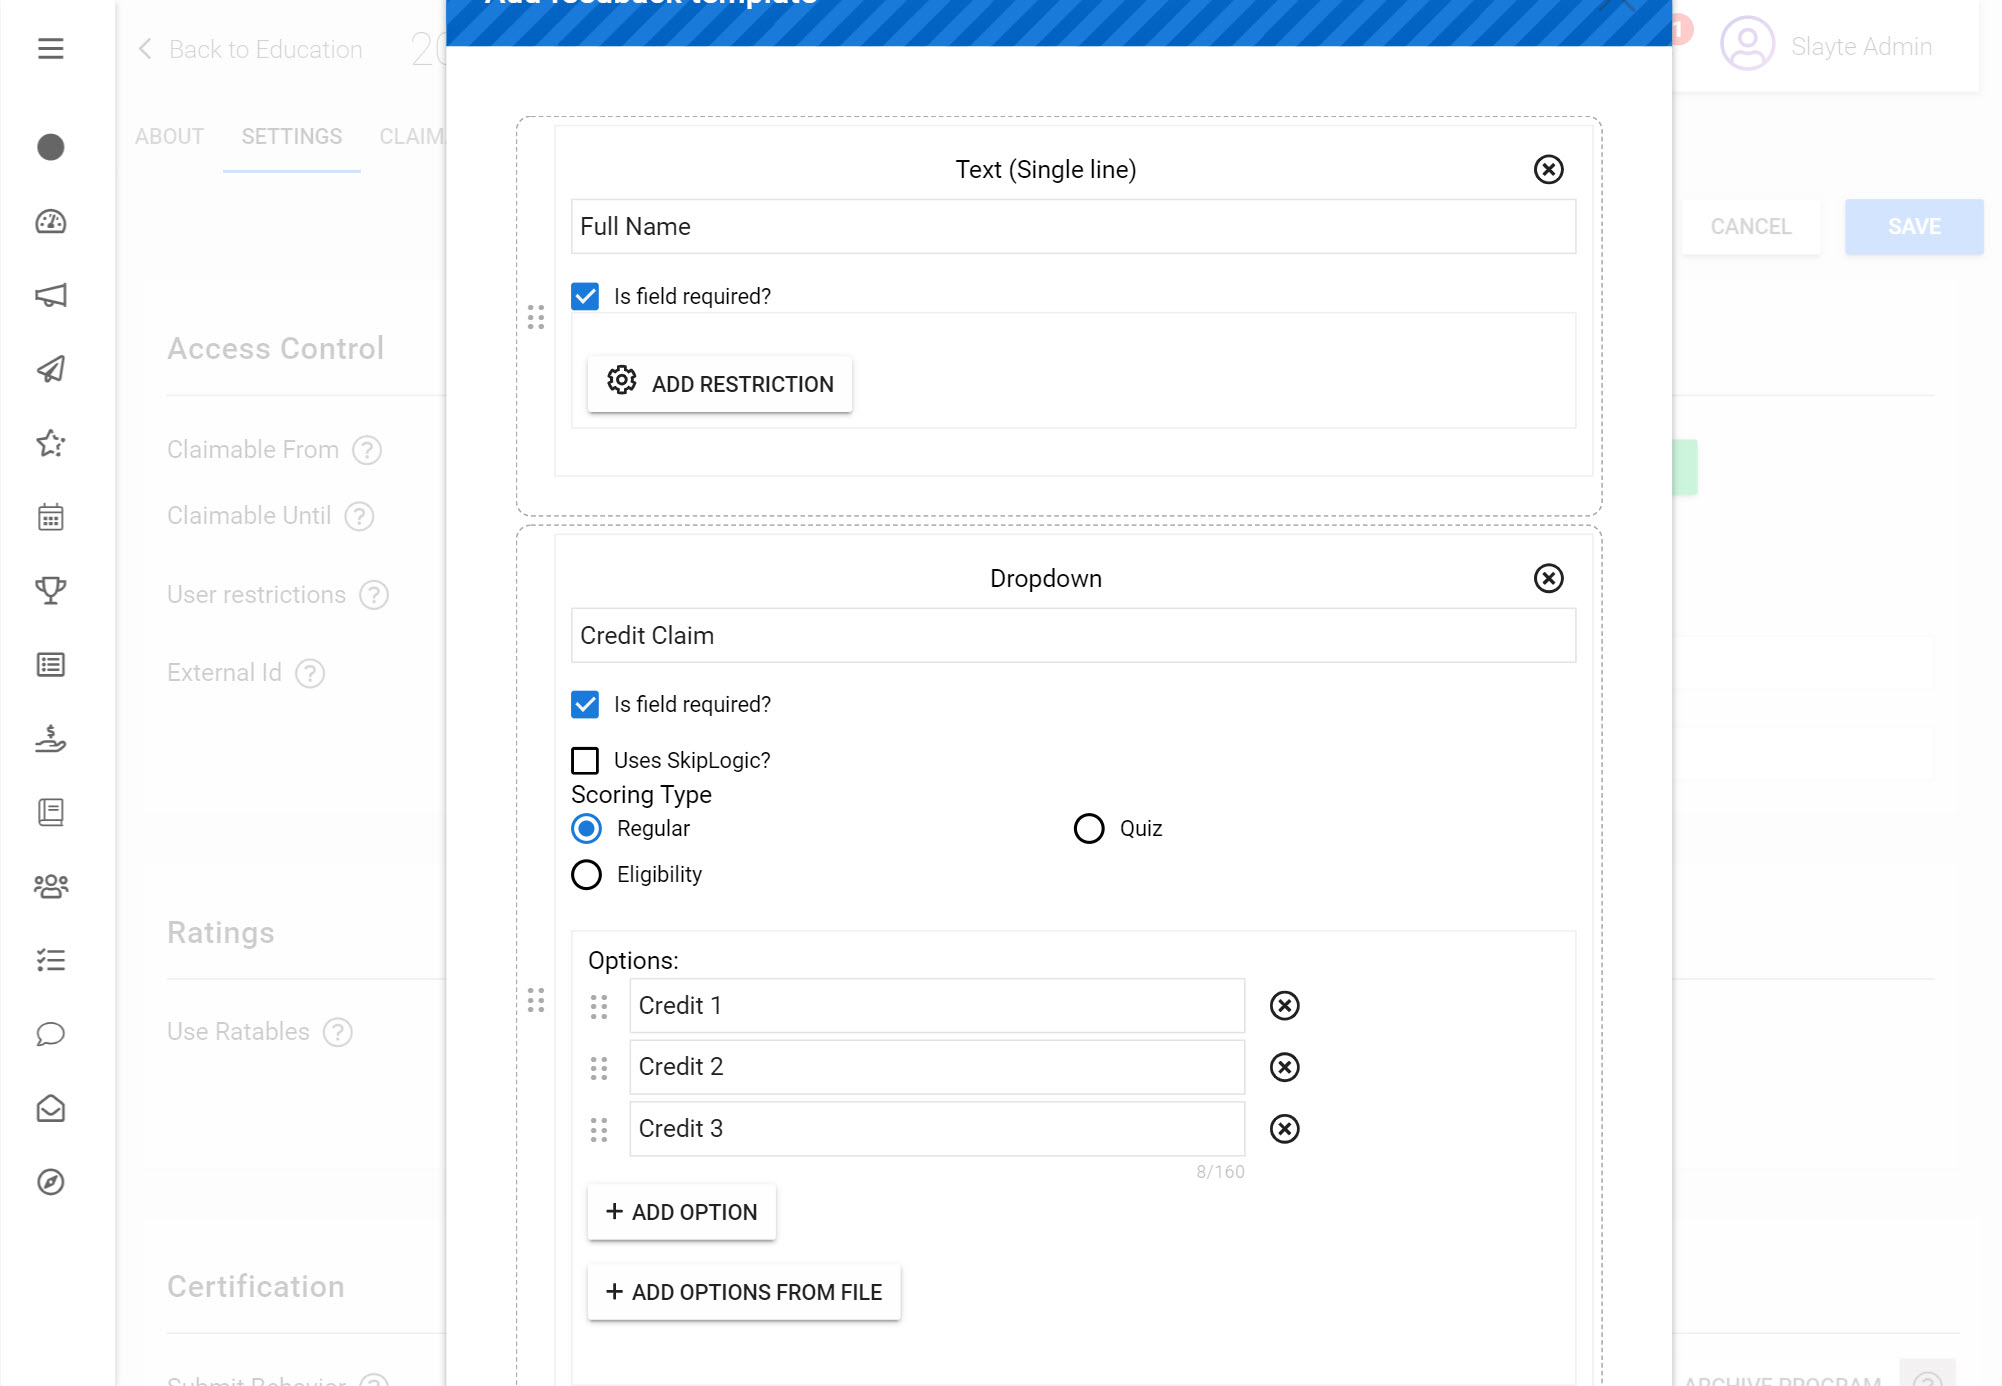
Click Add Field and choose Dropdown
Add the Field Label 'Credit Claim'
Add the options: Credit 1, Credit 2 and Credit 3
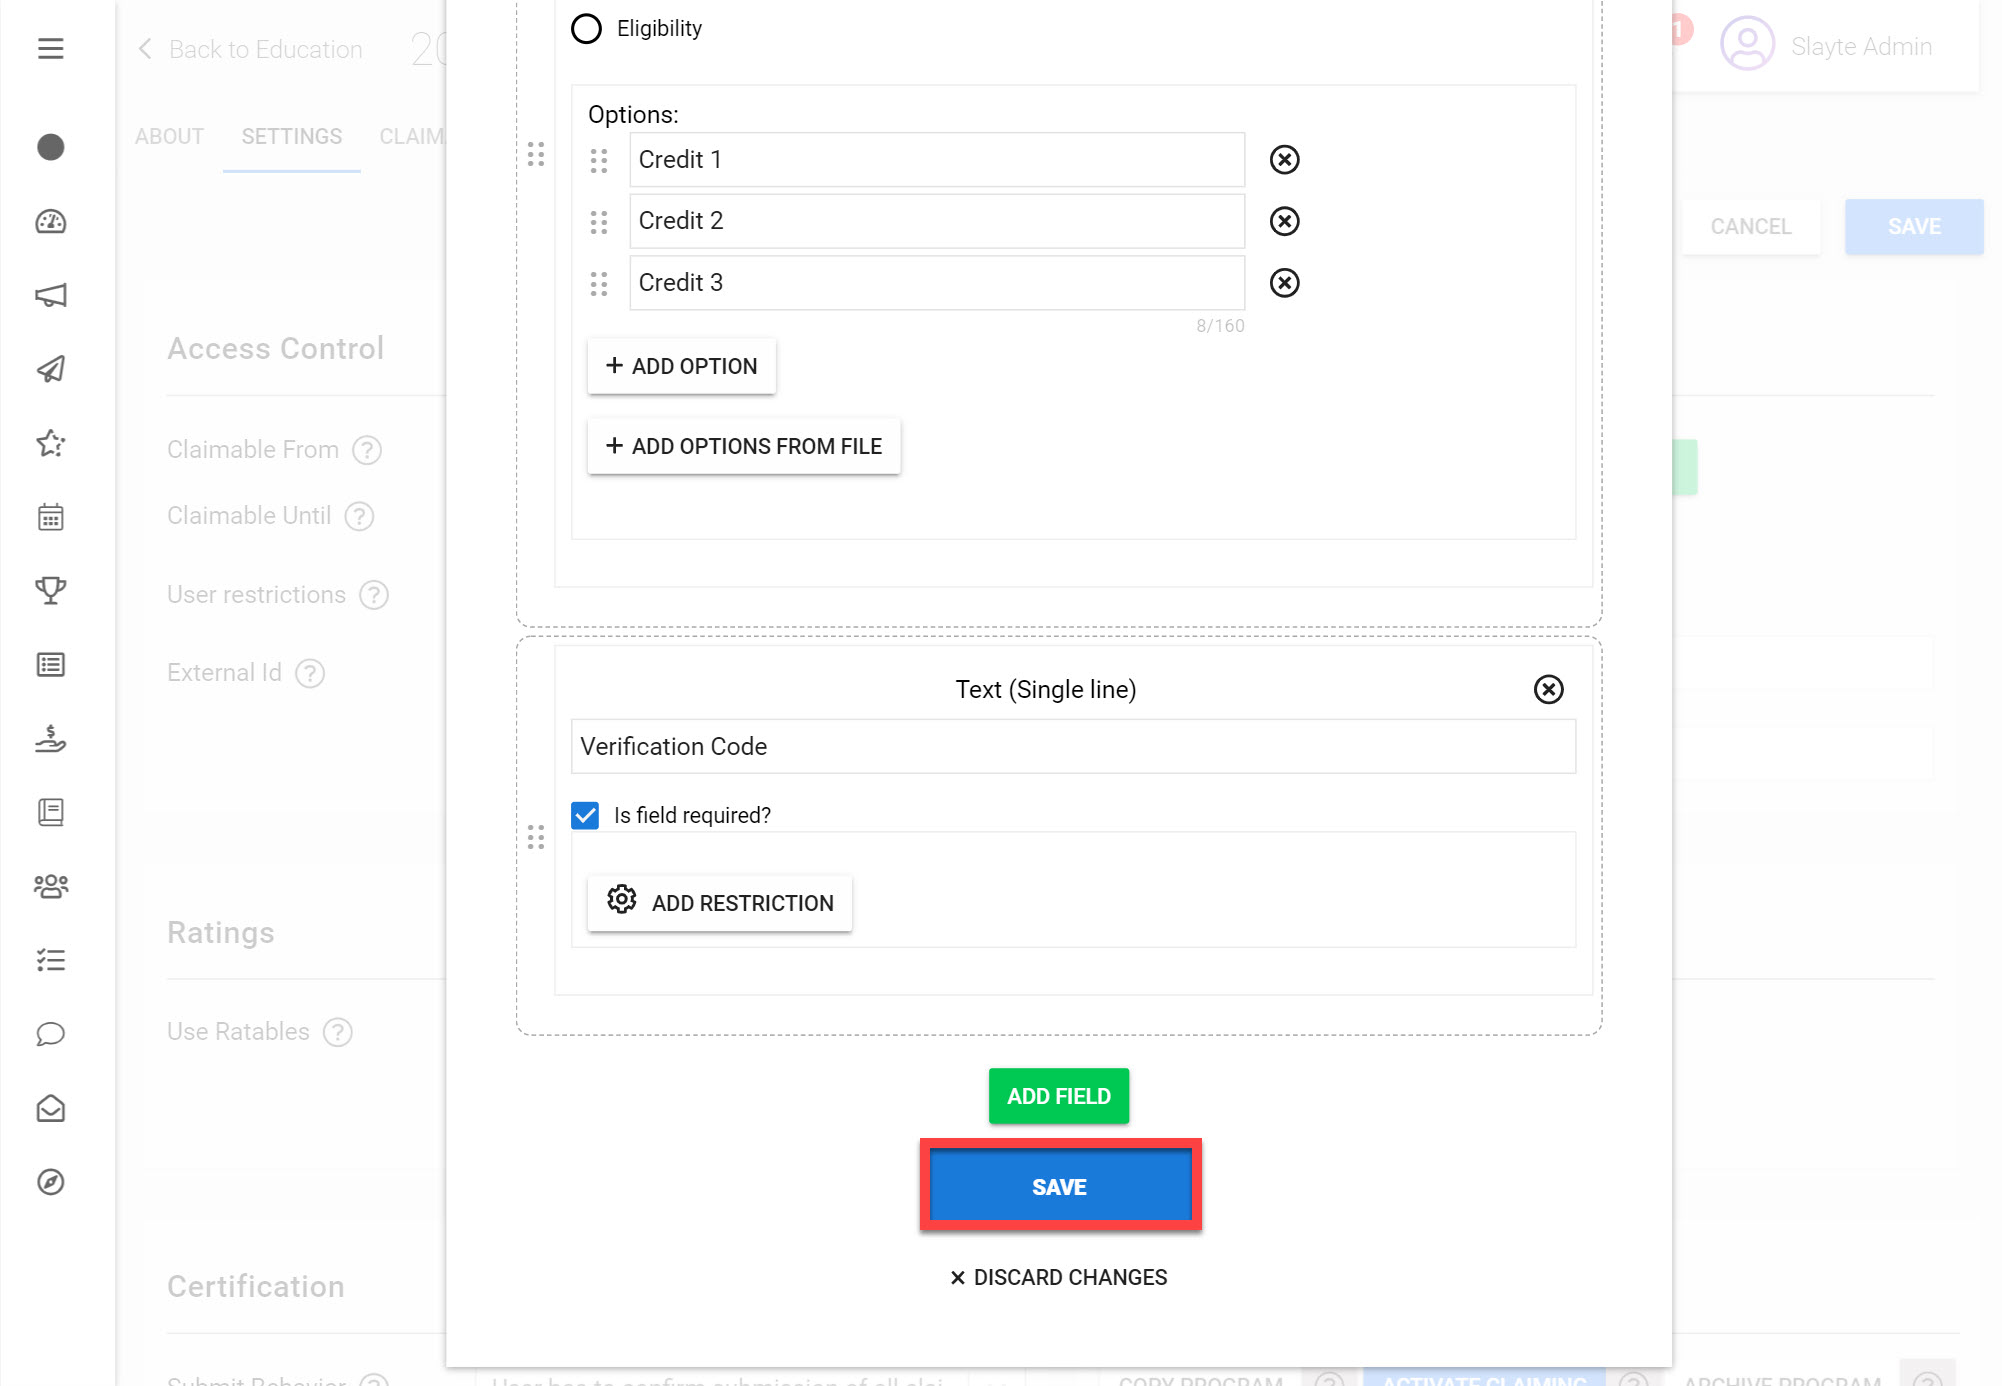
Click Add Field and choose Text (Single line)
Add Verification Code as the label
Click Save
You have now successfully created a Feedback Template that users will fill in when claiming for their credits.
Use Users: This feature allows you to match a list of users to corresponding Feedback Templates each should fill out. Toggle this option if you would like to control which Template each Claimer fills in.
Items Label: This will be the label attached to each claim
Claim Label: This will be the text added to the button that allows users to make a Claim in your program.
Ratables: These allow you to collect feedback ratings on certain items related to your Claimable Item e.g. session location.
Verification: This option allows you to add a few questions to your Feedback Template that Claimers will need to fill in correctly in order to complete the Claim. You can choose how many attempts each Claimer will have and also what the passing percentage score should be.
Certification
Under this section you can configure how certifications will be granted.
Submit Behaviour: This decides how Claims will be submitted. You can choose whether the user should submit each Claim manually or submit Claims all at once after confirming.
Submit Actions: Here you should specify the action type that will be performed once a claim is submitted.
Admin Notification Emails: Add a list of emails to be included for all notifications in this program.
Provider certificate overrides: This option allows you to override the default certificate template for provider(s) in this program.
Actions
At the bottom of the page you can complete the following options on your Claim Programs:
Copy Program: This option allows you to duplicate your Claim Program, Feedback and Speaker Templates. Claimable items however will not be duplicated, these will need to be re-added to each Claim Program. This is a useful feature for making multiple Claim Programs that vary slightly.
Activate Claiming: Once you activate a Program users can make claims for credits. You will also need to ensure you have correctly set up the begin and end dates for your Claim Program, and that the users fulfill any access restrictions added.
Archive Program: If you no longer require a Claim Program and would like to remove it from your main list, you can archive it to move it to the archived category and later delete it, if preferred.
Scroll to the top of the page and click Save
You have now successfully set up your Claim Program. Next it might be a good idea to add Claimable Items to your Program.
