
Verification Templates can be used as a way to confirm whether a user has completed the task they are claiming credits for. These usually contain a few questions linked to the credits they are claiming for. If you have set up a Claim Program to confirm attending a seminar for example, you could create a Verification Template that covers content discussed in this seminar, as a way to confirm their attendance.
Verification Templates need to be added directly onto the Claimable Items.
To do so:
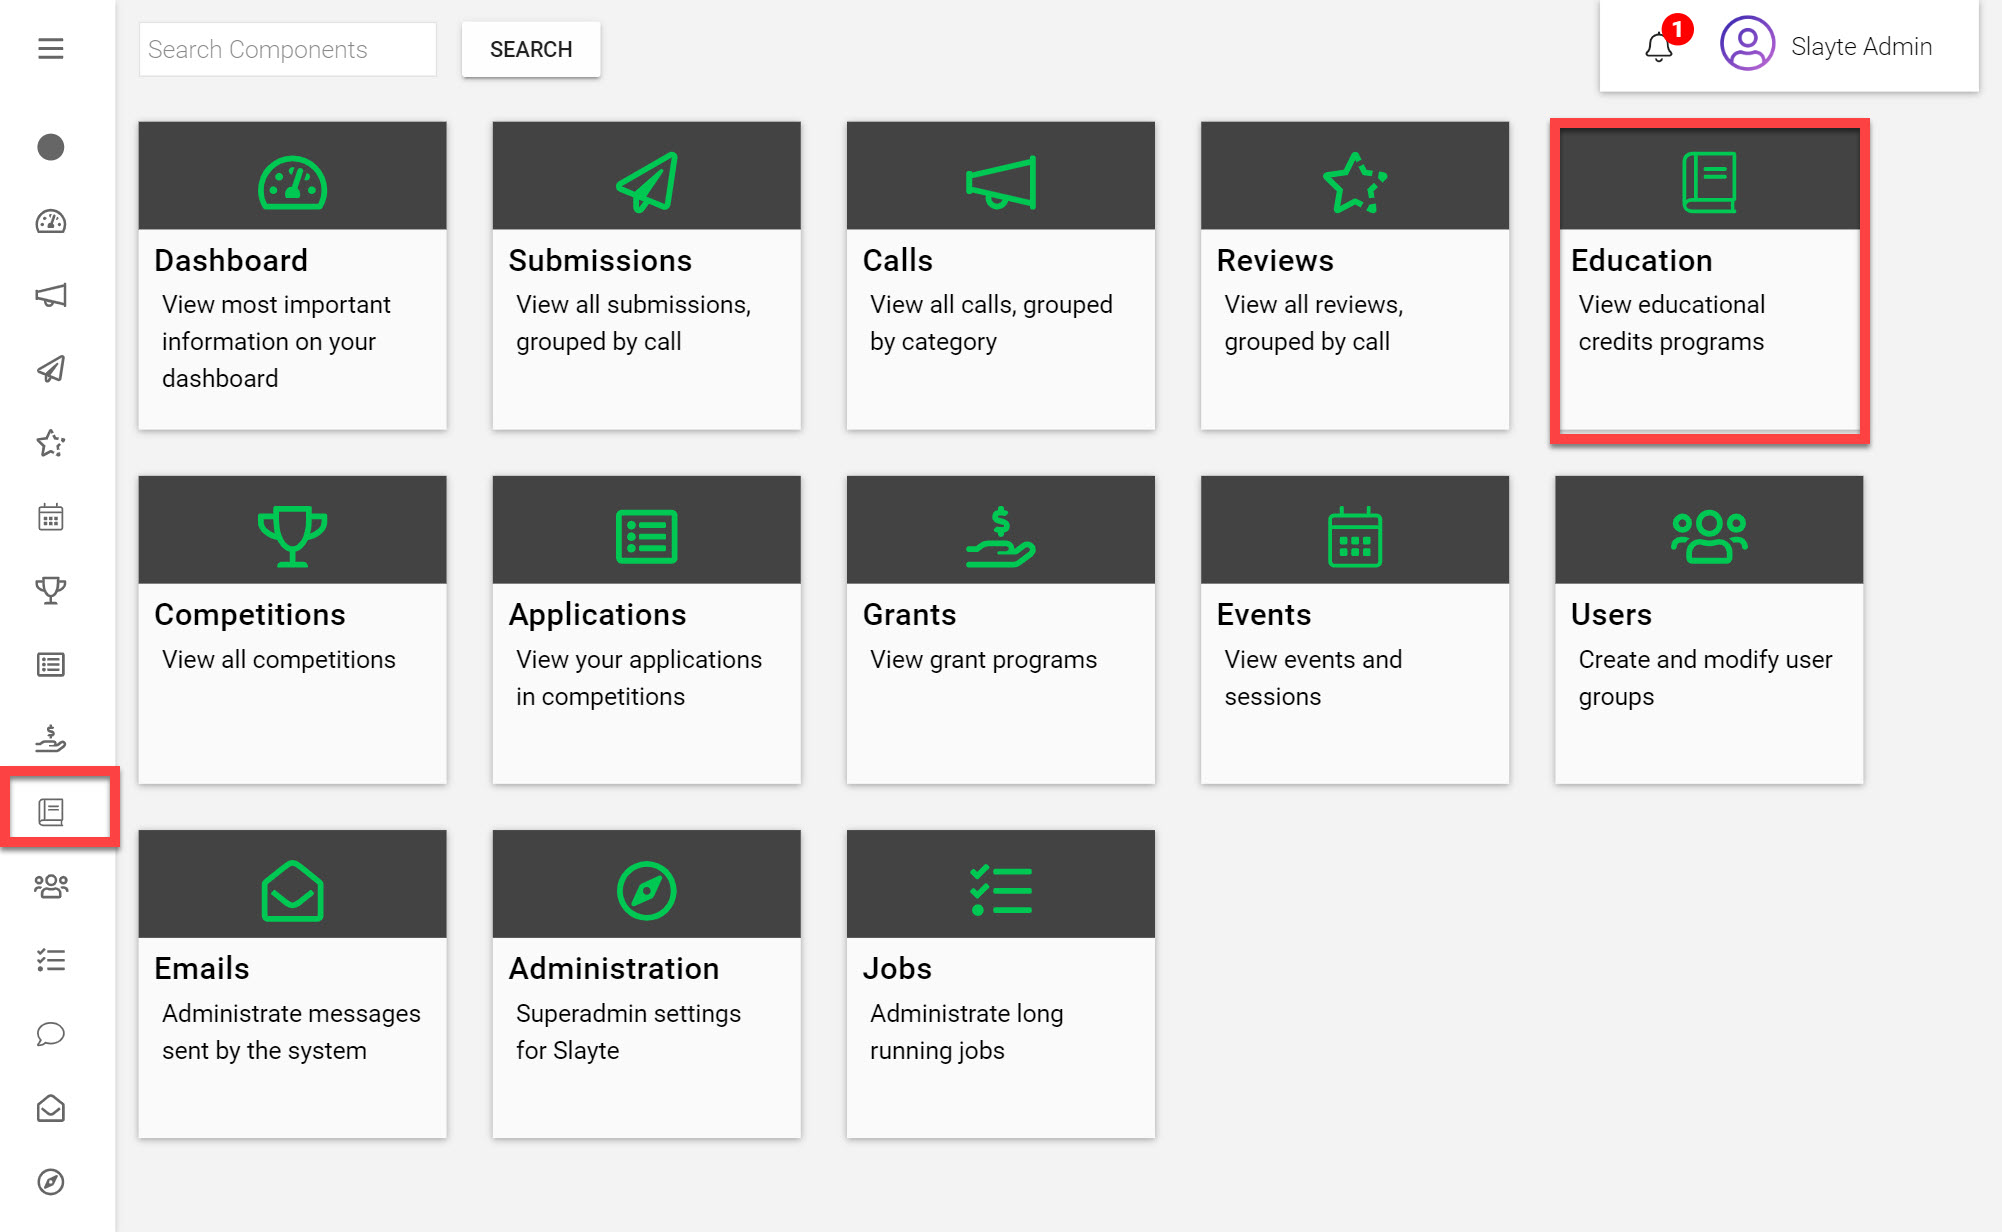
Go to the Homepage and click on the Education icon
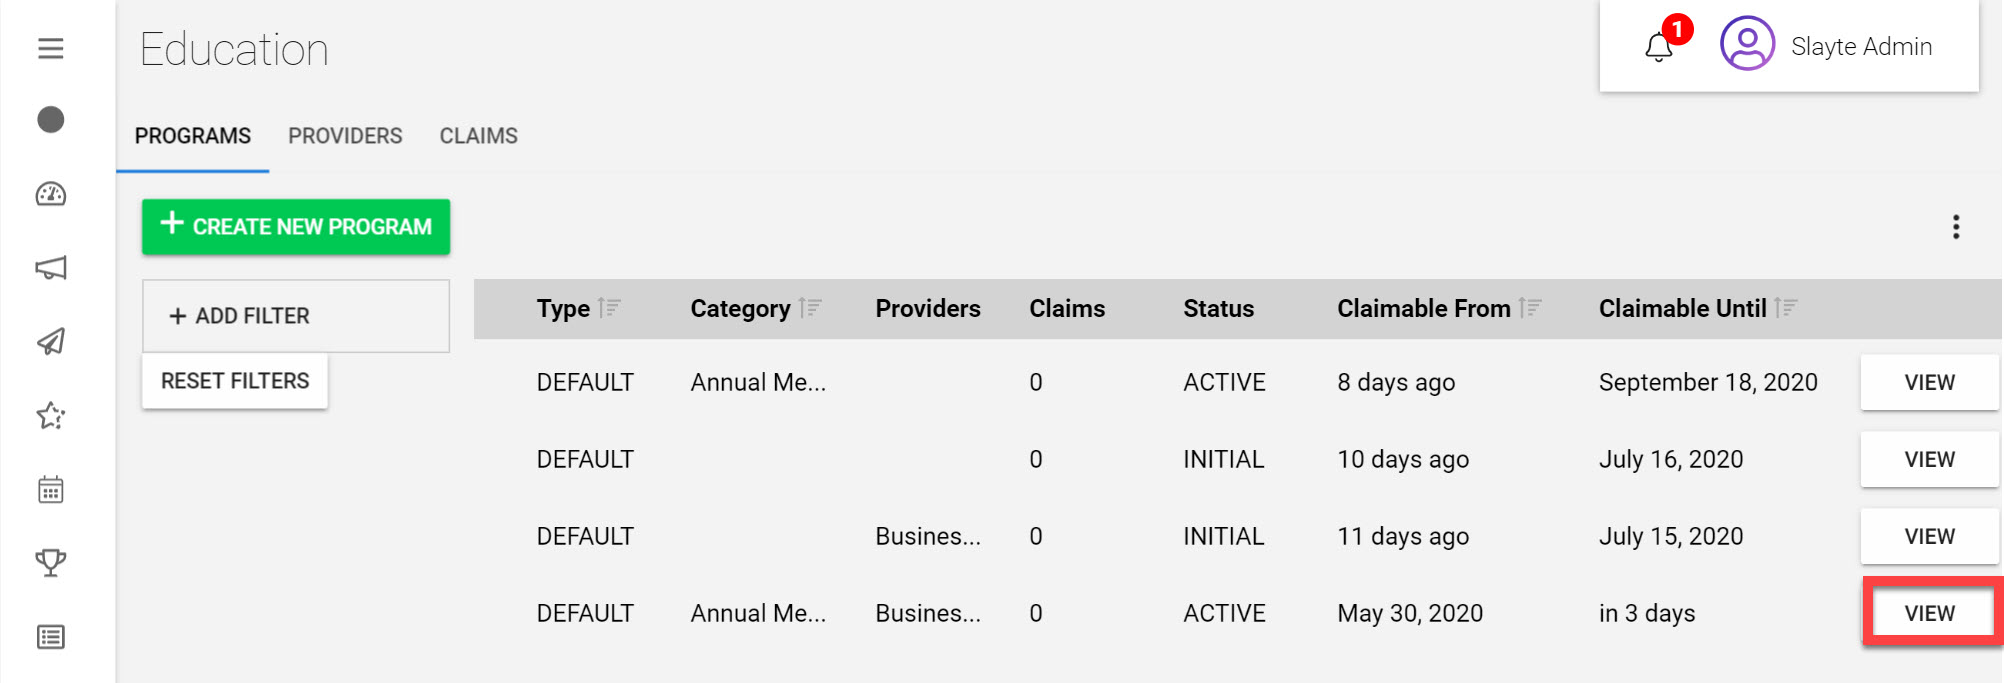
Click View next to the Claim Program you would like to add a Verification Template in
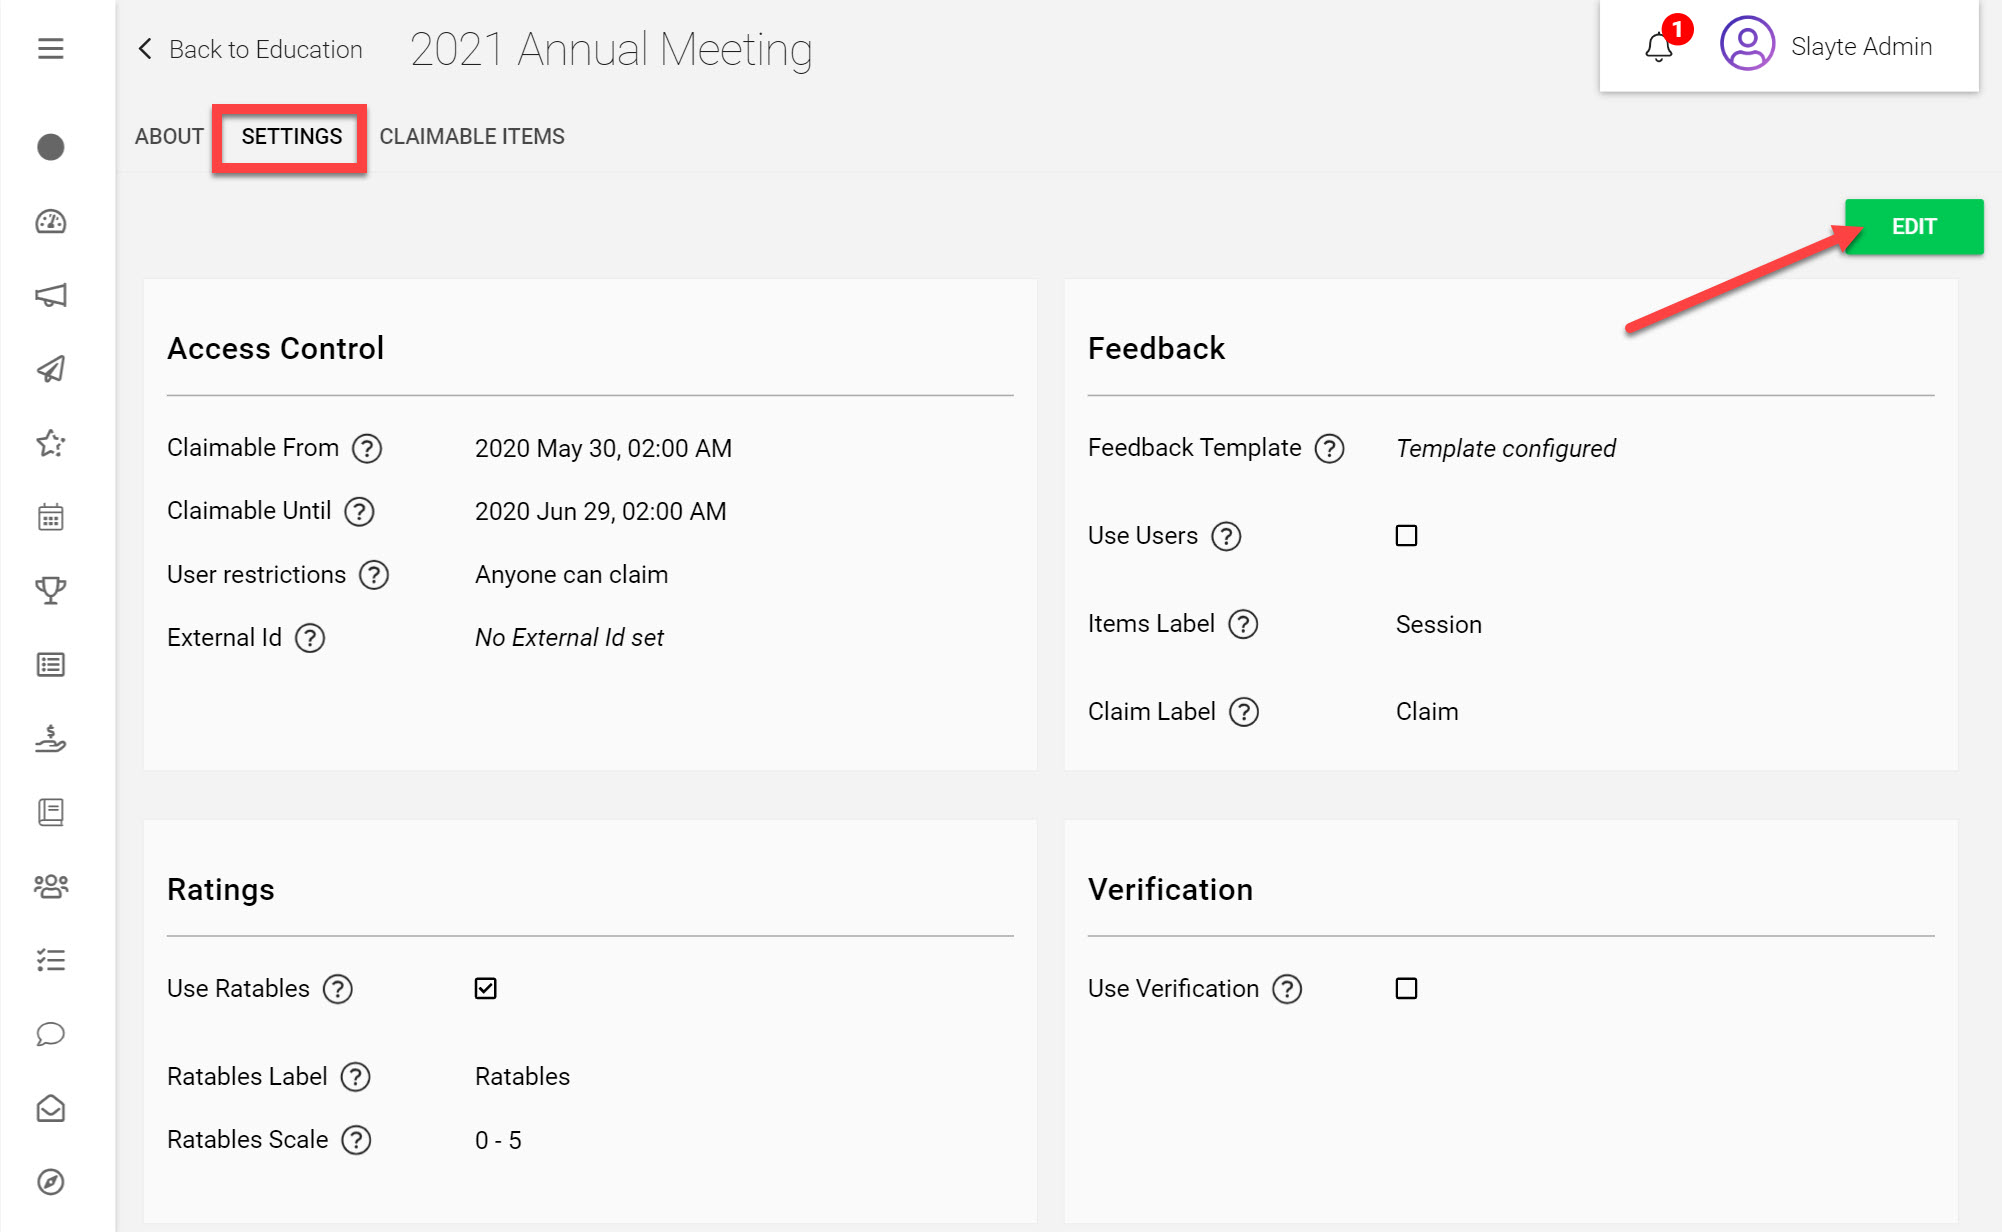
Click on the Settings tab
Click Edit
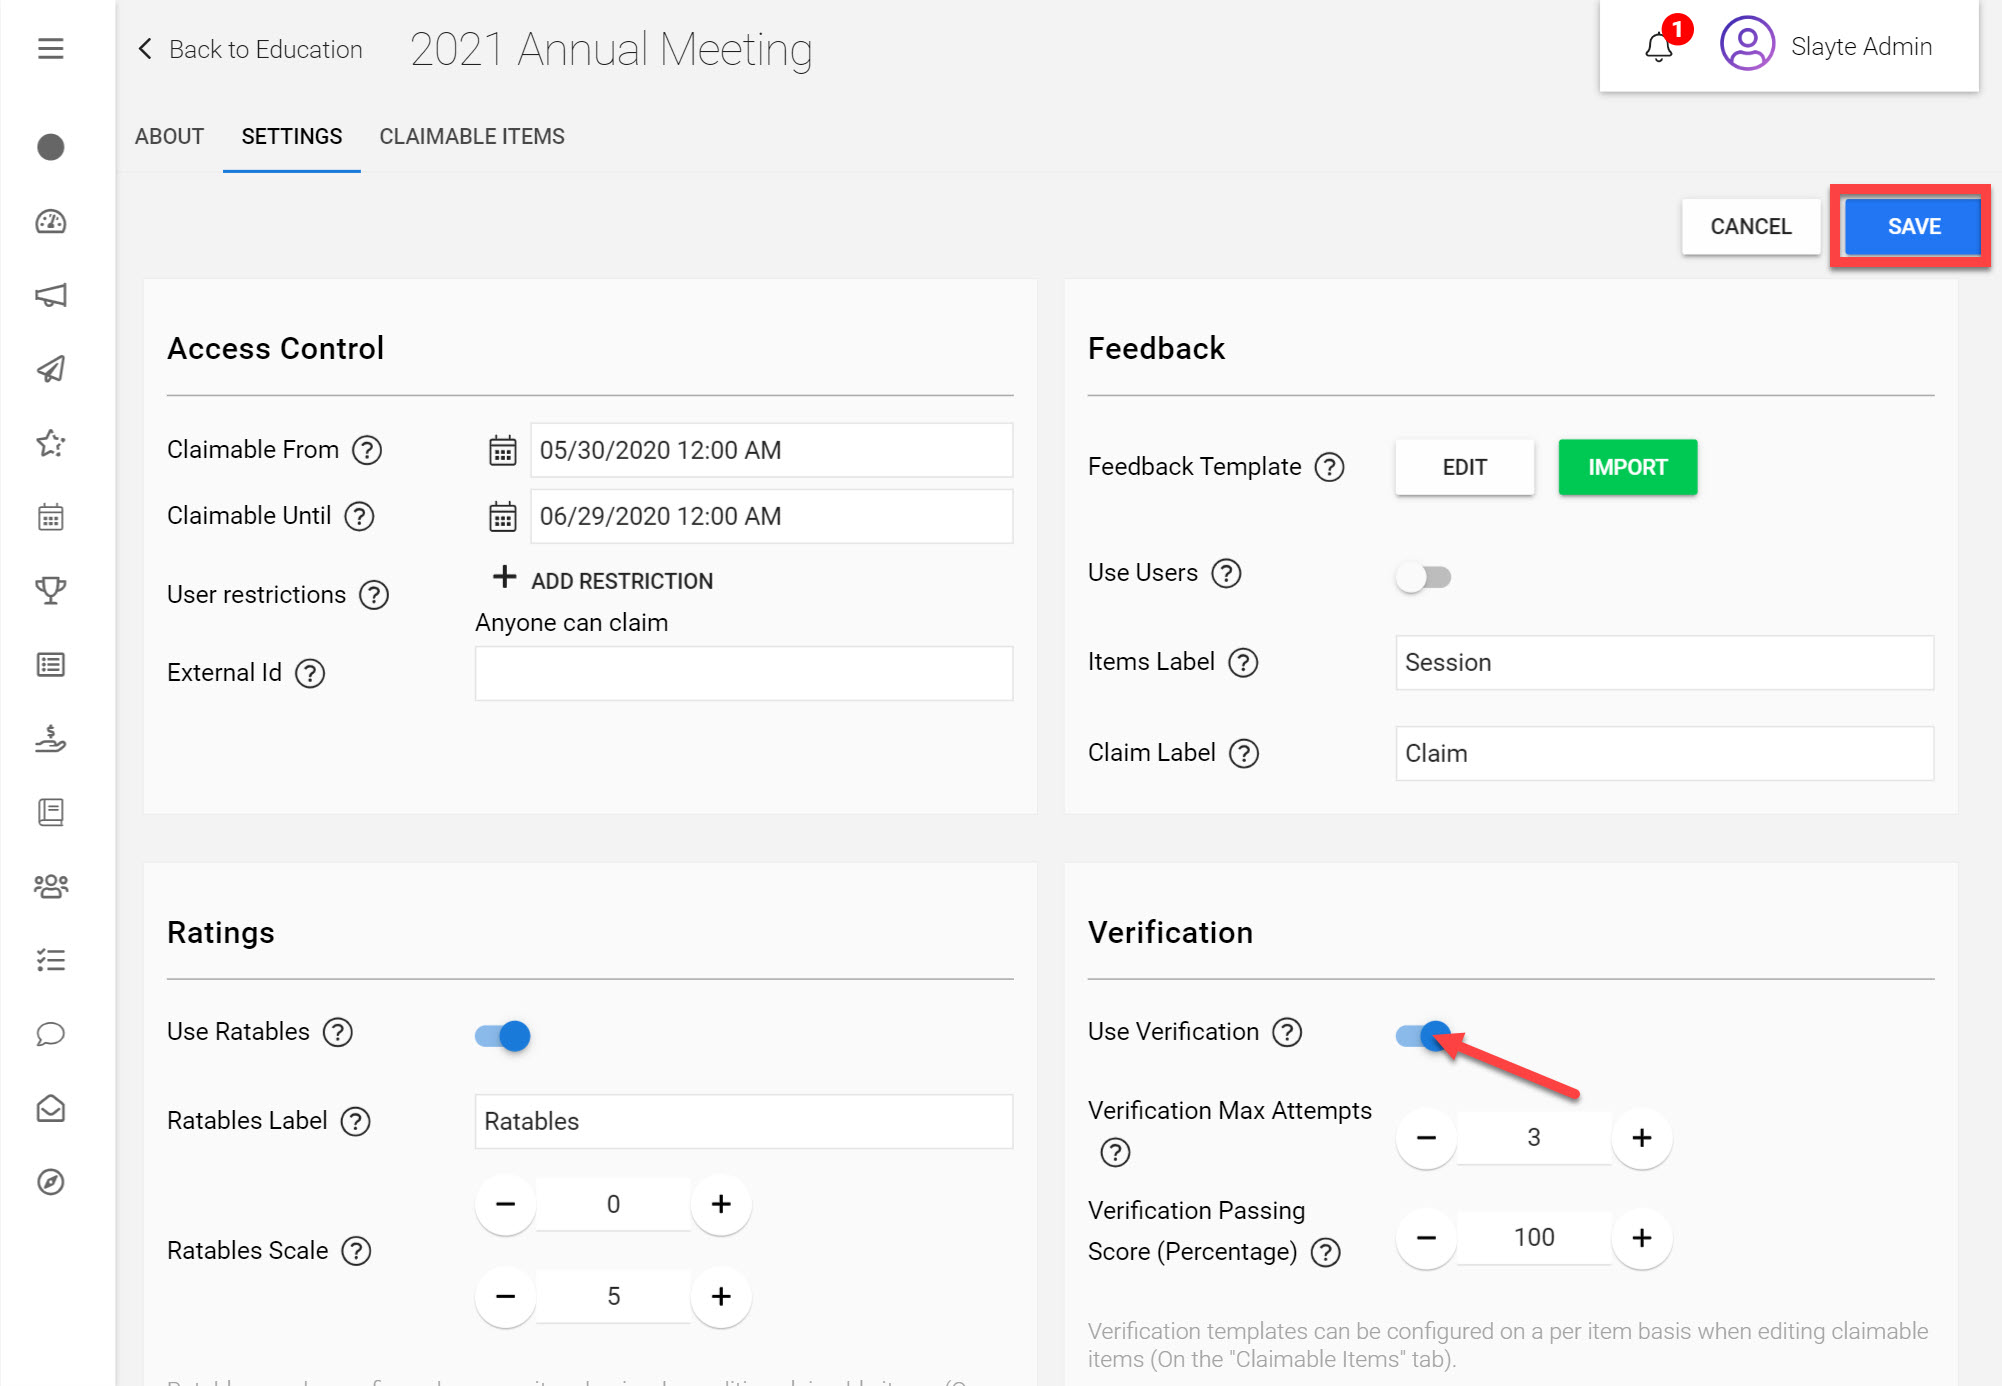
Under Verification toggle Use Verification
Click Save on the top-right
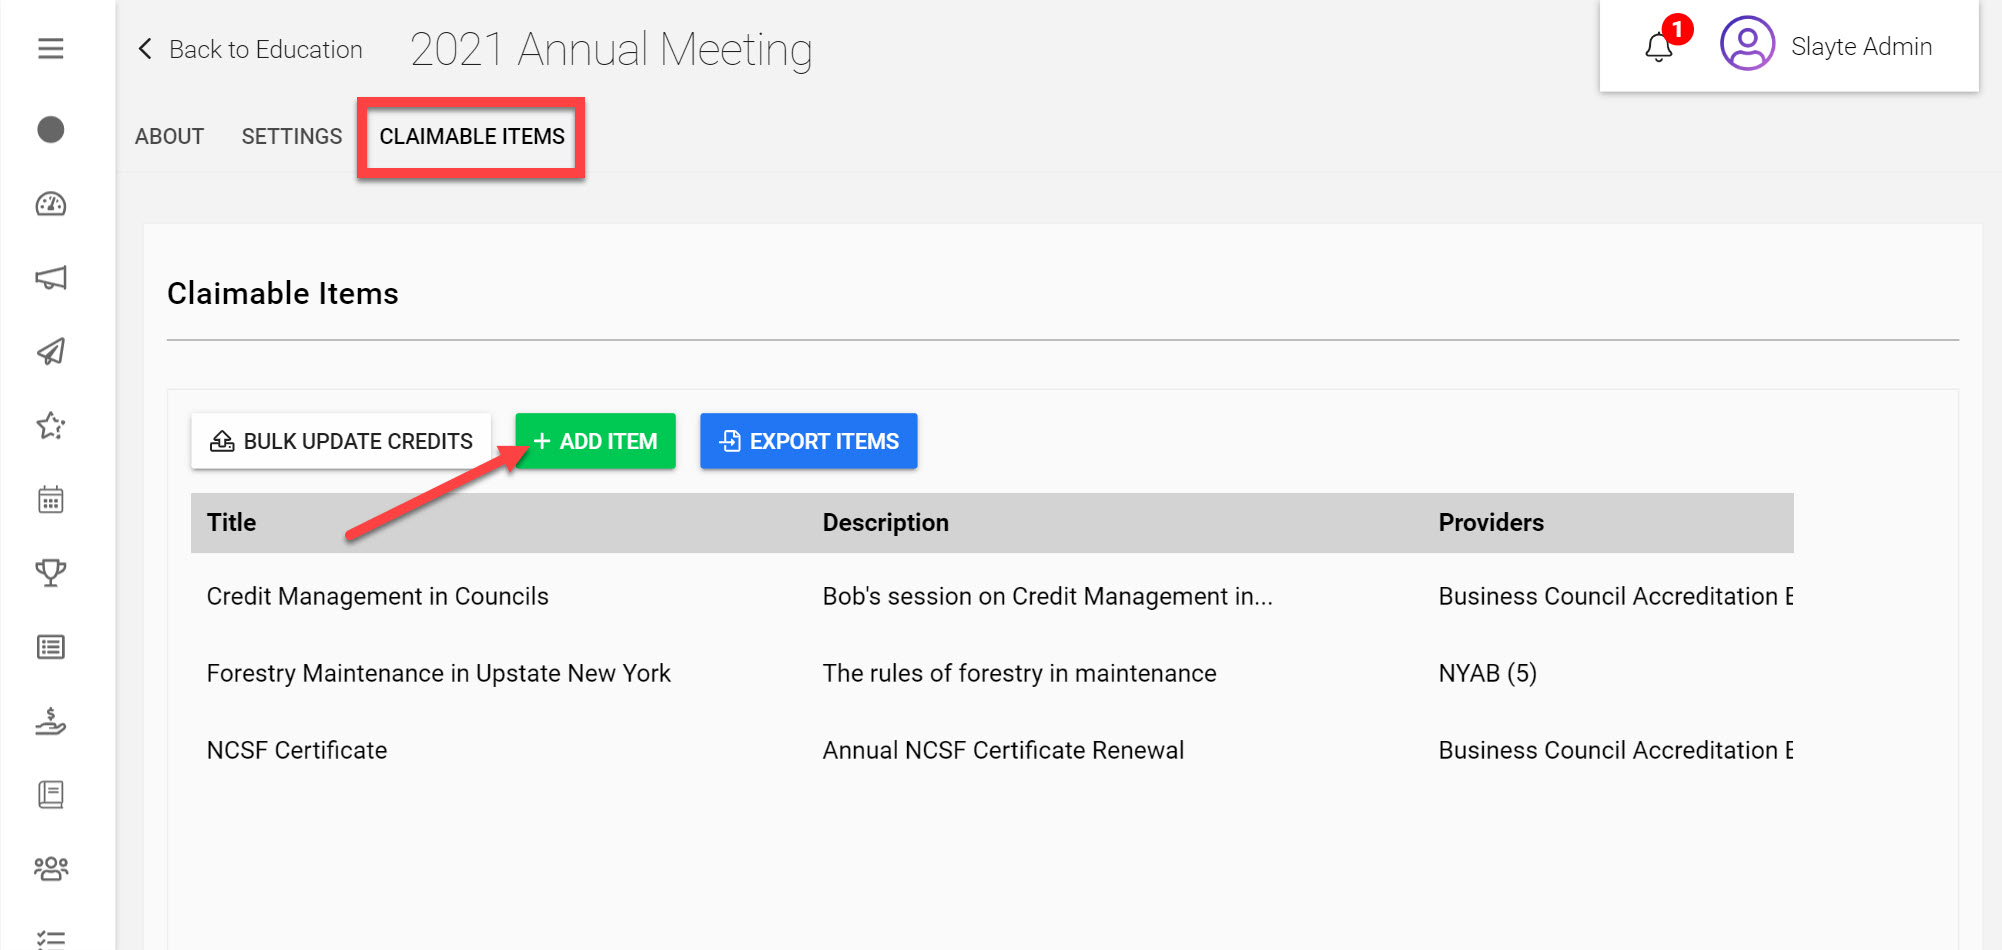
Click on the Claimable Items tab
Click Add Item
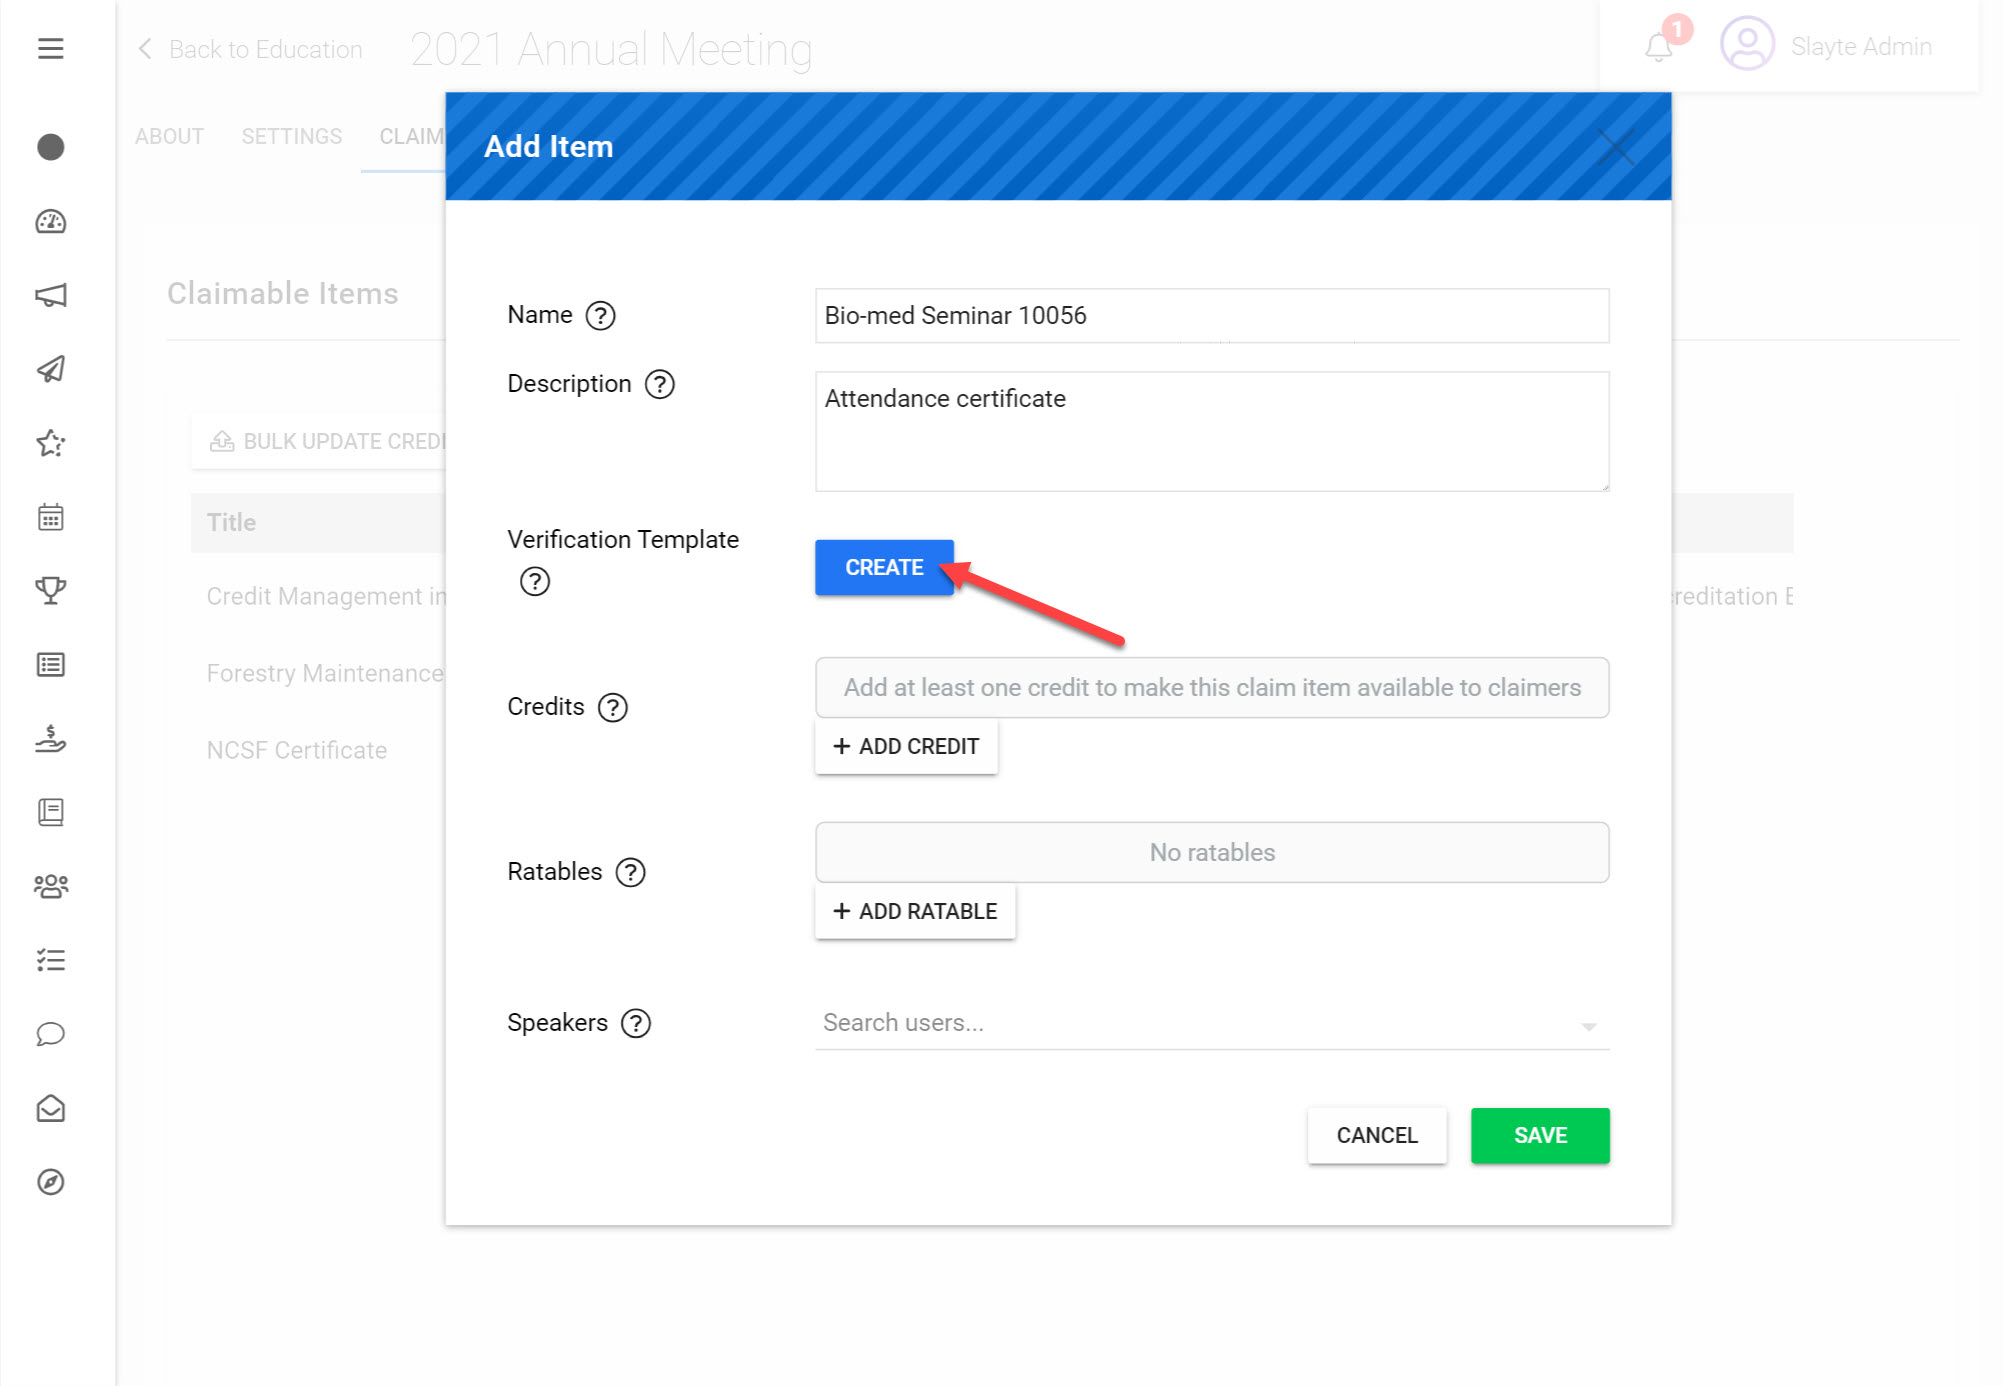
Fill in a Name and Description for this
Click Create
You will be able to see a list of the Form Fields that you can use and modify to build your Verification Template. For this example we will run you through a basic setup.
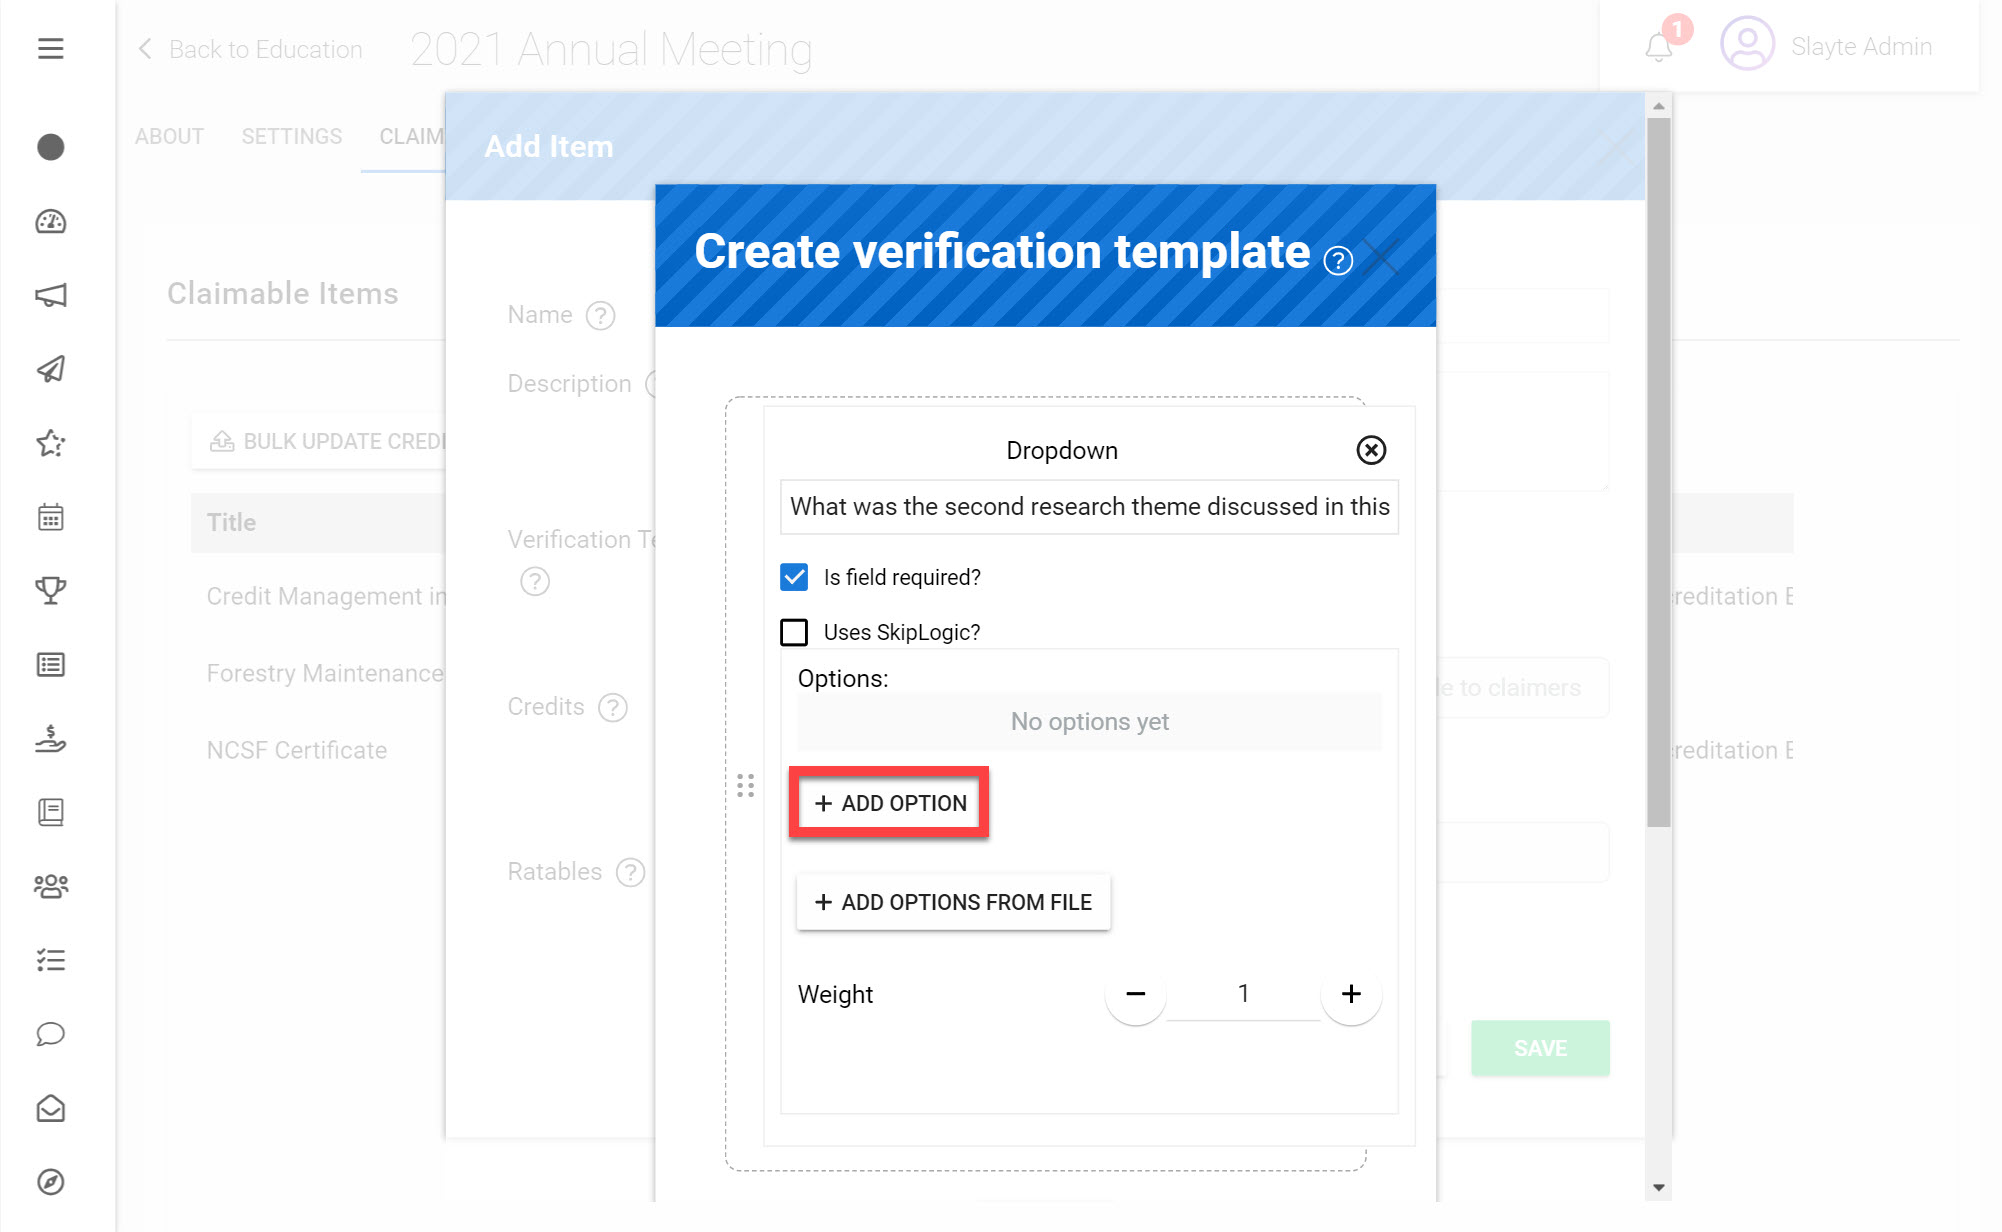
Click Add Field and choose Dropdown
For the Field Label enter ‘What was the second research theme discussed in this seminar?’
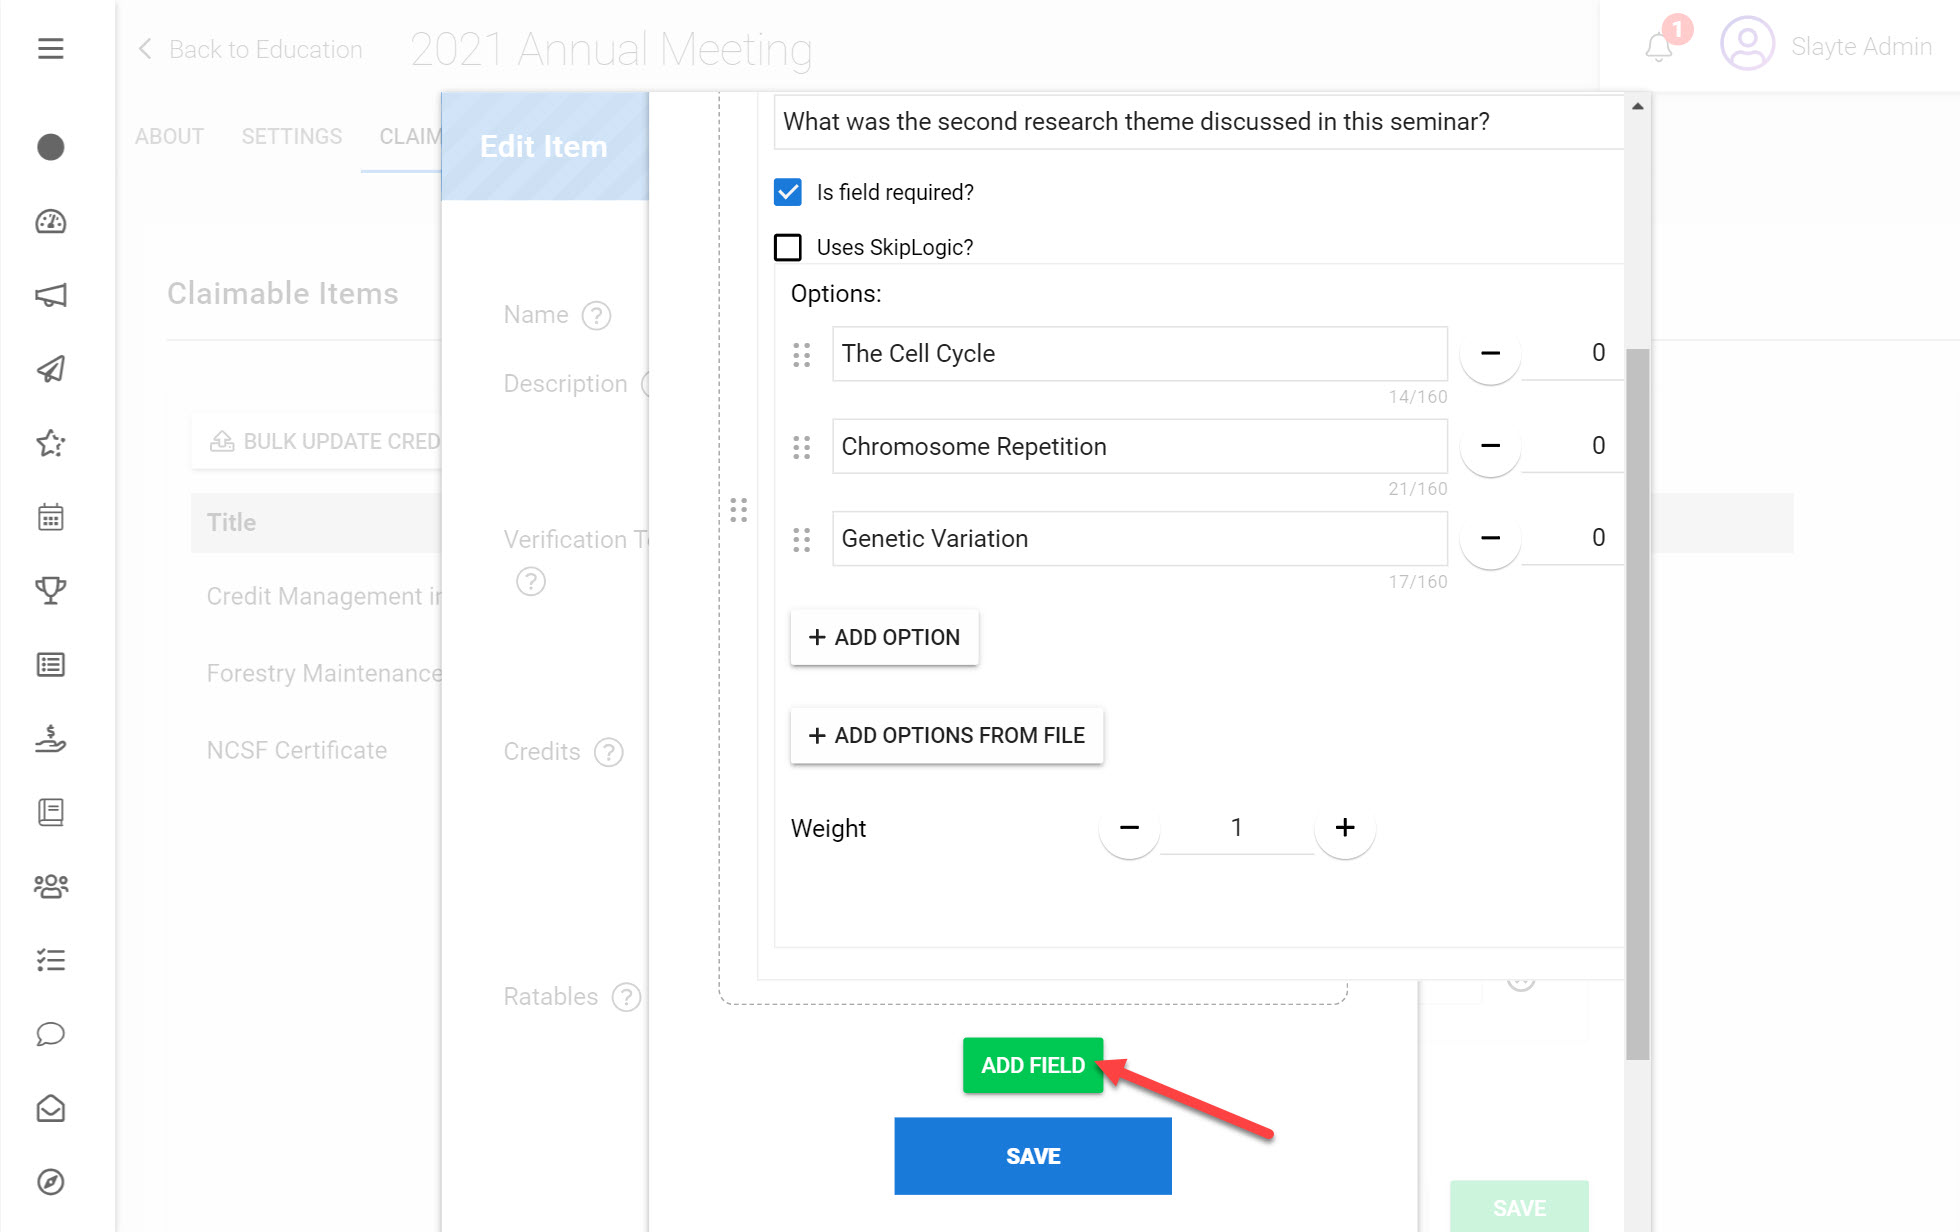
Add the options: The Cell Cycle, Chromosome Repetition, Genetic Variation
Click Add Field and then View all Field Types

Click Yes/No
For the Field Label enter ‘Was the topic ‘Mitosis’ discussed in this research seminar?'
Click Save
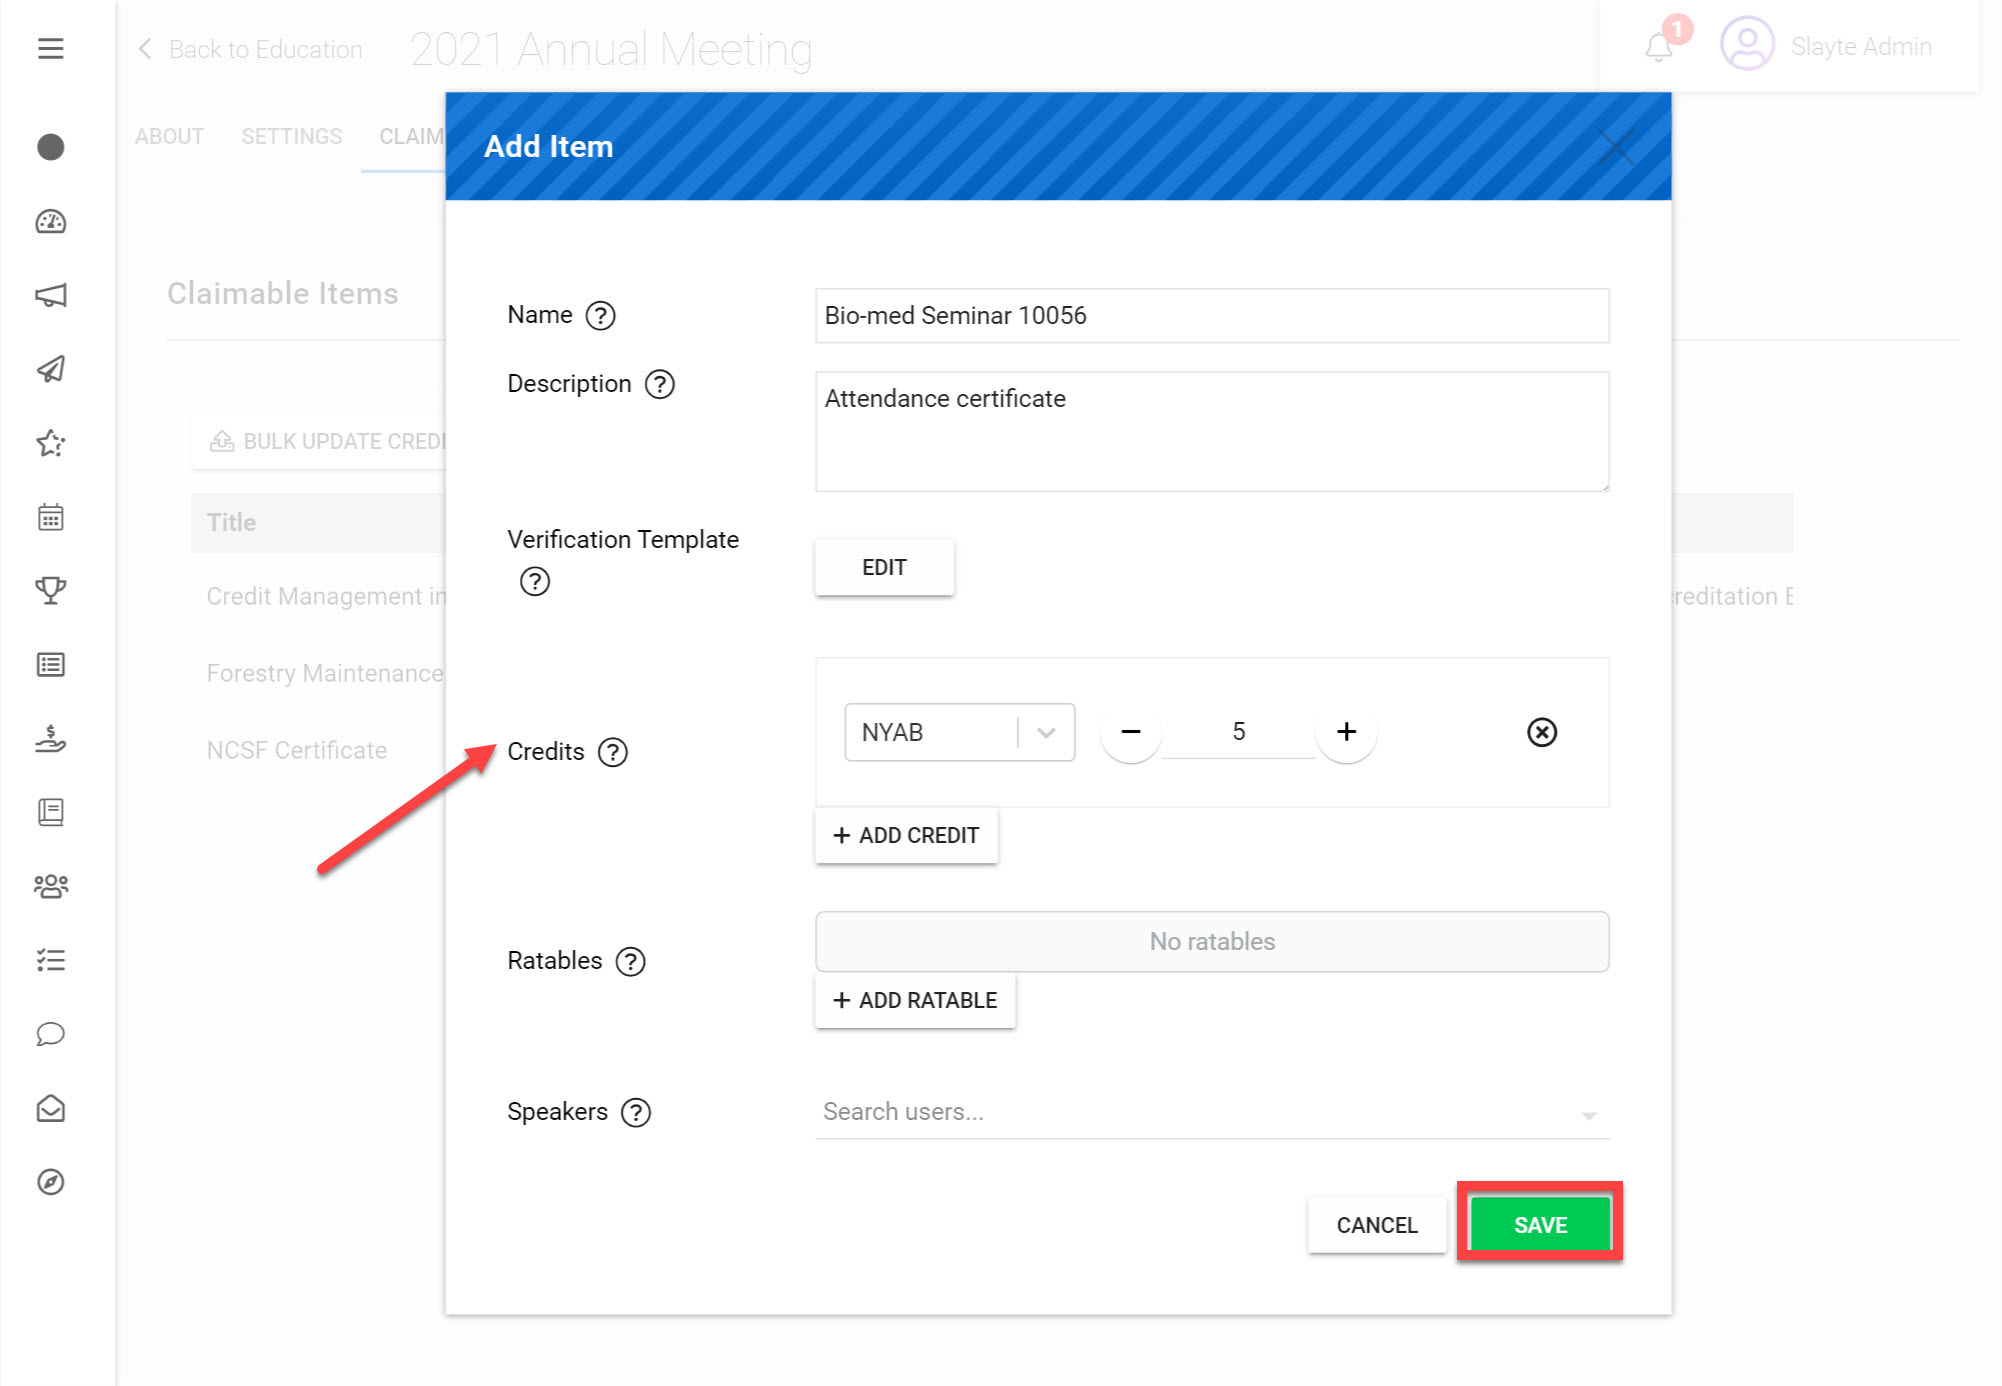
Click Add Credit and choose a Provider
Choose how many credits you would like to make claimable for this Claim Item
Click Save
You have now successfully added a Verification Template to your Claimable Item.
