
There are a number of ways to view and manage Submissions as they come into your Call. This article will explain how to best view and search for specific Submissions within Slayte
Submissions List View
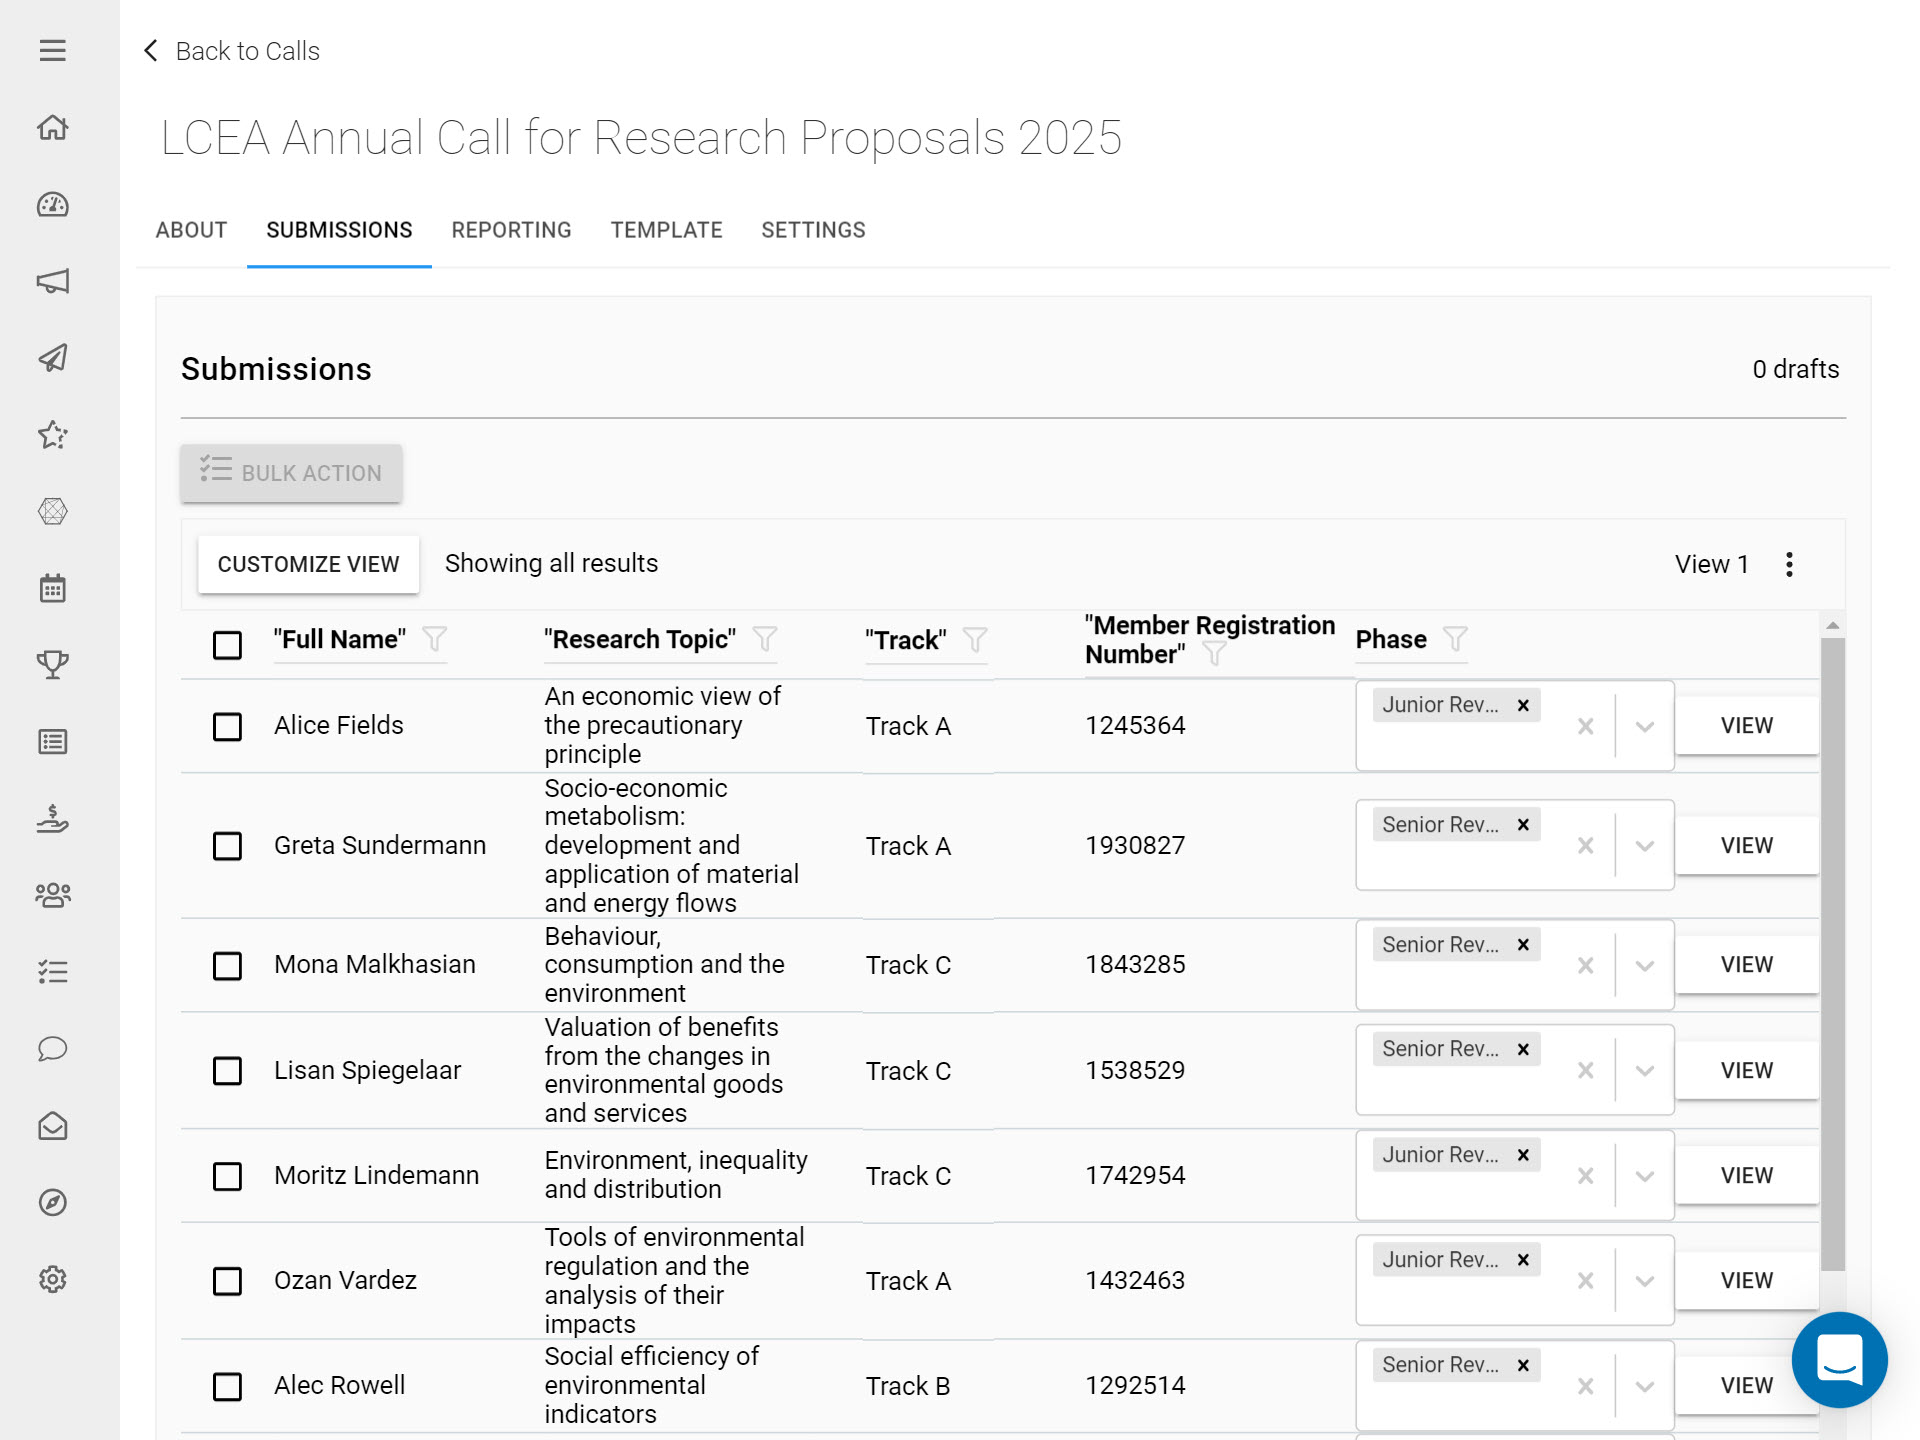
The Submission List View in Slayte provides the best overview of all collected Submissions within a Call.
Customizing the Submission List View
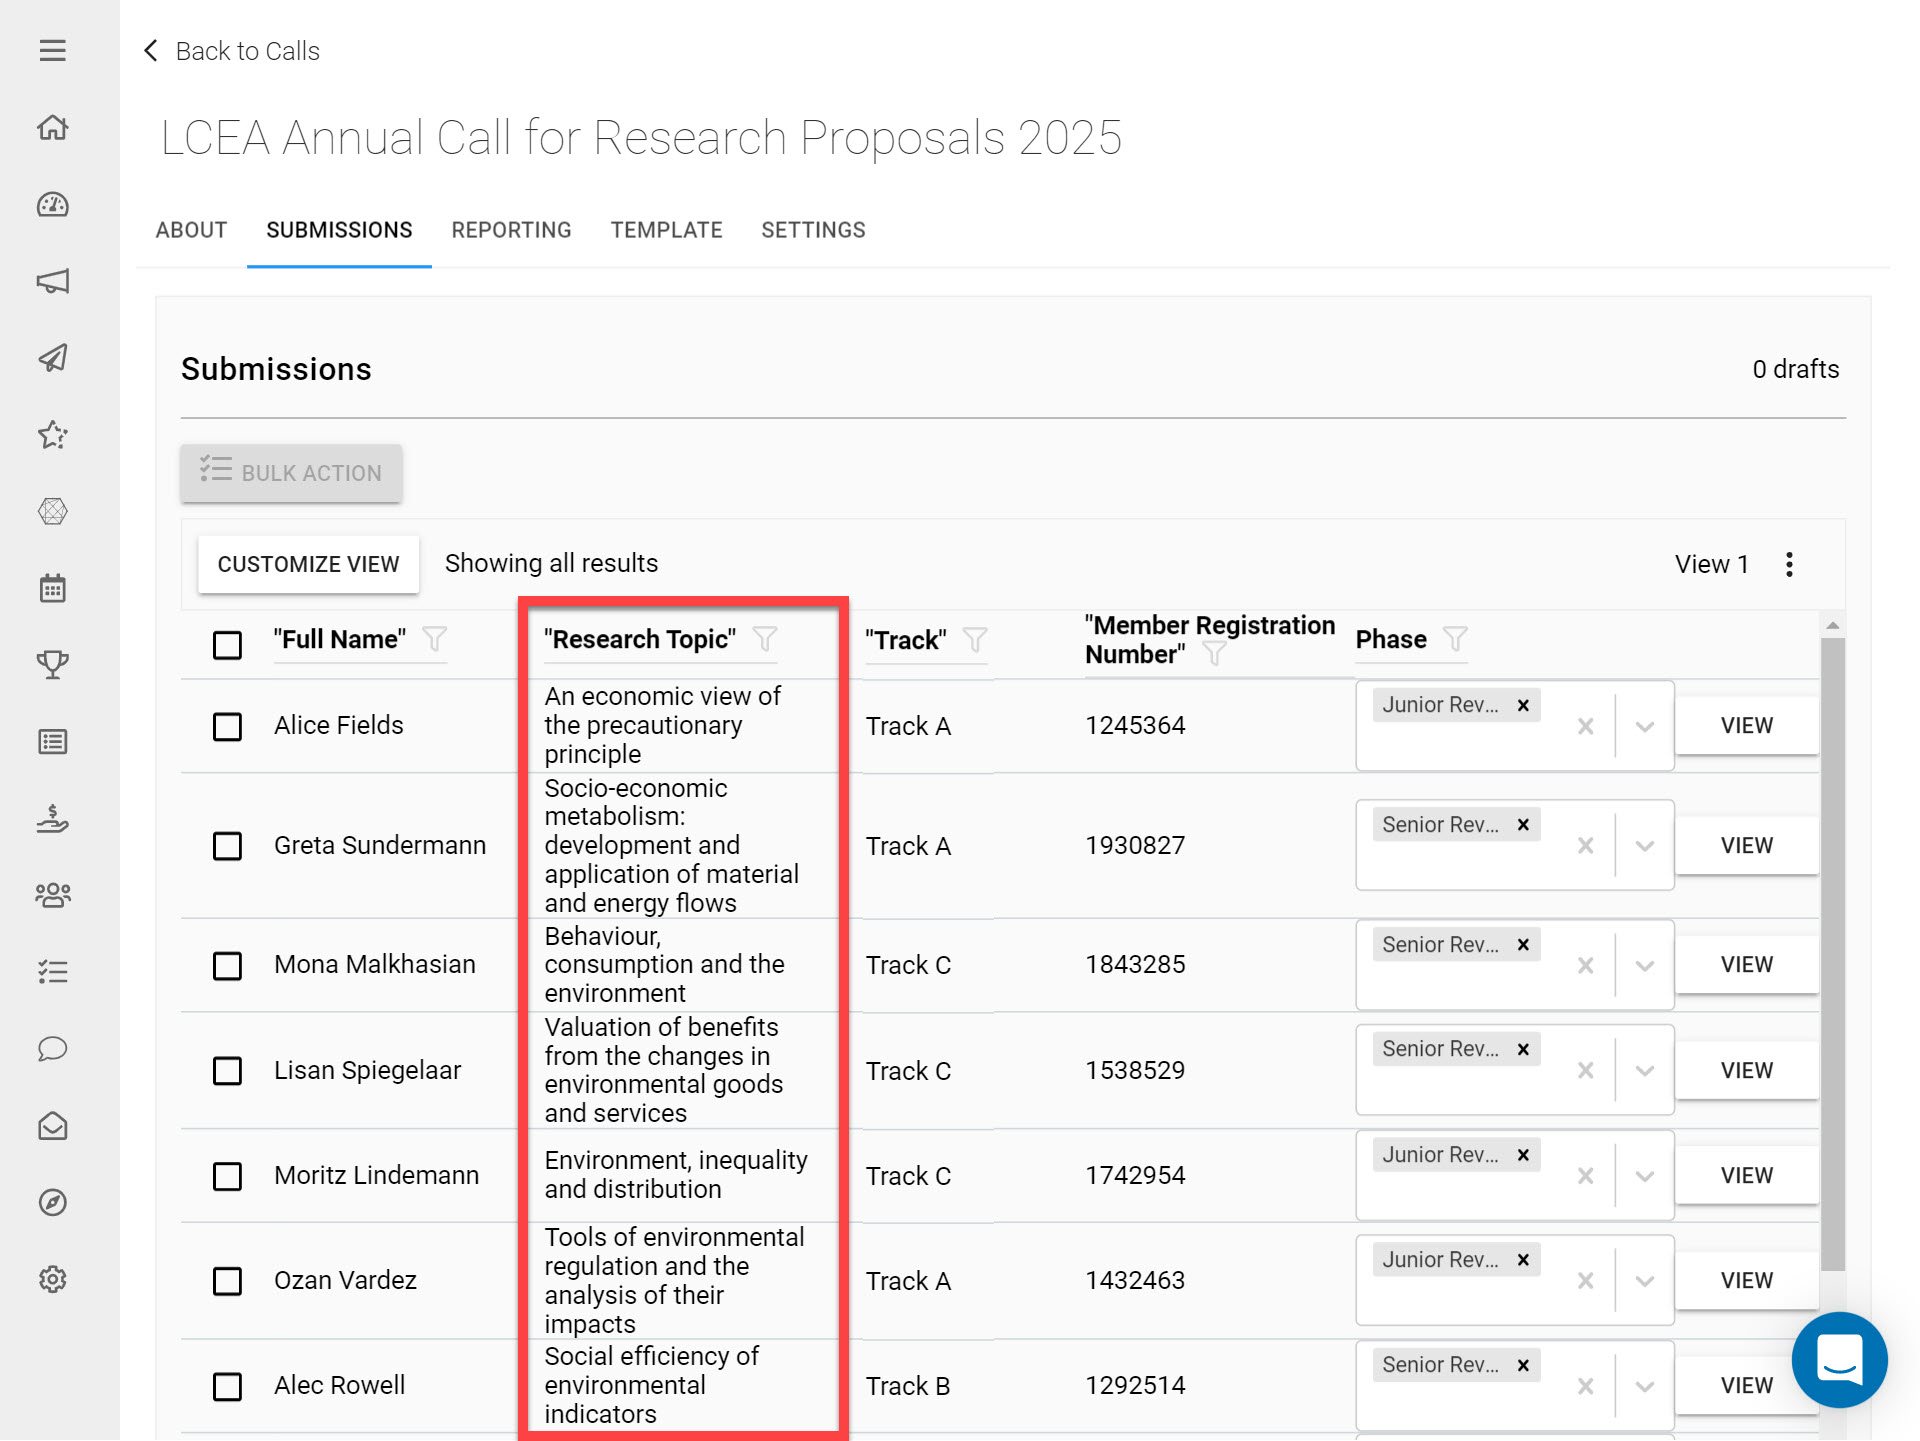
Customizing the Submission List View is a very powerful tool that allows you to change which columns are displayed in your Submission list, to show Field results of your choice.
Assume you are viewing Submissions from a Call you have recently created - customizing the Submission List View will allow you to include any Form Field added to this Call as a custom column in the list view. Each row would then display the value captured from the Submitter for that specific Field added.
Clicking Customize View opens a dialog with two tabs: ‘Filter Criterium' and ‘Result Field’ otherwise known as "Filters" and Table Columns.
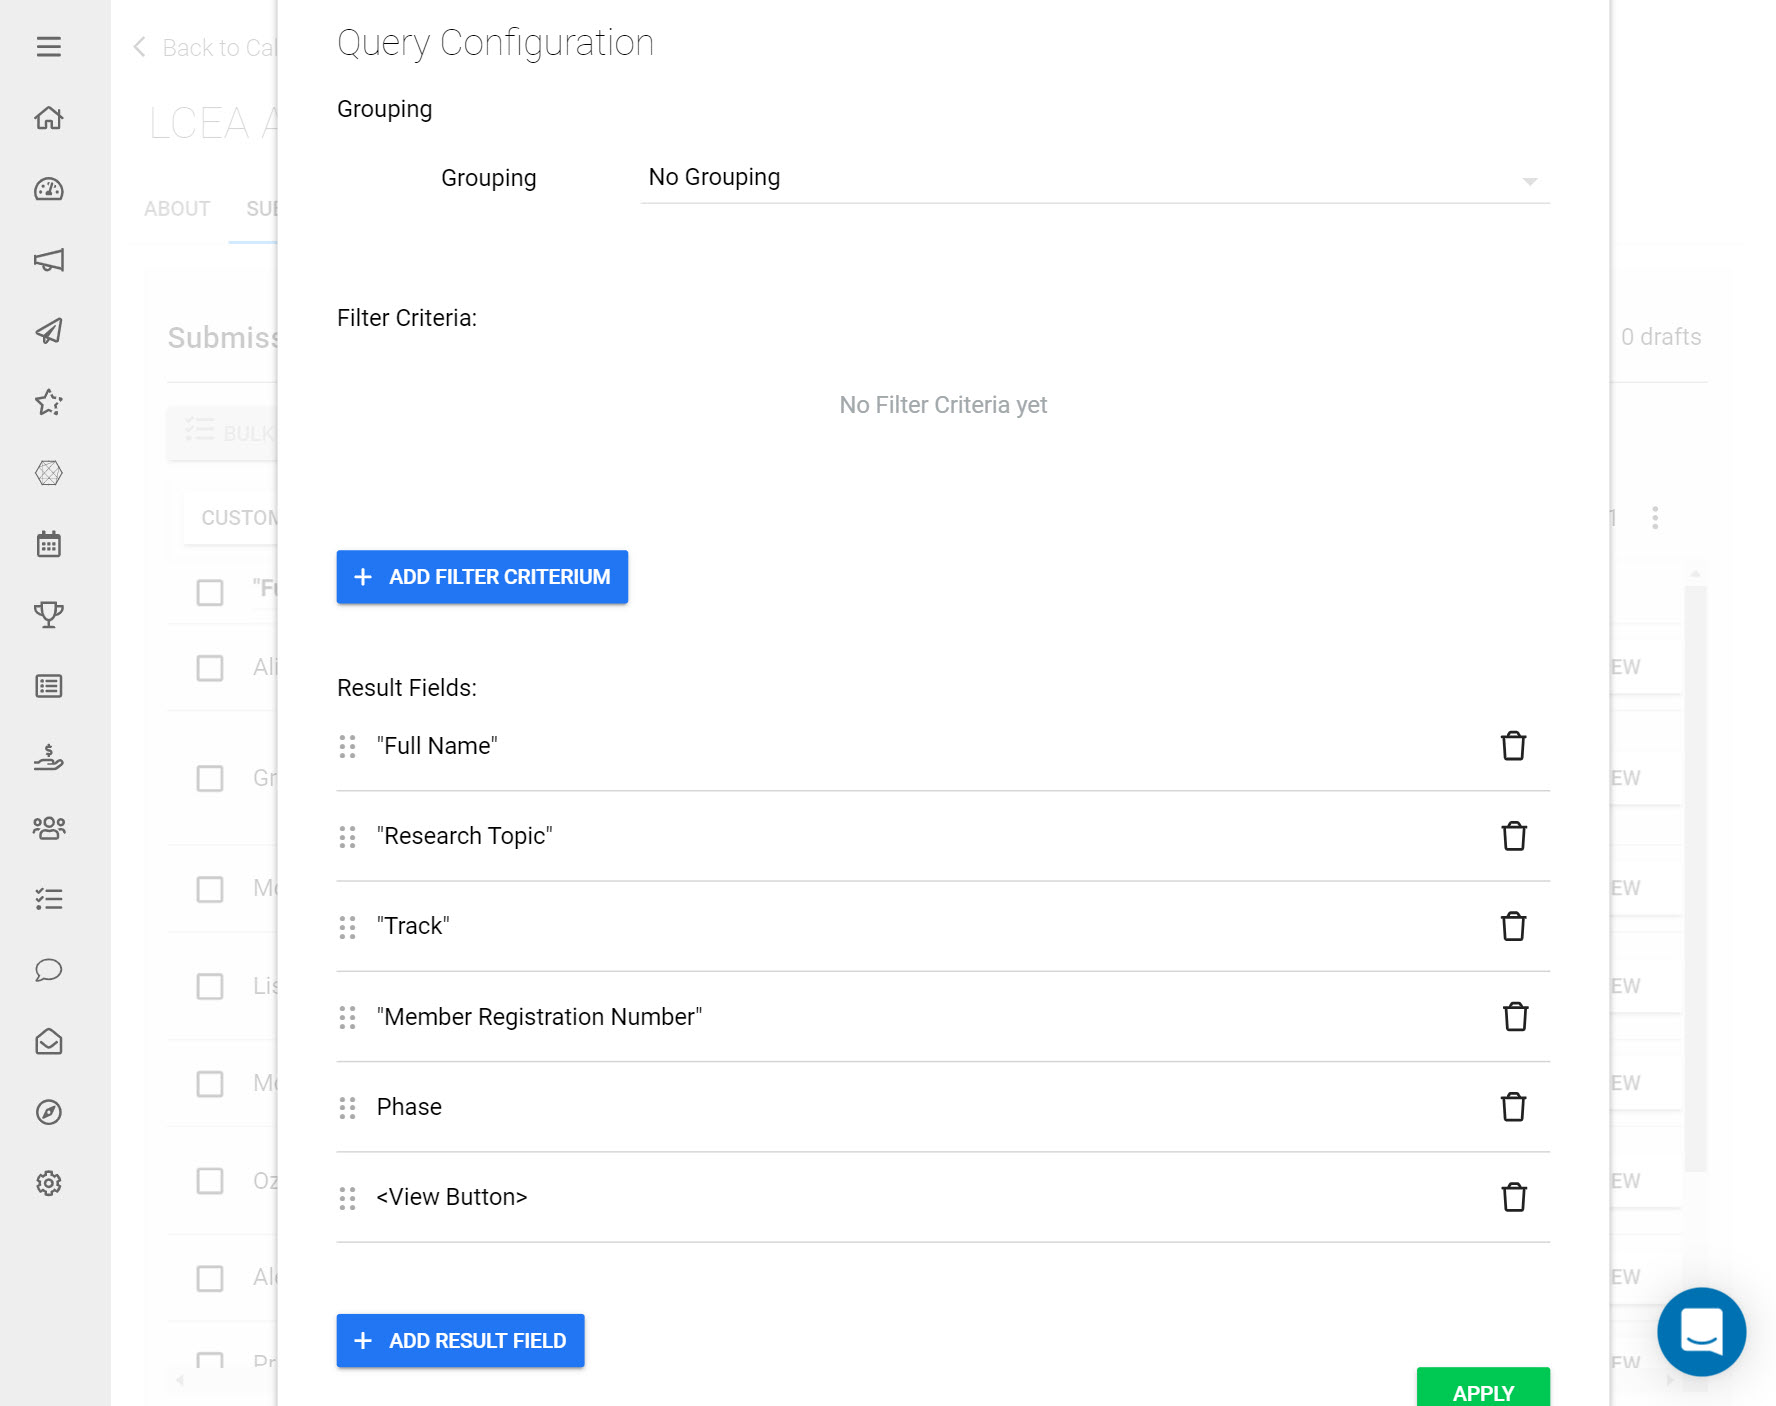
Filter Criterium (filters) allow you to search through submissions using a search query of your choice. If you would like to to only view Submissions from a specific author e.g, you would ‘Add Filter Criterium’ for Authors. Next type in the specific User Name and click ‘Apply’ to view specified results. This closes the dialog and applies any changes to the table component.
Result Fields (columns) can be used to organize which information on your Custom View is displayed. This can be used e.g. to display any fields on your Submission Form, the current Phase of the Submission, who the assigned reviewers are etc. You can also add any Review Criteria Fields in the same way. This article goes into more detail about Filtering.
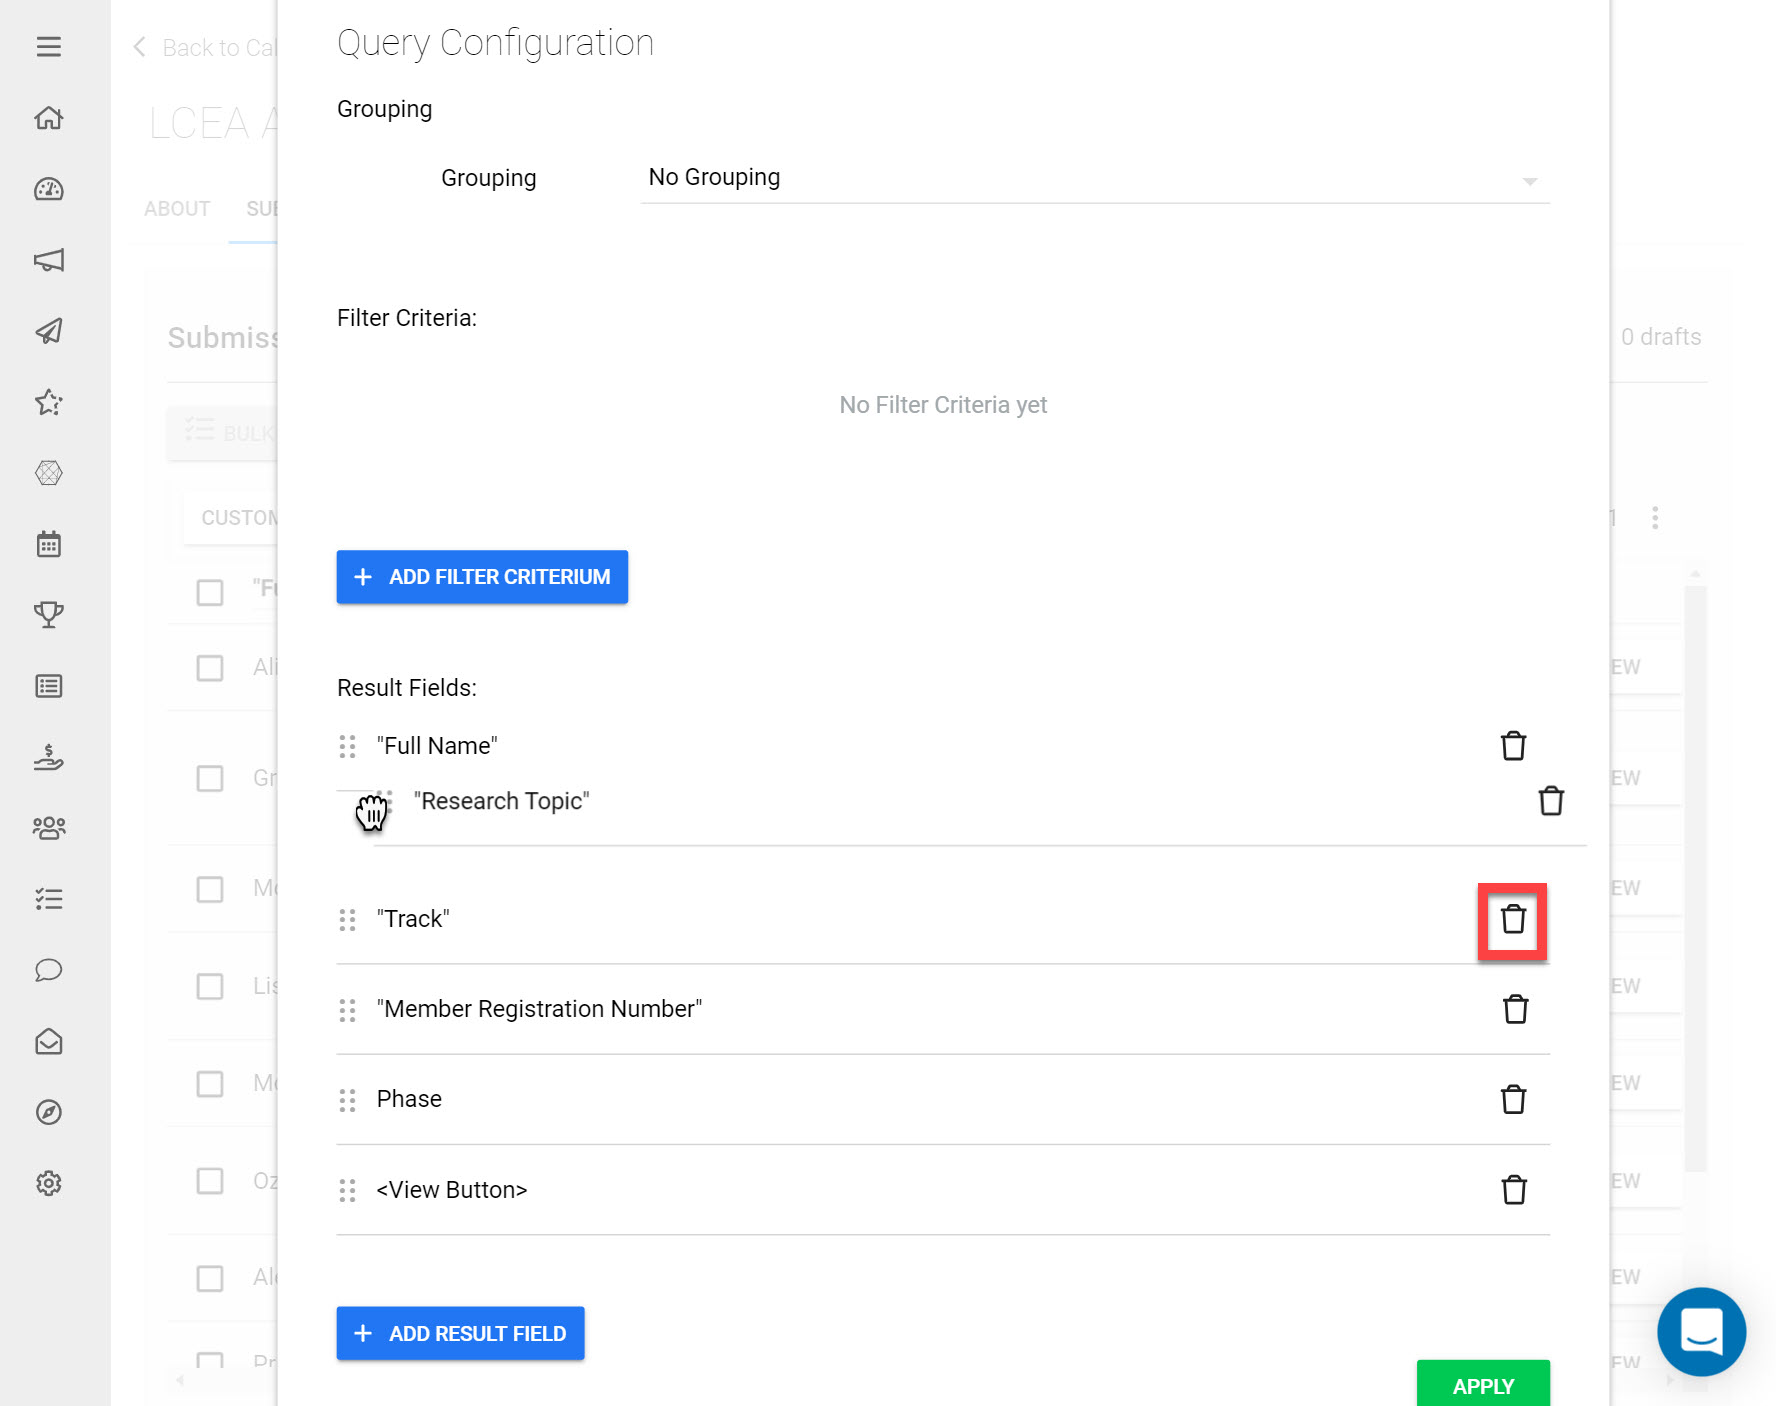
The order of the Result Fields can be reorganized by dragging items up and down using the dotted reordering icon. Result Fields can also be deleted by clicking the trashcan icon.
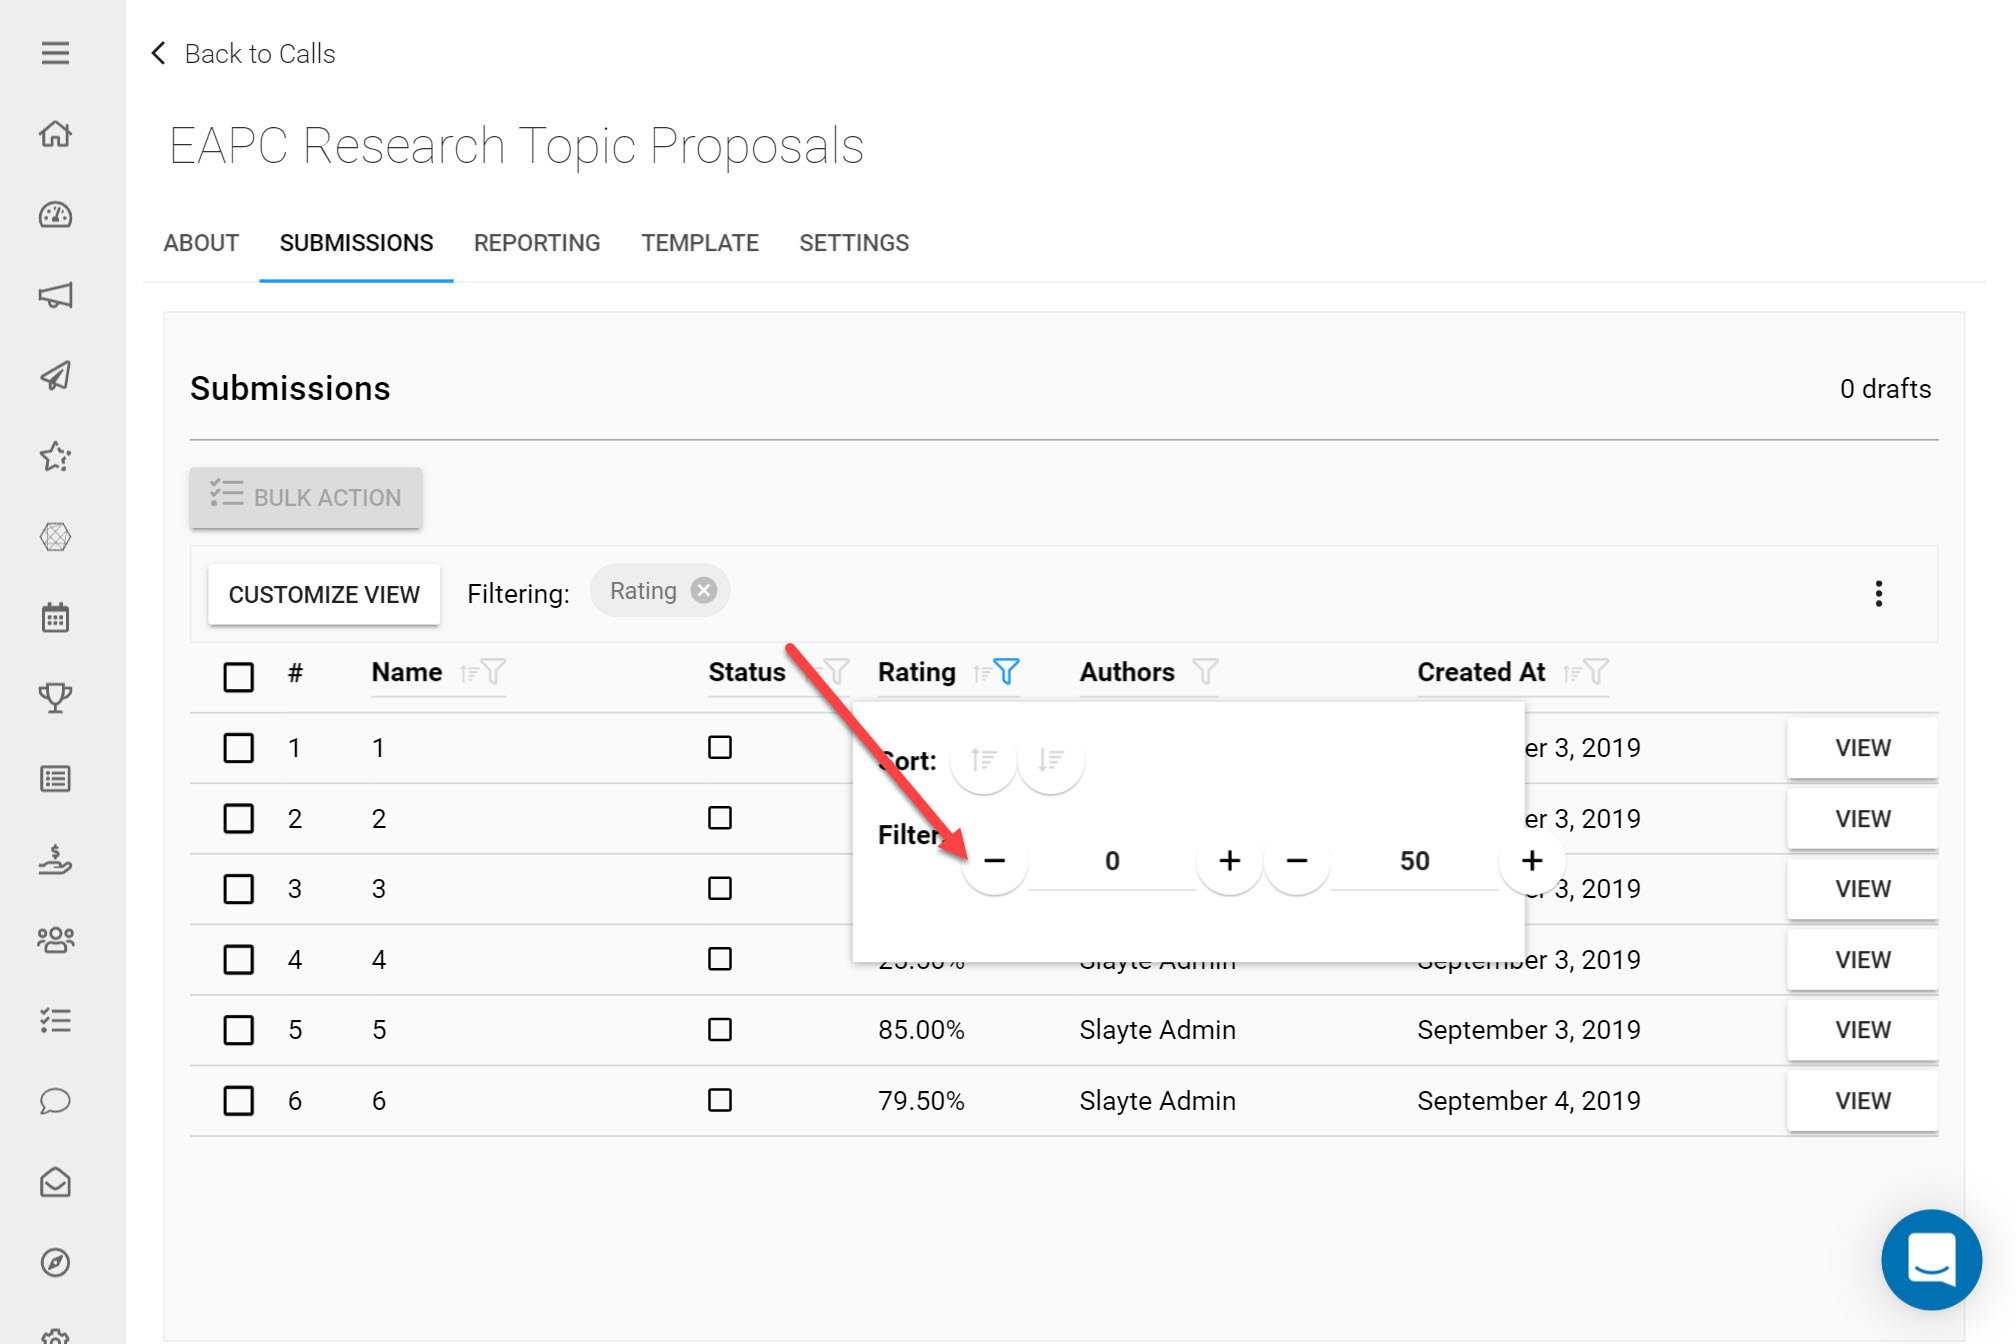
In the Submissions View, filters can be used to sort submissions in Ascending/ Descending order. They can also be used to find submissions that lie between certain boundaries. To only show e.g. Submissions with a rating higher than 50%, click the Filter Icon beside the Rating field. Input 50 into the lower bound and click anywhere outside the dialog box. This will then only display Submissions with a minimum rating value of 50%.
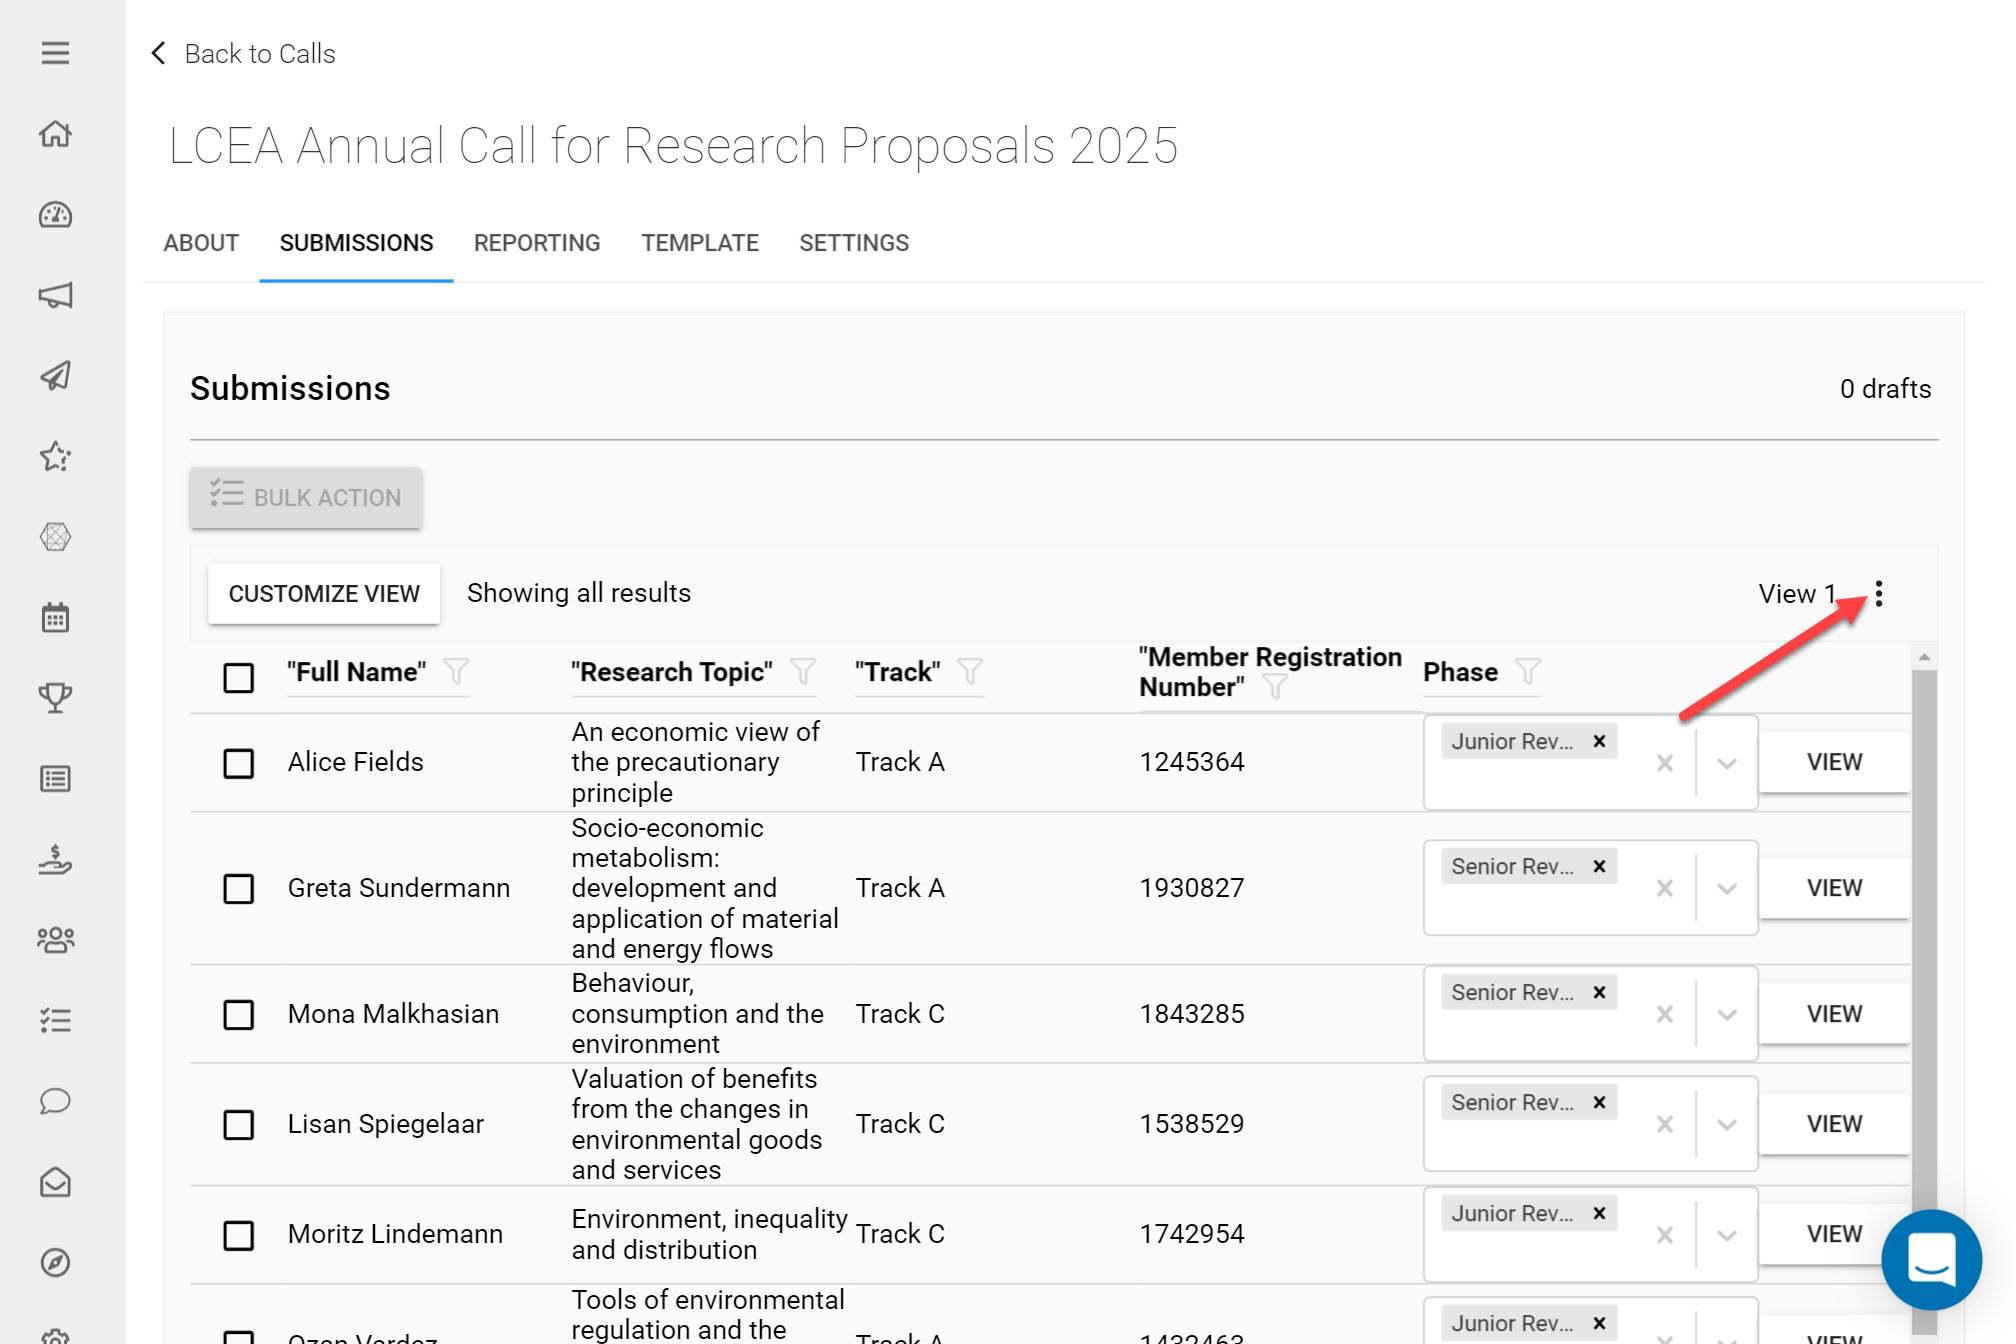
Working with Custom Views
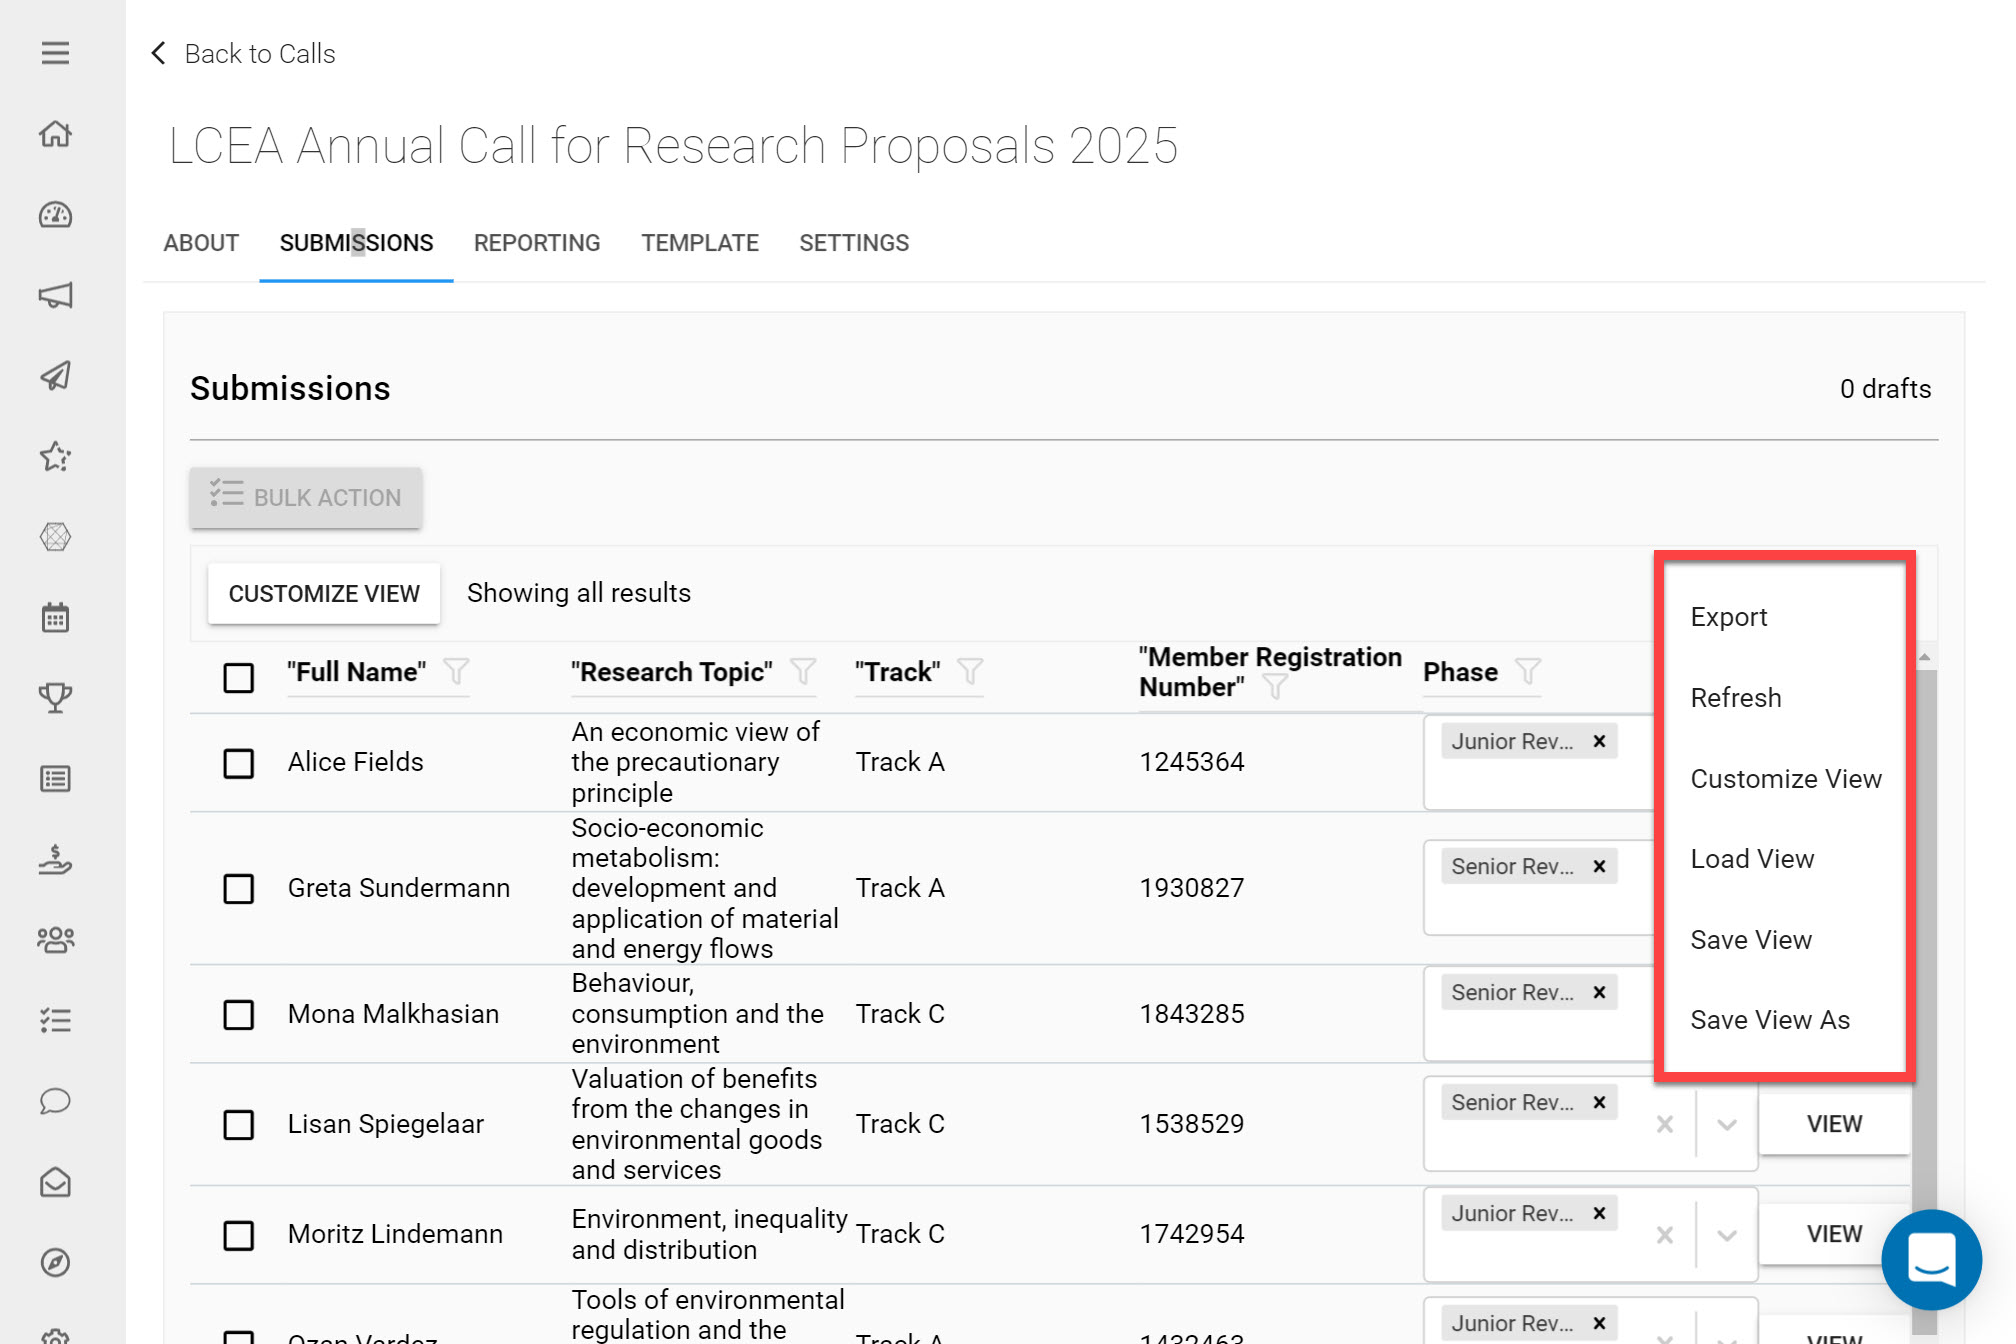
Once you have customized your Submission List View, you will have the options to complete the following actions by clicking on the three dots located on the top-right side of the Submission tab.
Export — Check the box of one or more submissions that you want to export to PDF files.
Export All — Export All allows a seamless export if there are more than 50 submissions as a .CSV file.
Refresh — Refresh the listing to ensure that you are viewing all submissions.
Customize View — This menu item opens the popup window to configure the submission view. See the section above.
Saving and Loading - Save a custom view so that you can later load it again. Use this feature to maintain a variety of different views and load them when required.
Sharing a Custom View - A custom view can be shared with your colleagues. Upon sharing, they will find the view in the 'Load View' list.
Default View - Mark a custom view as default for a call to automatically load it when viewing the list of submissions in the call.
How to View Pending Drafts In a Call
If you would like to view the current drafts that are pending in a Call:
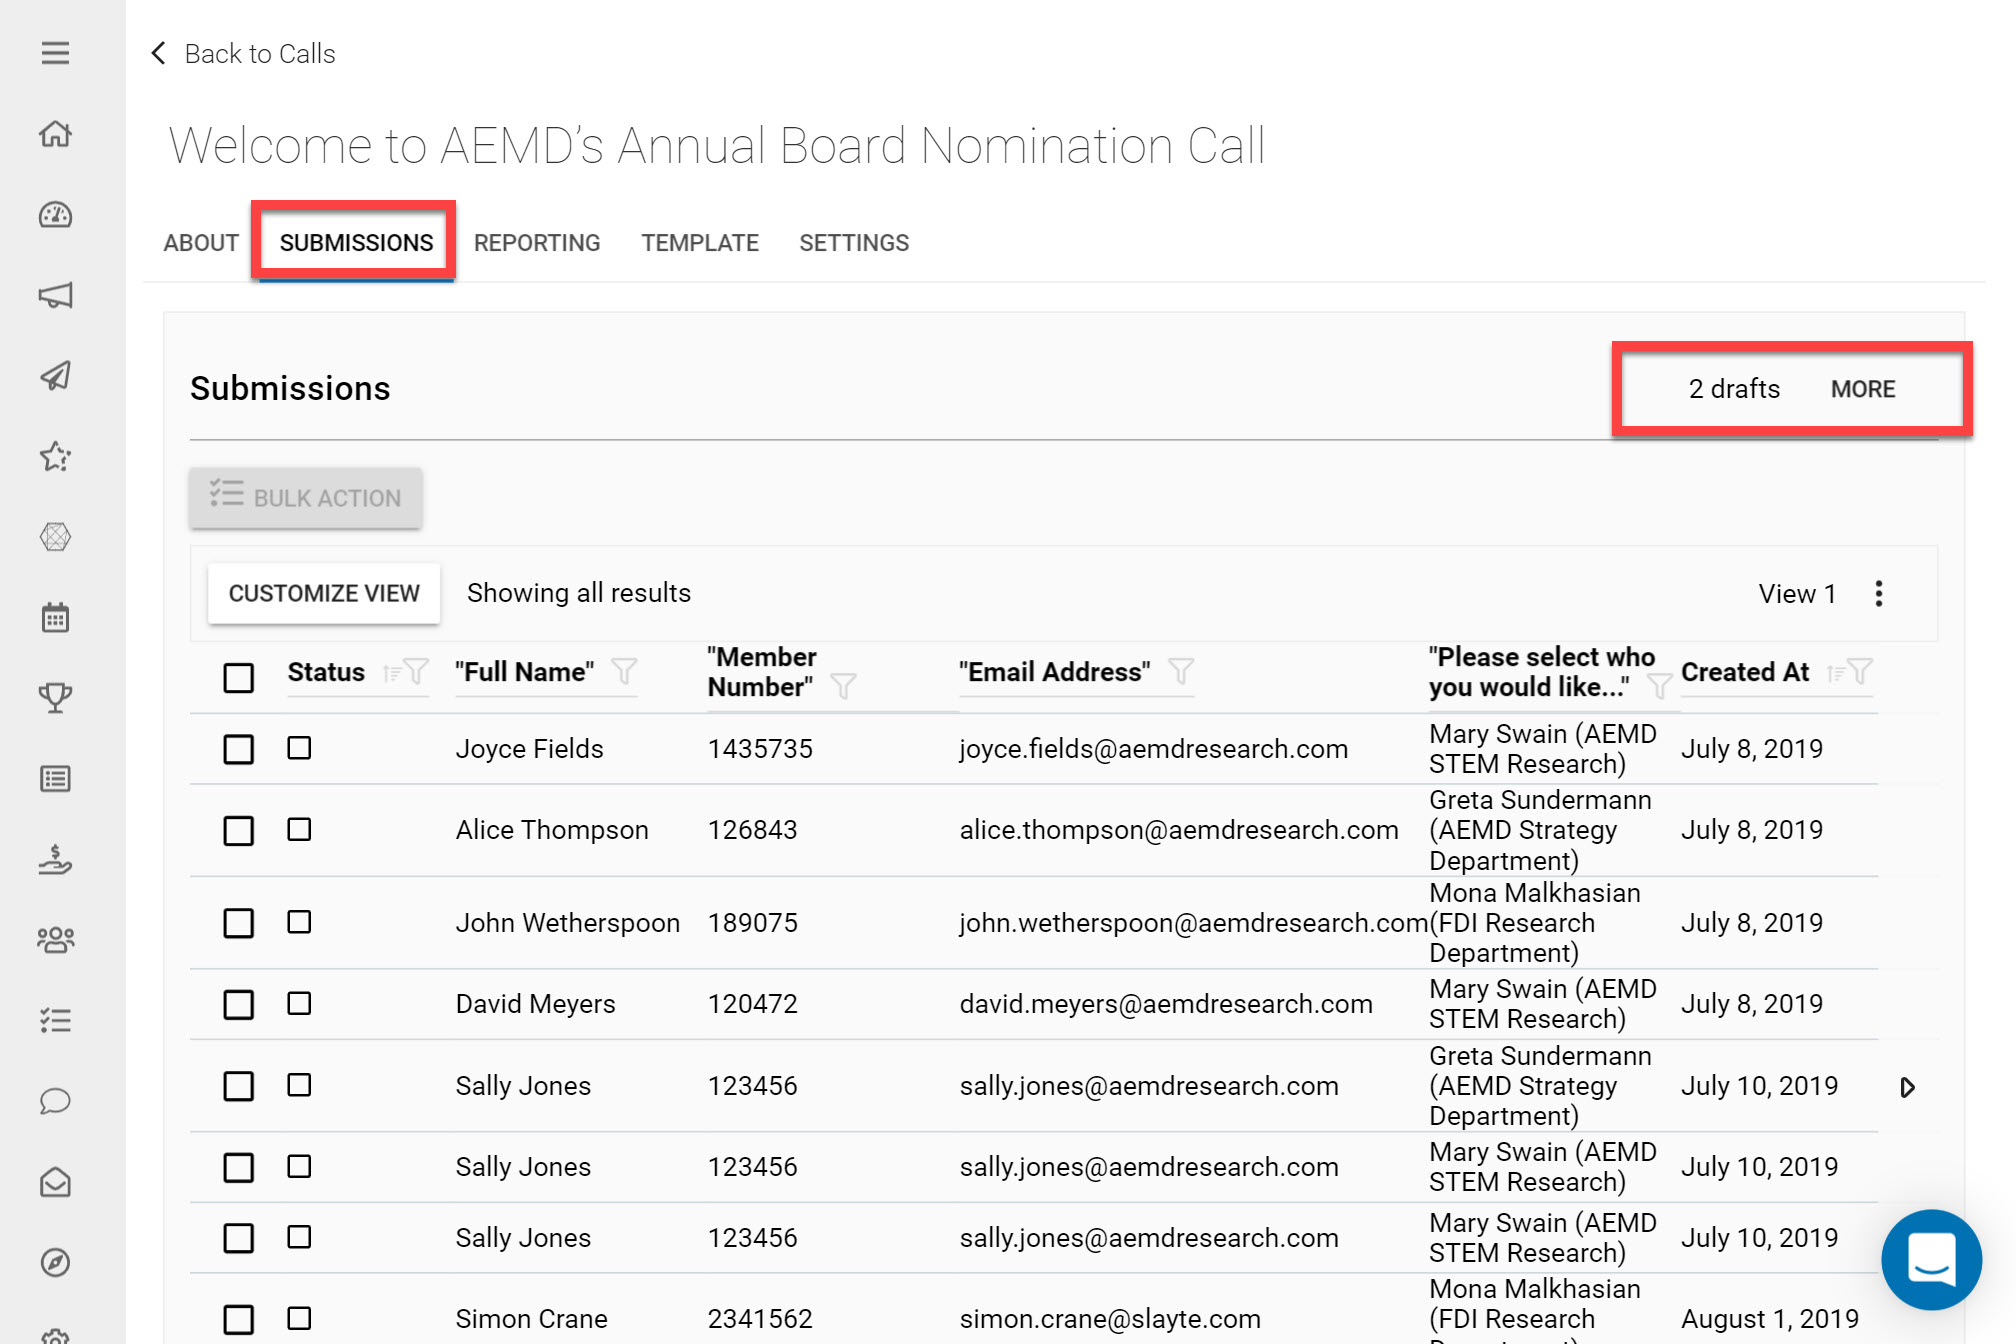
Navigate to the Call you would like to view pending Submissions on
Click on the Submissions tab
Here you will be able to view how many drafts are pending in the Call
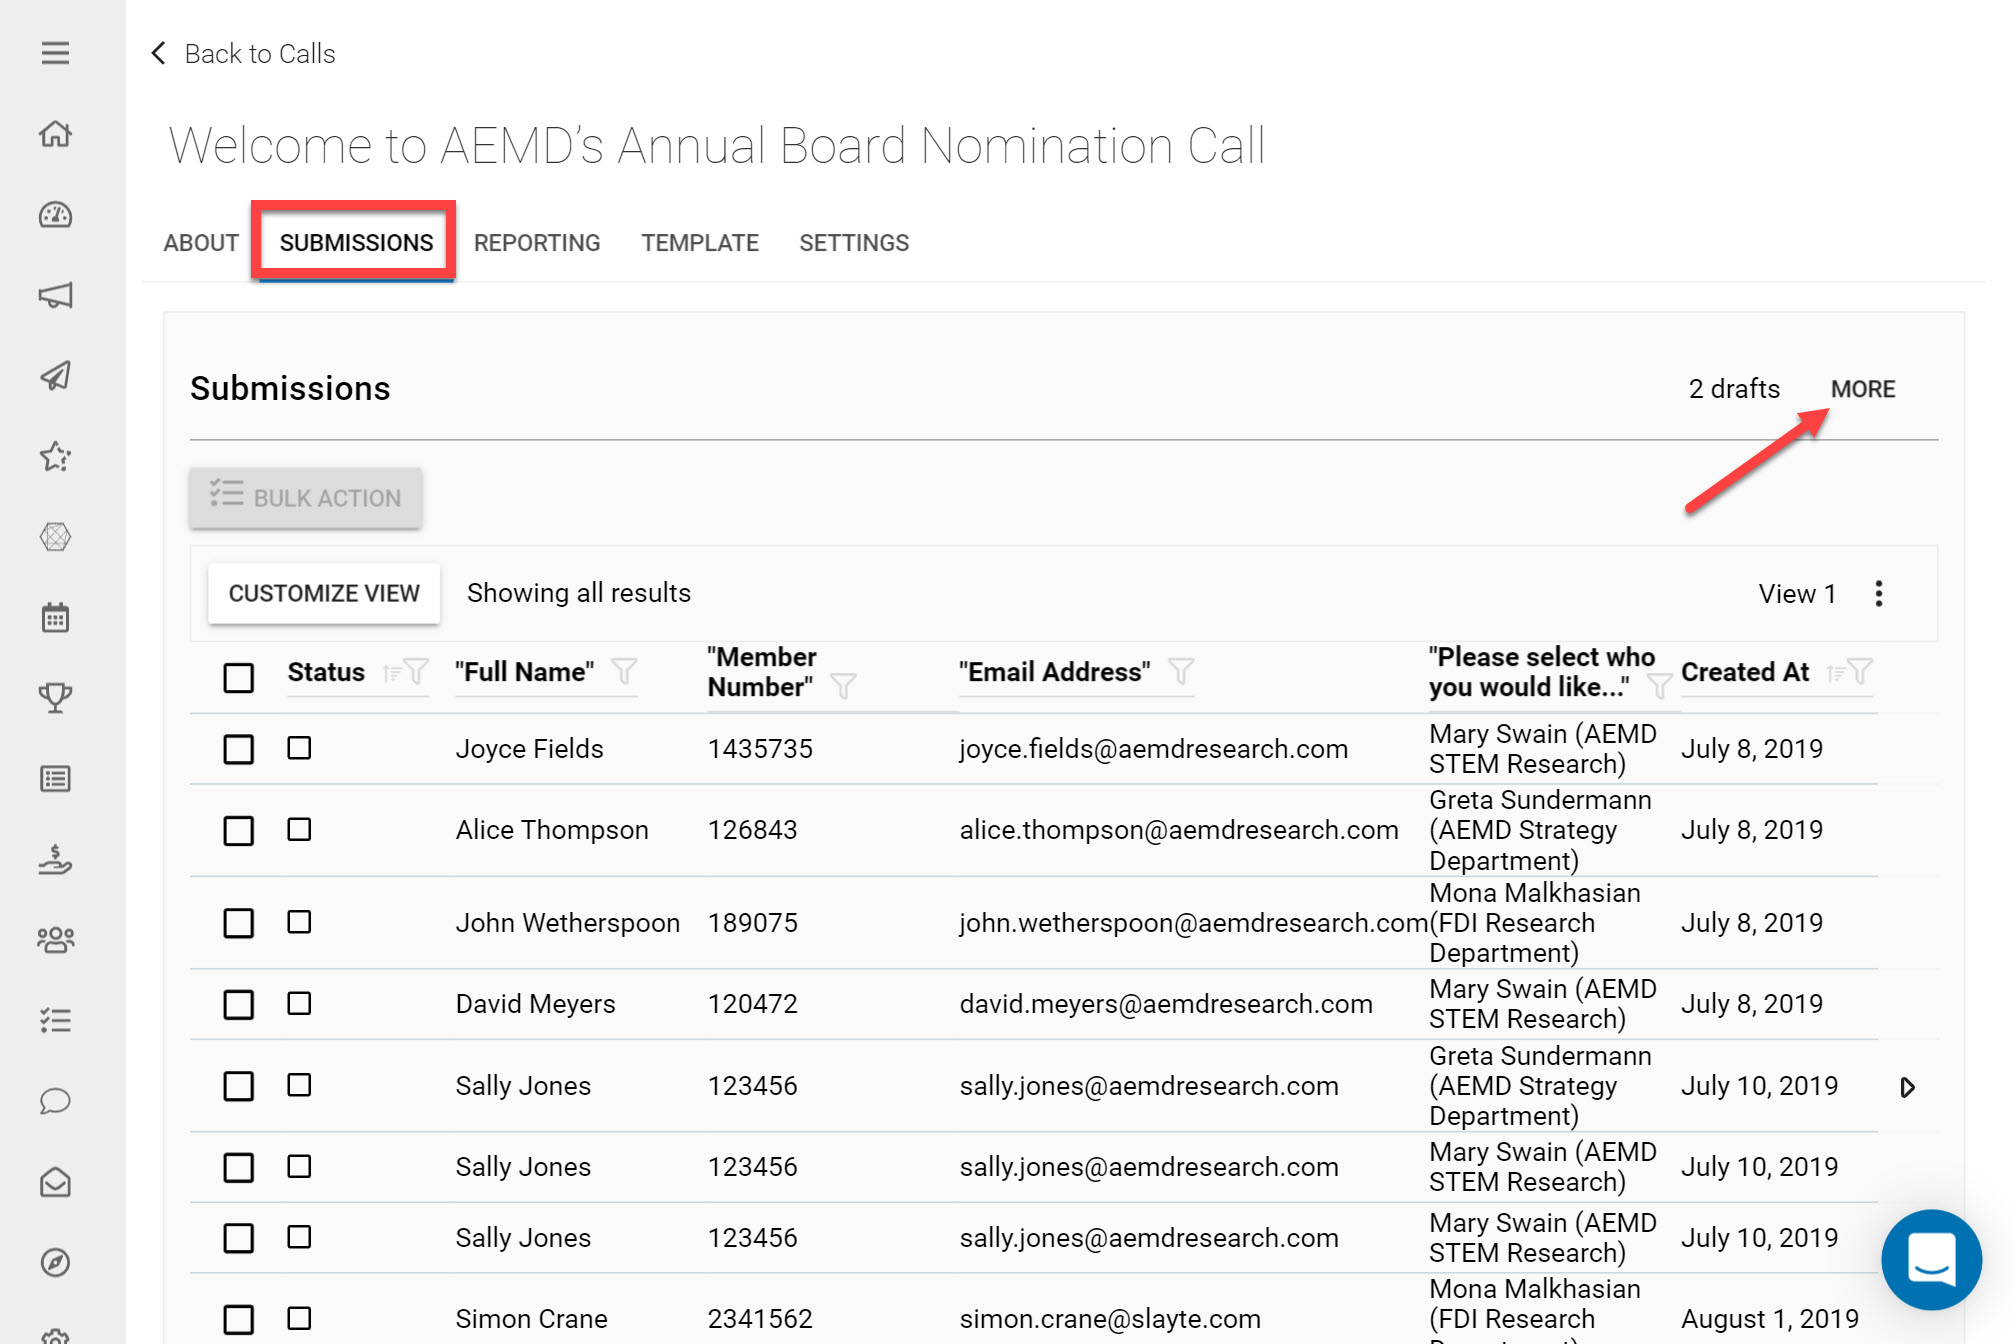
Click More to view additional information on the users who have pending drafts and their progress.
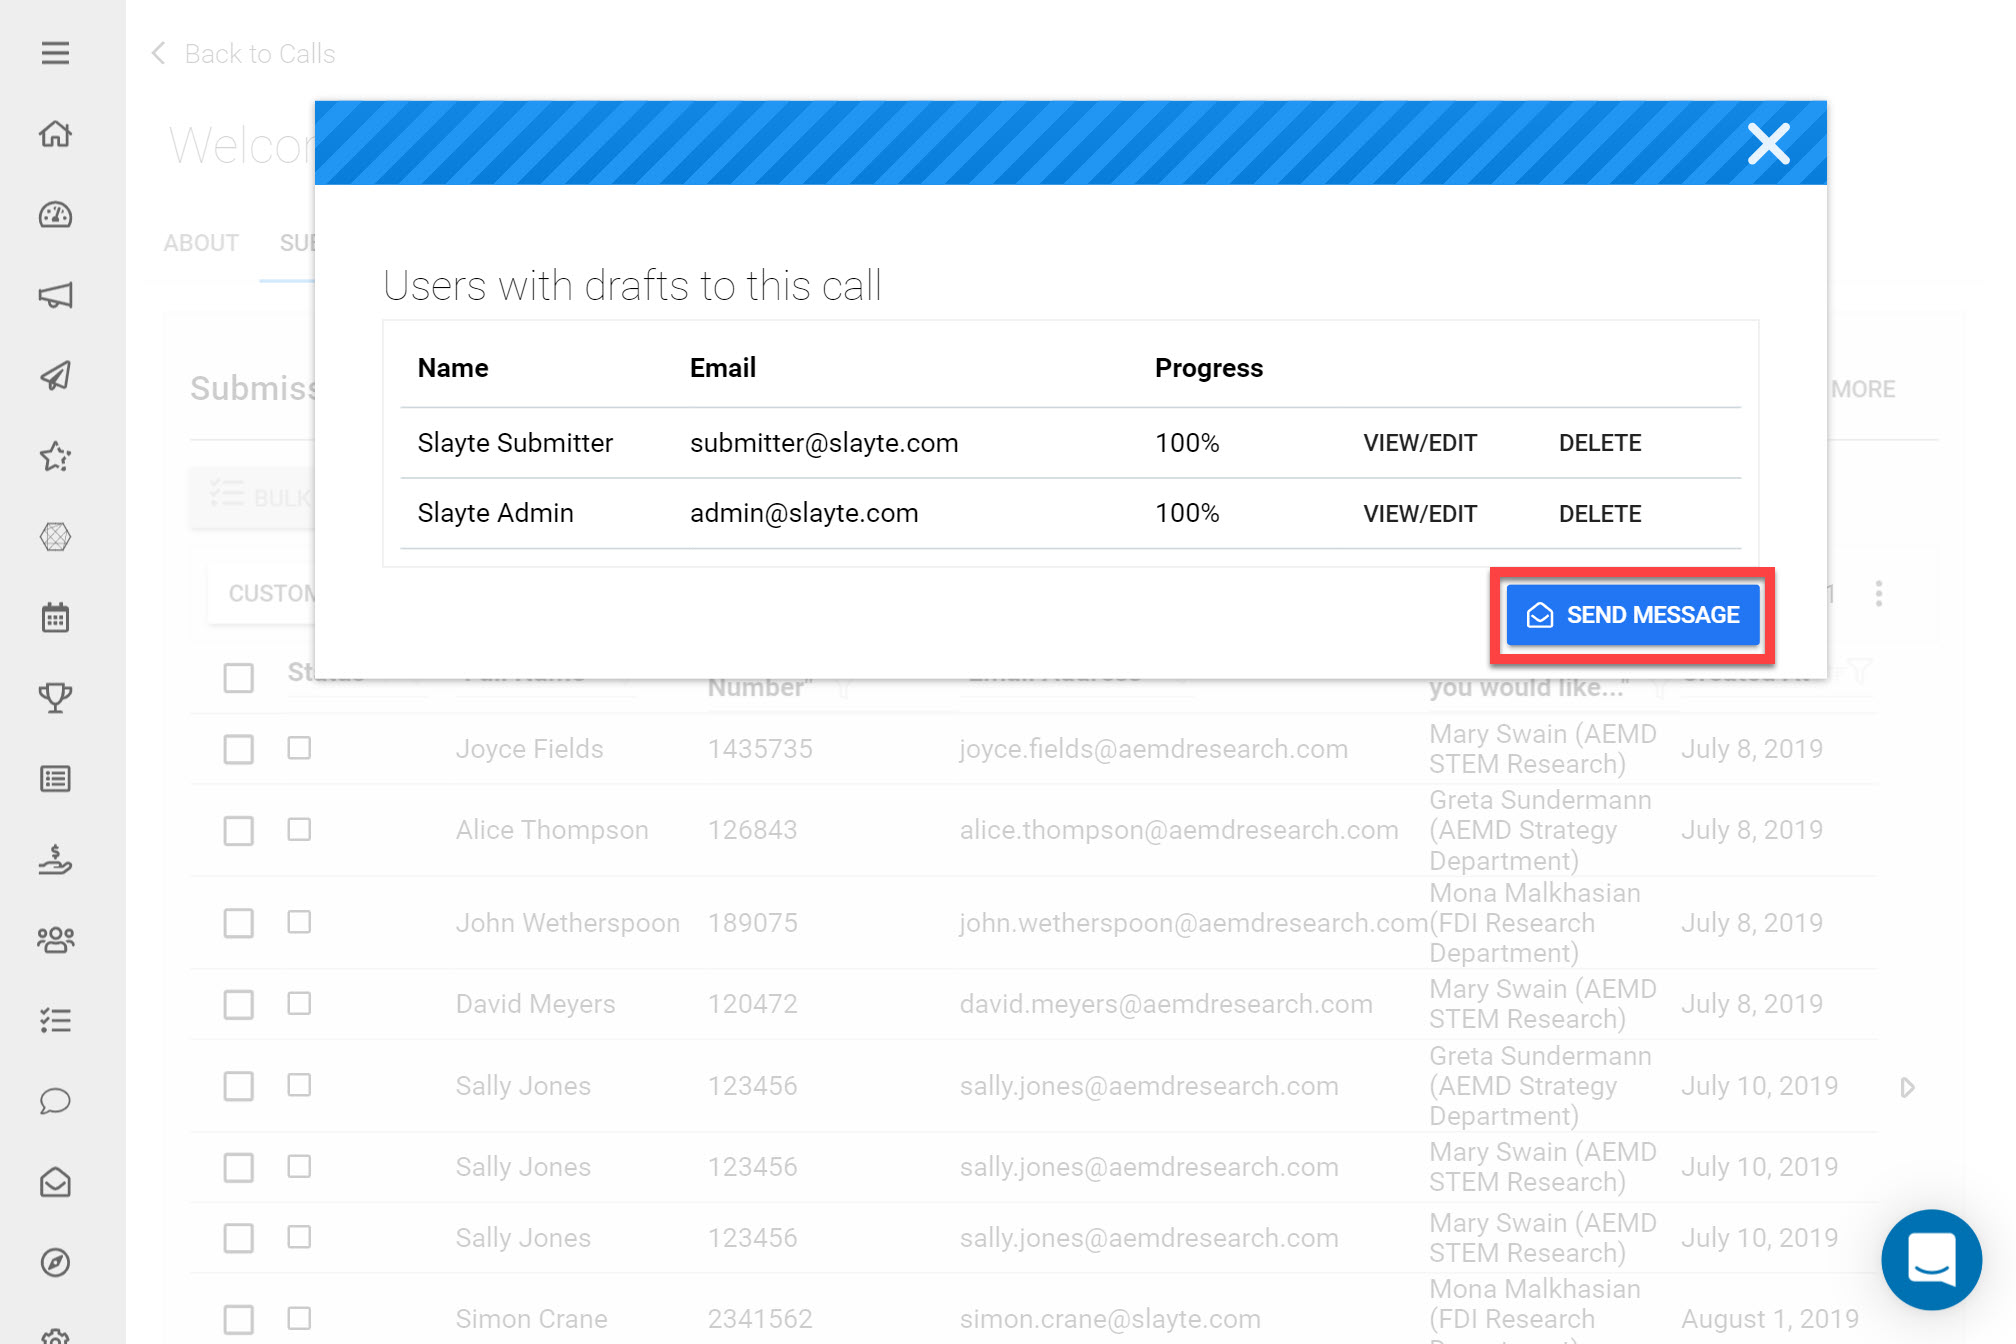
If you would like to send a message to those users who have pending drafts you can click Send Message.
Here you can either choose to write your own message or use an existing Message Template. You additionally have the option to choose which users you send the message to by selecting their Checkboxes.
