Once you start receiving Submissions you may need to take further action to process them. Depending on your preferences you can either manage Submissions individually or in bulk.
In this article we will cover how to:
- Manage Review Assignments
- Import Reviews
- Manage Call Phases
- Accept/Reject Submissions
- Tag Submissions
- Send Messages to Submitters
Let's first take a look at completing these actions in bulk:
Managing Submissions using Bulk Actions
Performing Bulk Actions on Submissions allows you to complete actions on multiple Submissions at the same time. To use a Bulk Action:
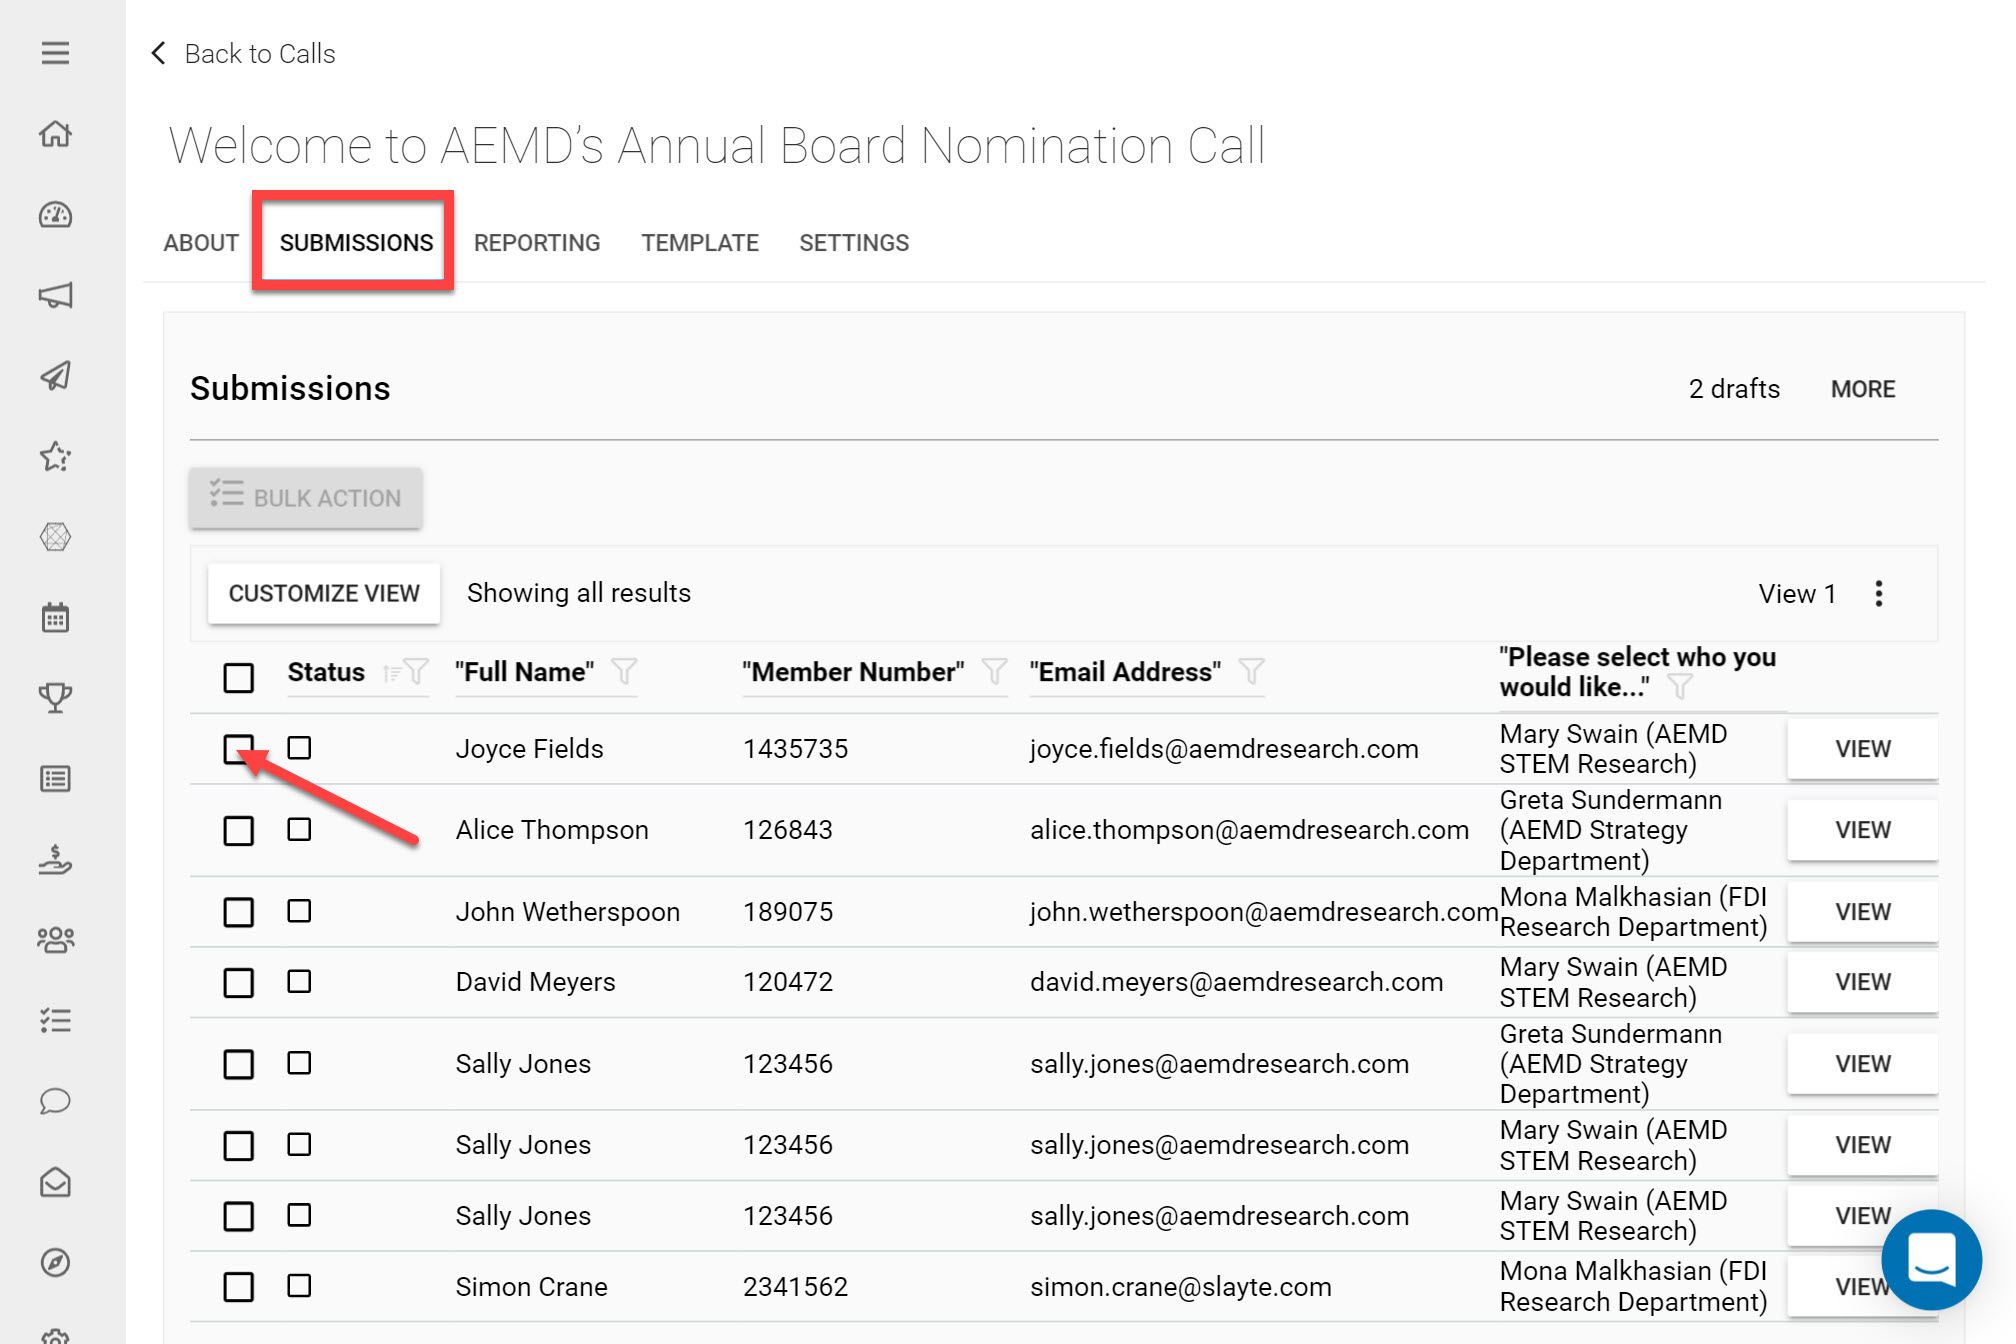
Go to a Call you would like to manage Submissions in
Click on the Submissions tab
Use the Checkboxes to select which Submissions you would like to manage
*Tip: You can use the top checkbox to select all Submissions in your list view.
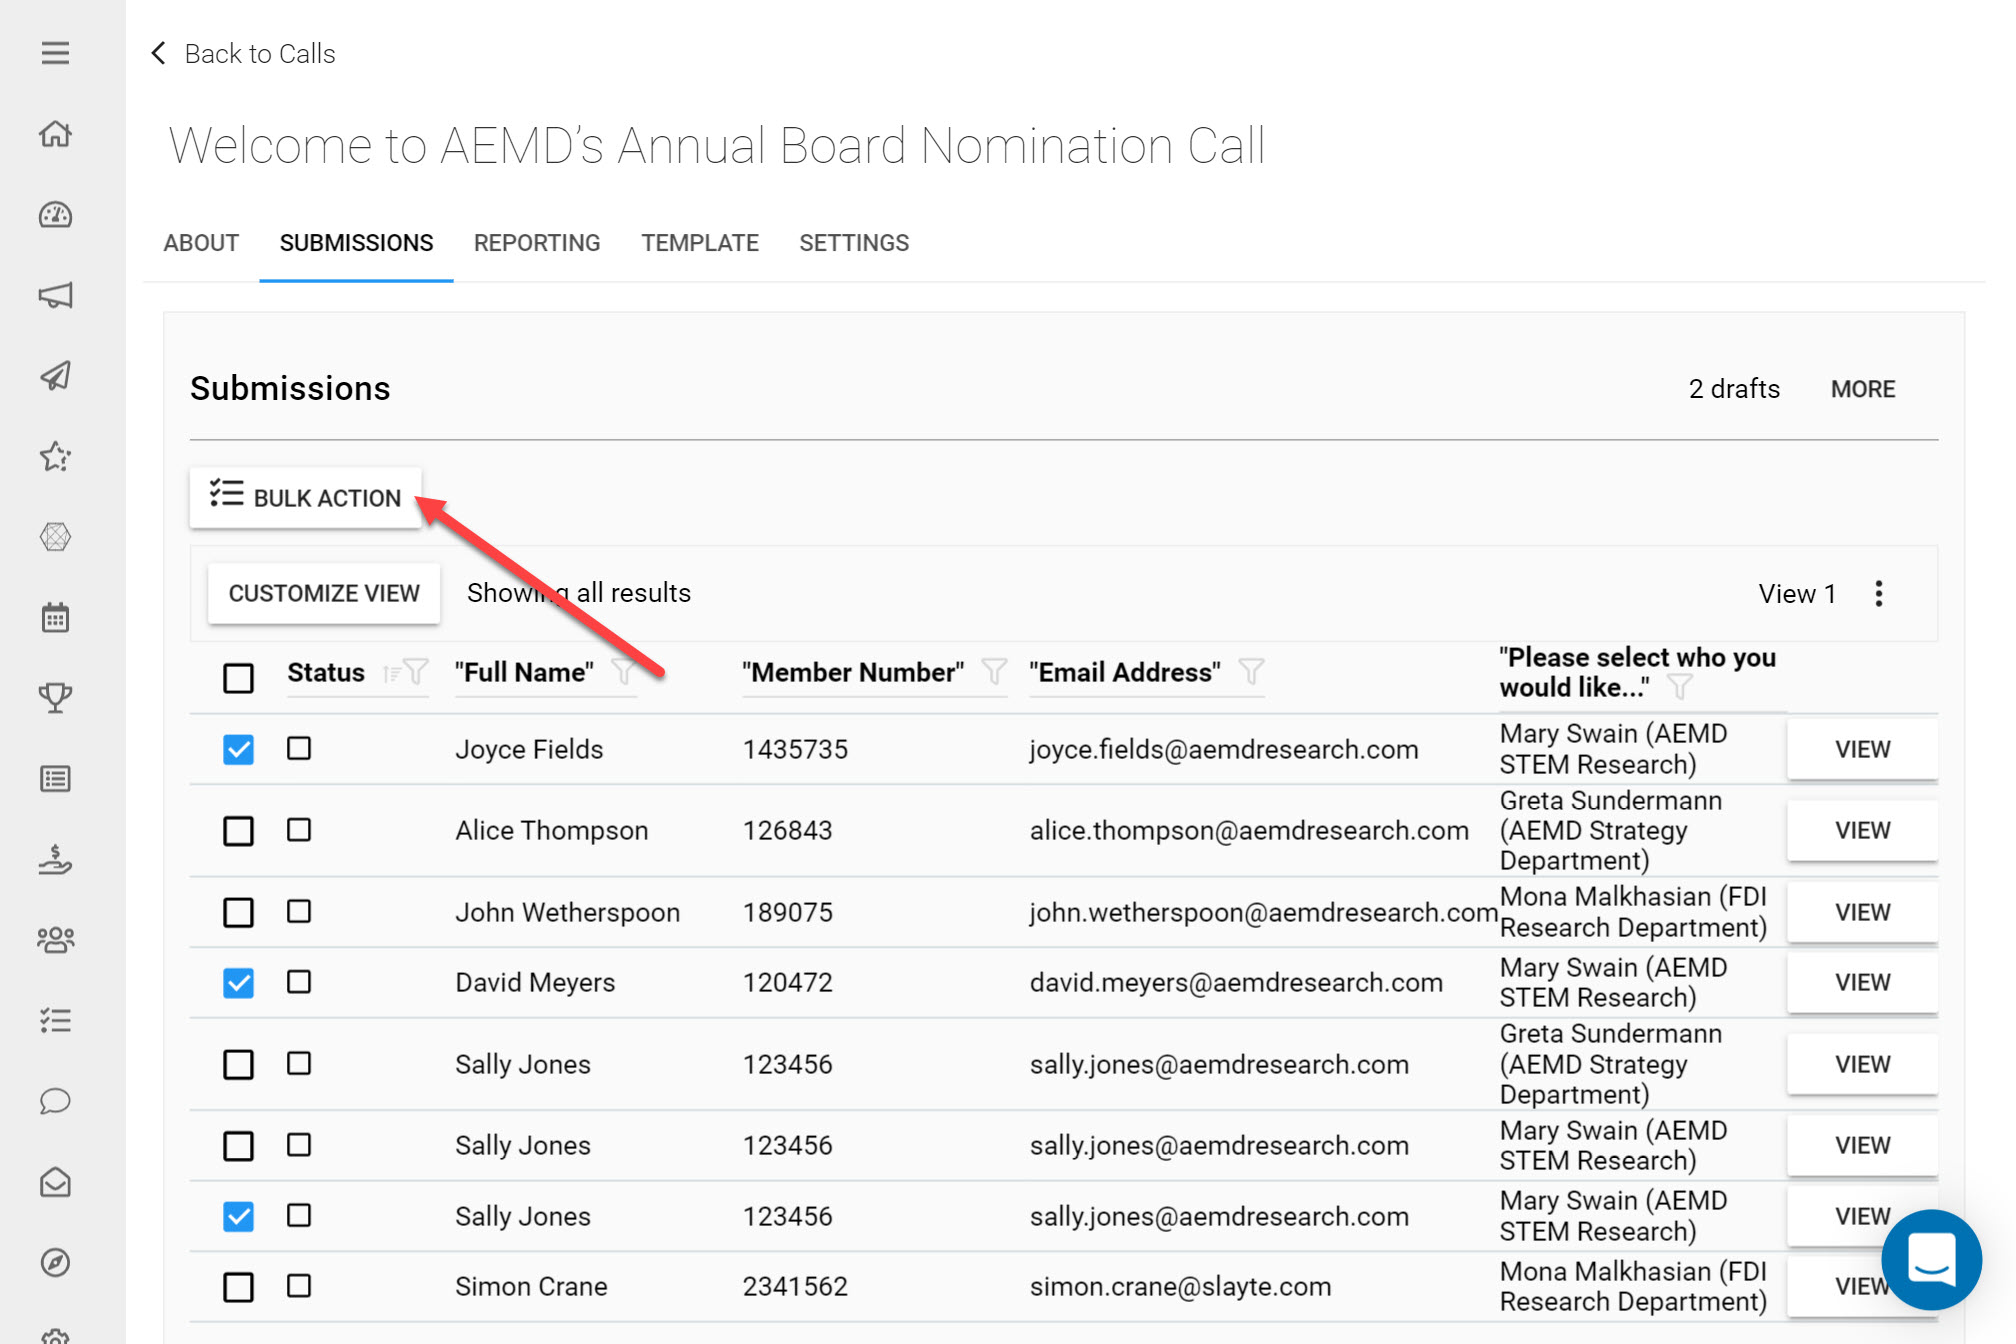
Click on the Bulk Action button
*Note: You will only be allowed to click Bulk Action once you have selected Submissions.
Here you will see a list of bulk actions you can complete on all Submissions you have selected.
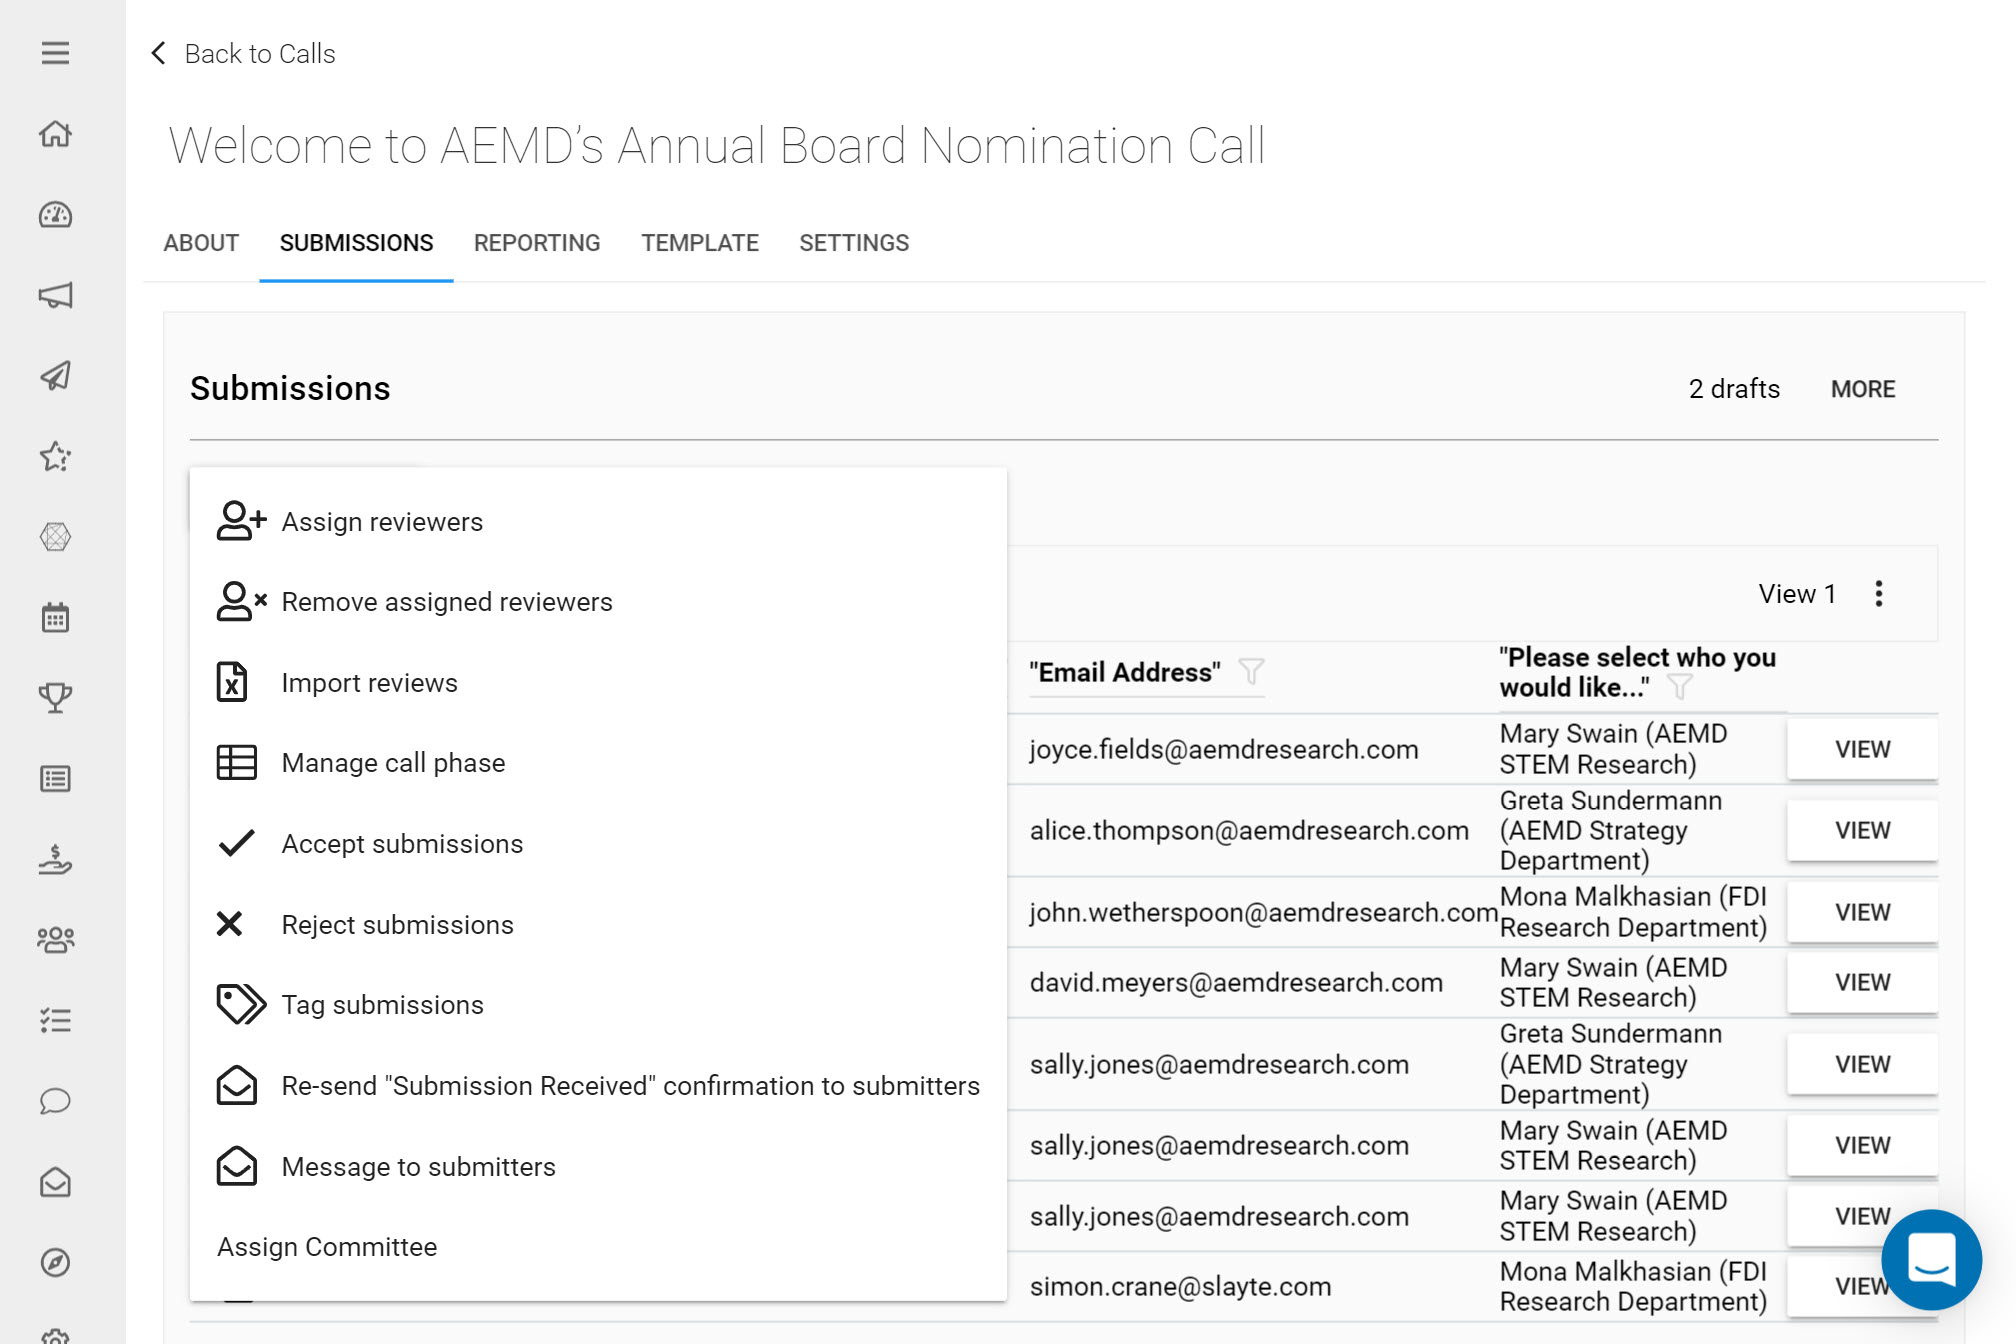
Assign Reviewers (if a Review Phase has been added)
This allows you to assign Reviewers to Submissions and configure the Review assignment rules. This article goes into more detail on Assigning Reviewers.
Remove Assigned Reviewers (if a Review Phase has been added)
This option enables you to remove any pre-existing review assignments from selected Submissions.
Import Reviews (if a Review Phase has been added)
Here you can import any previously completed Reviews on the selected Submissions by adding these to a template and importing them.
To use this feature:
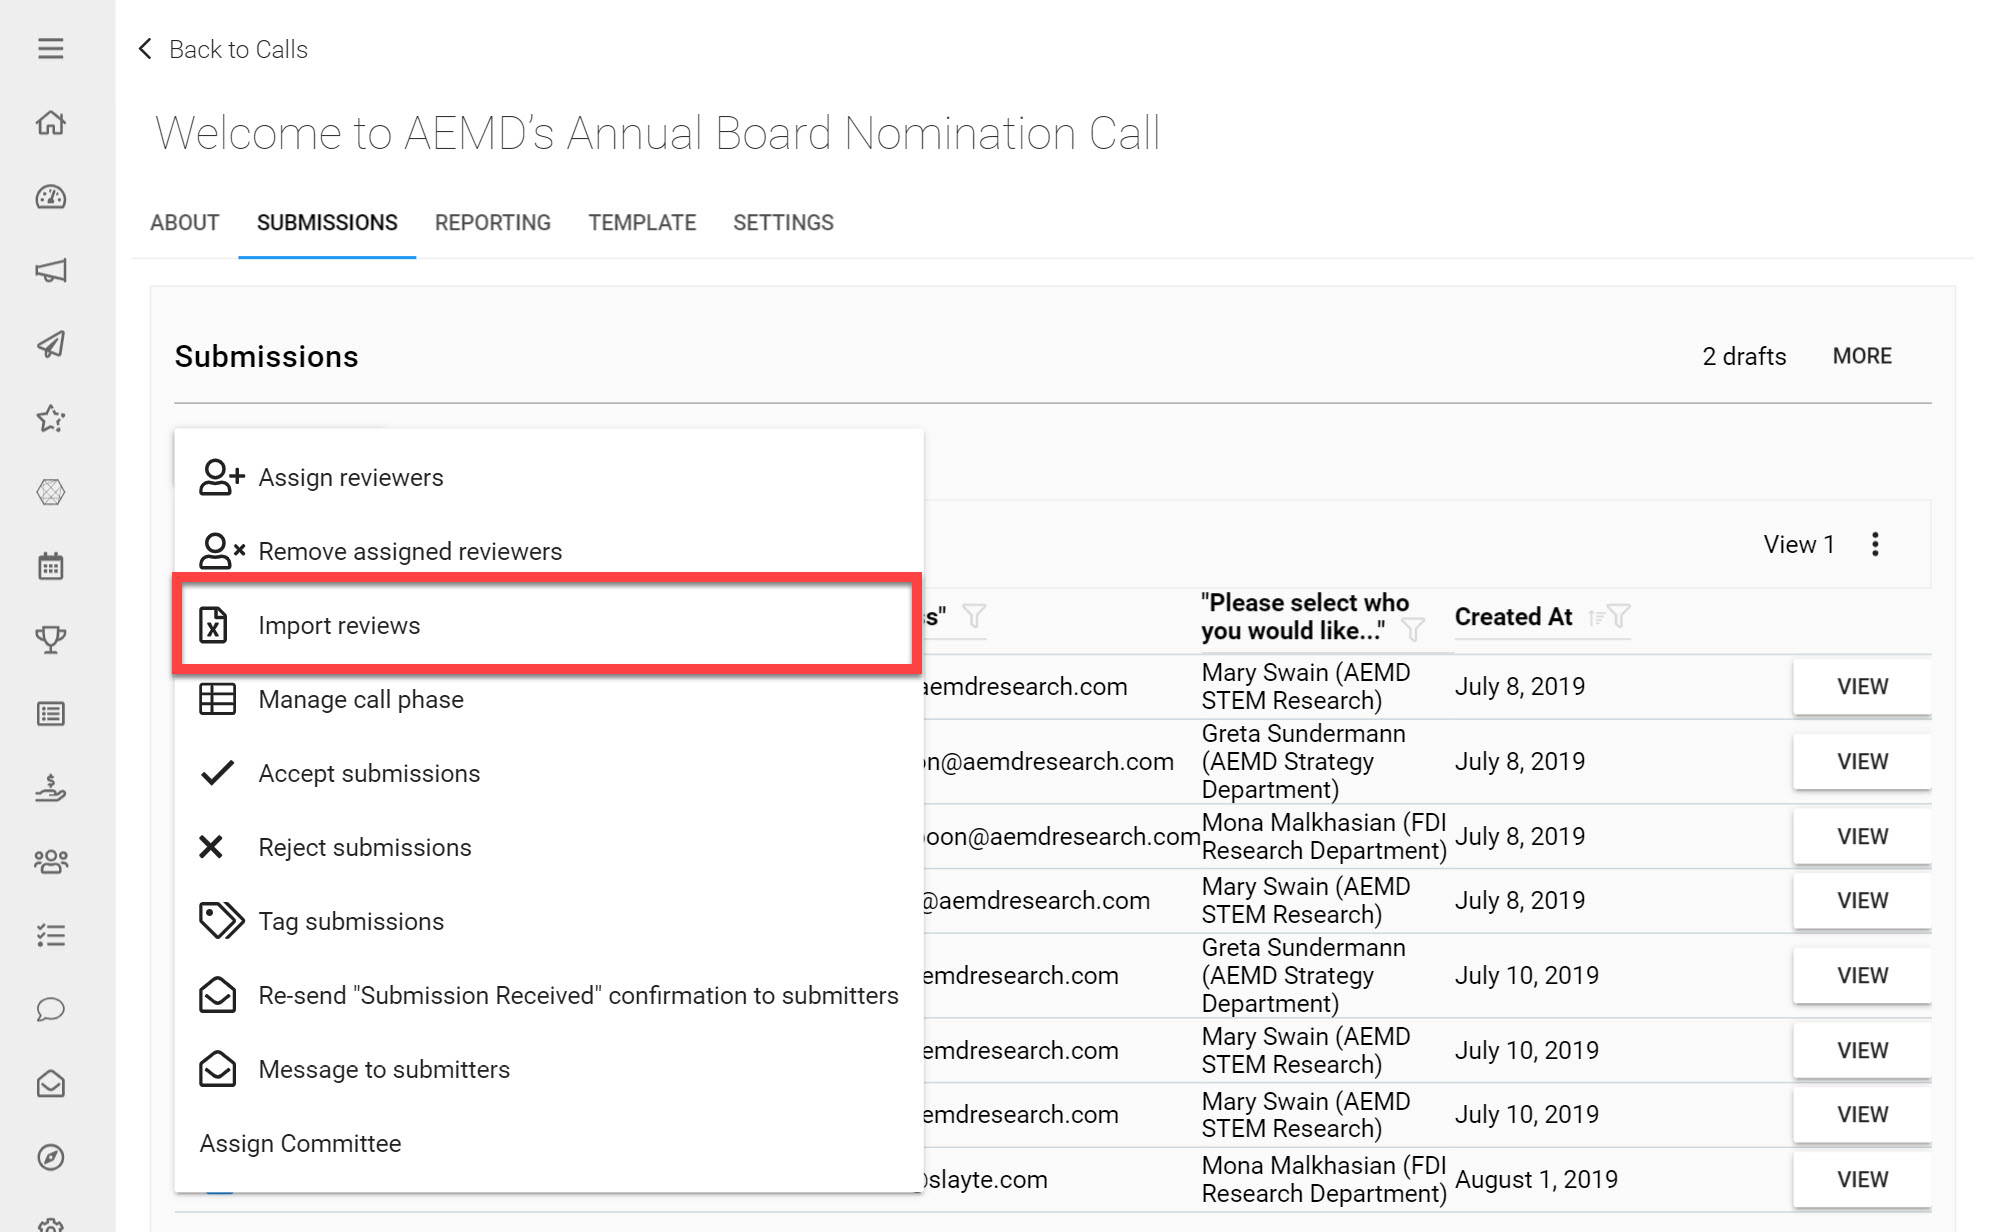
Click Import Reviews
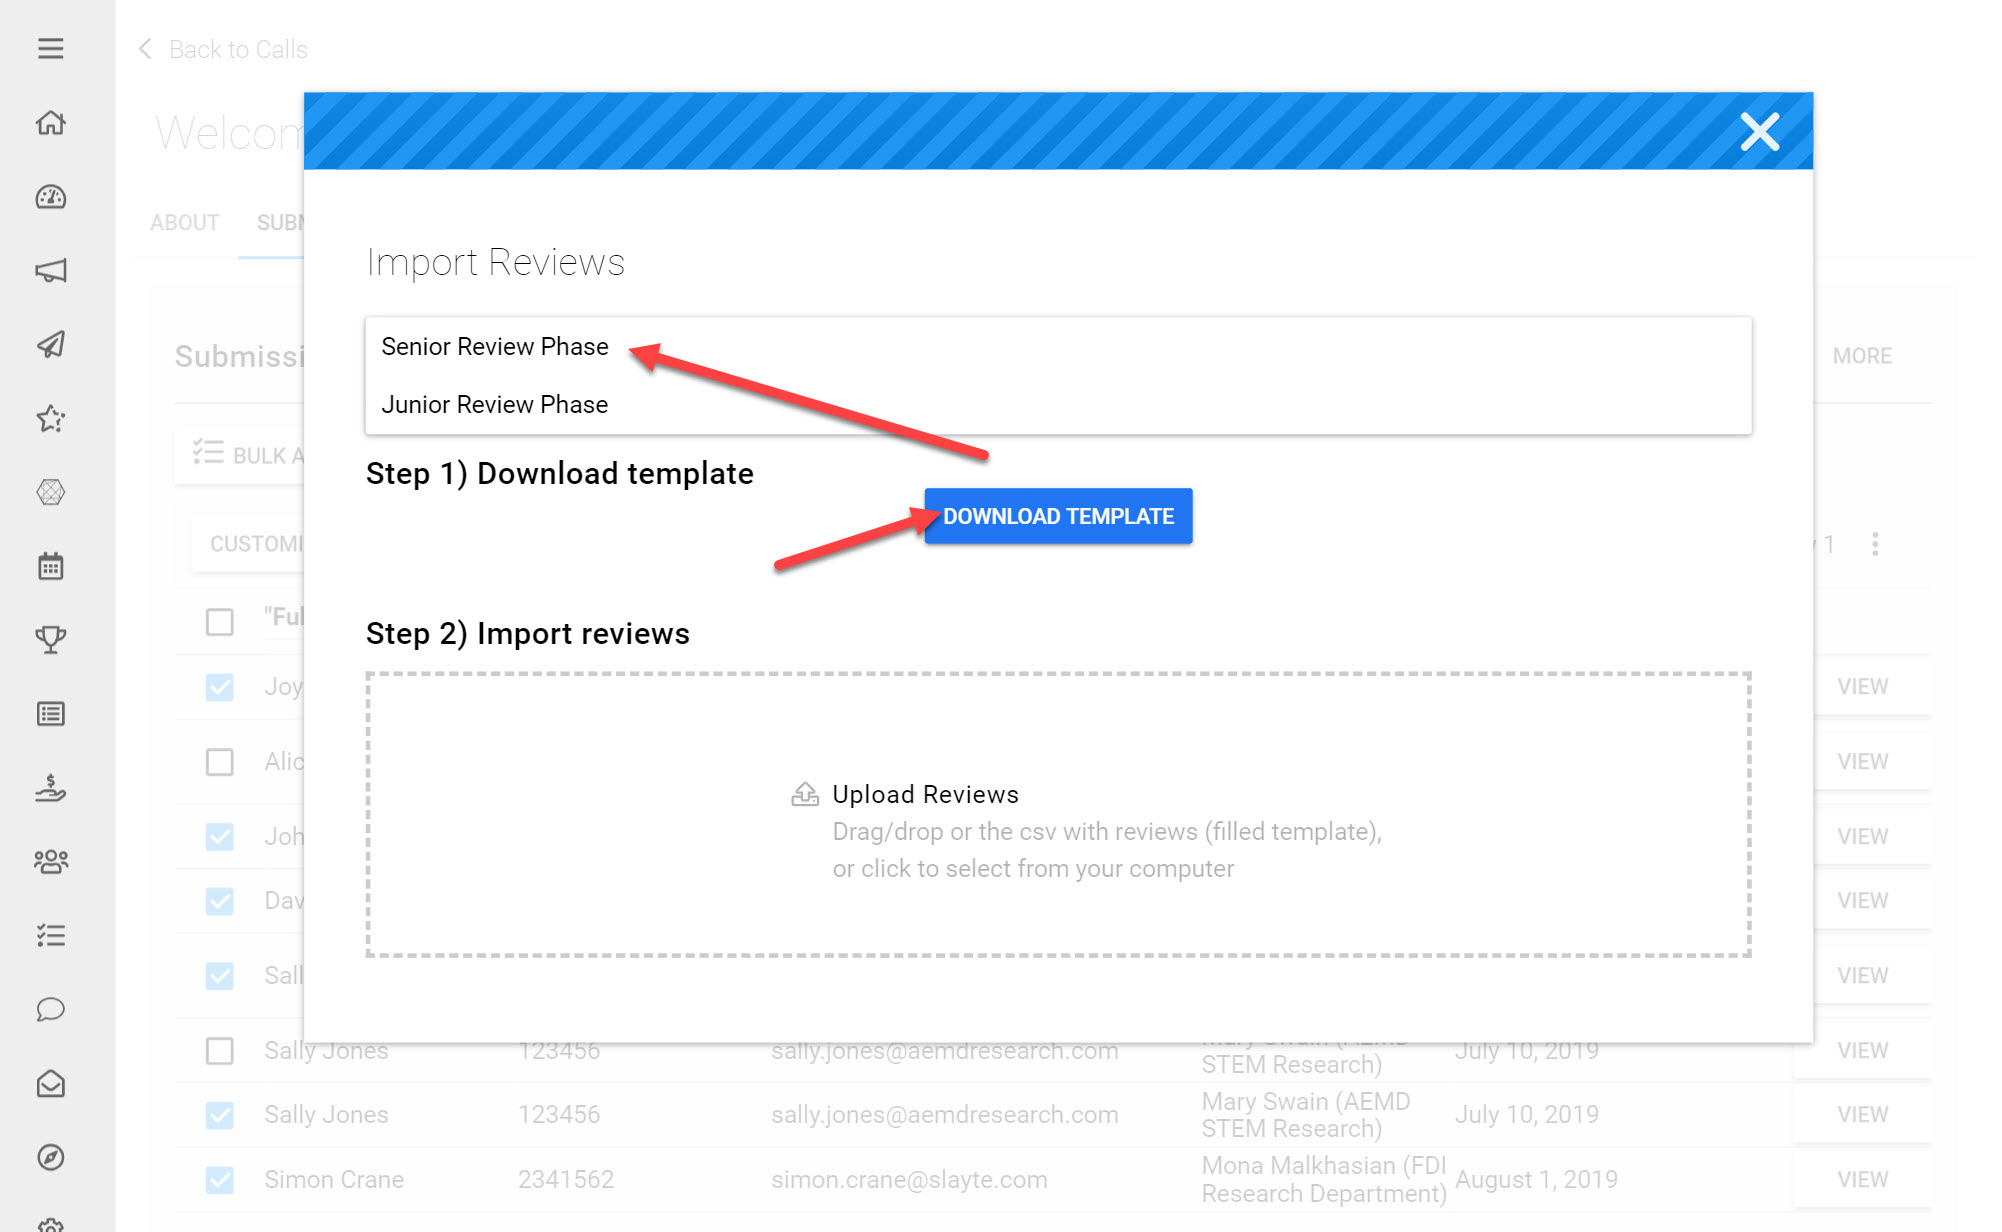
Choose the Review Form you would like to Import Reviews to
Click Download Template
Add your previously collected Reviews on the downloaded .XLS file Template

Click Upload Reviews and choose your updated .XLS file Template
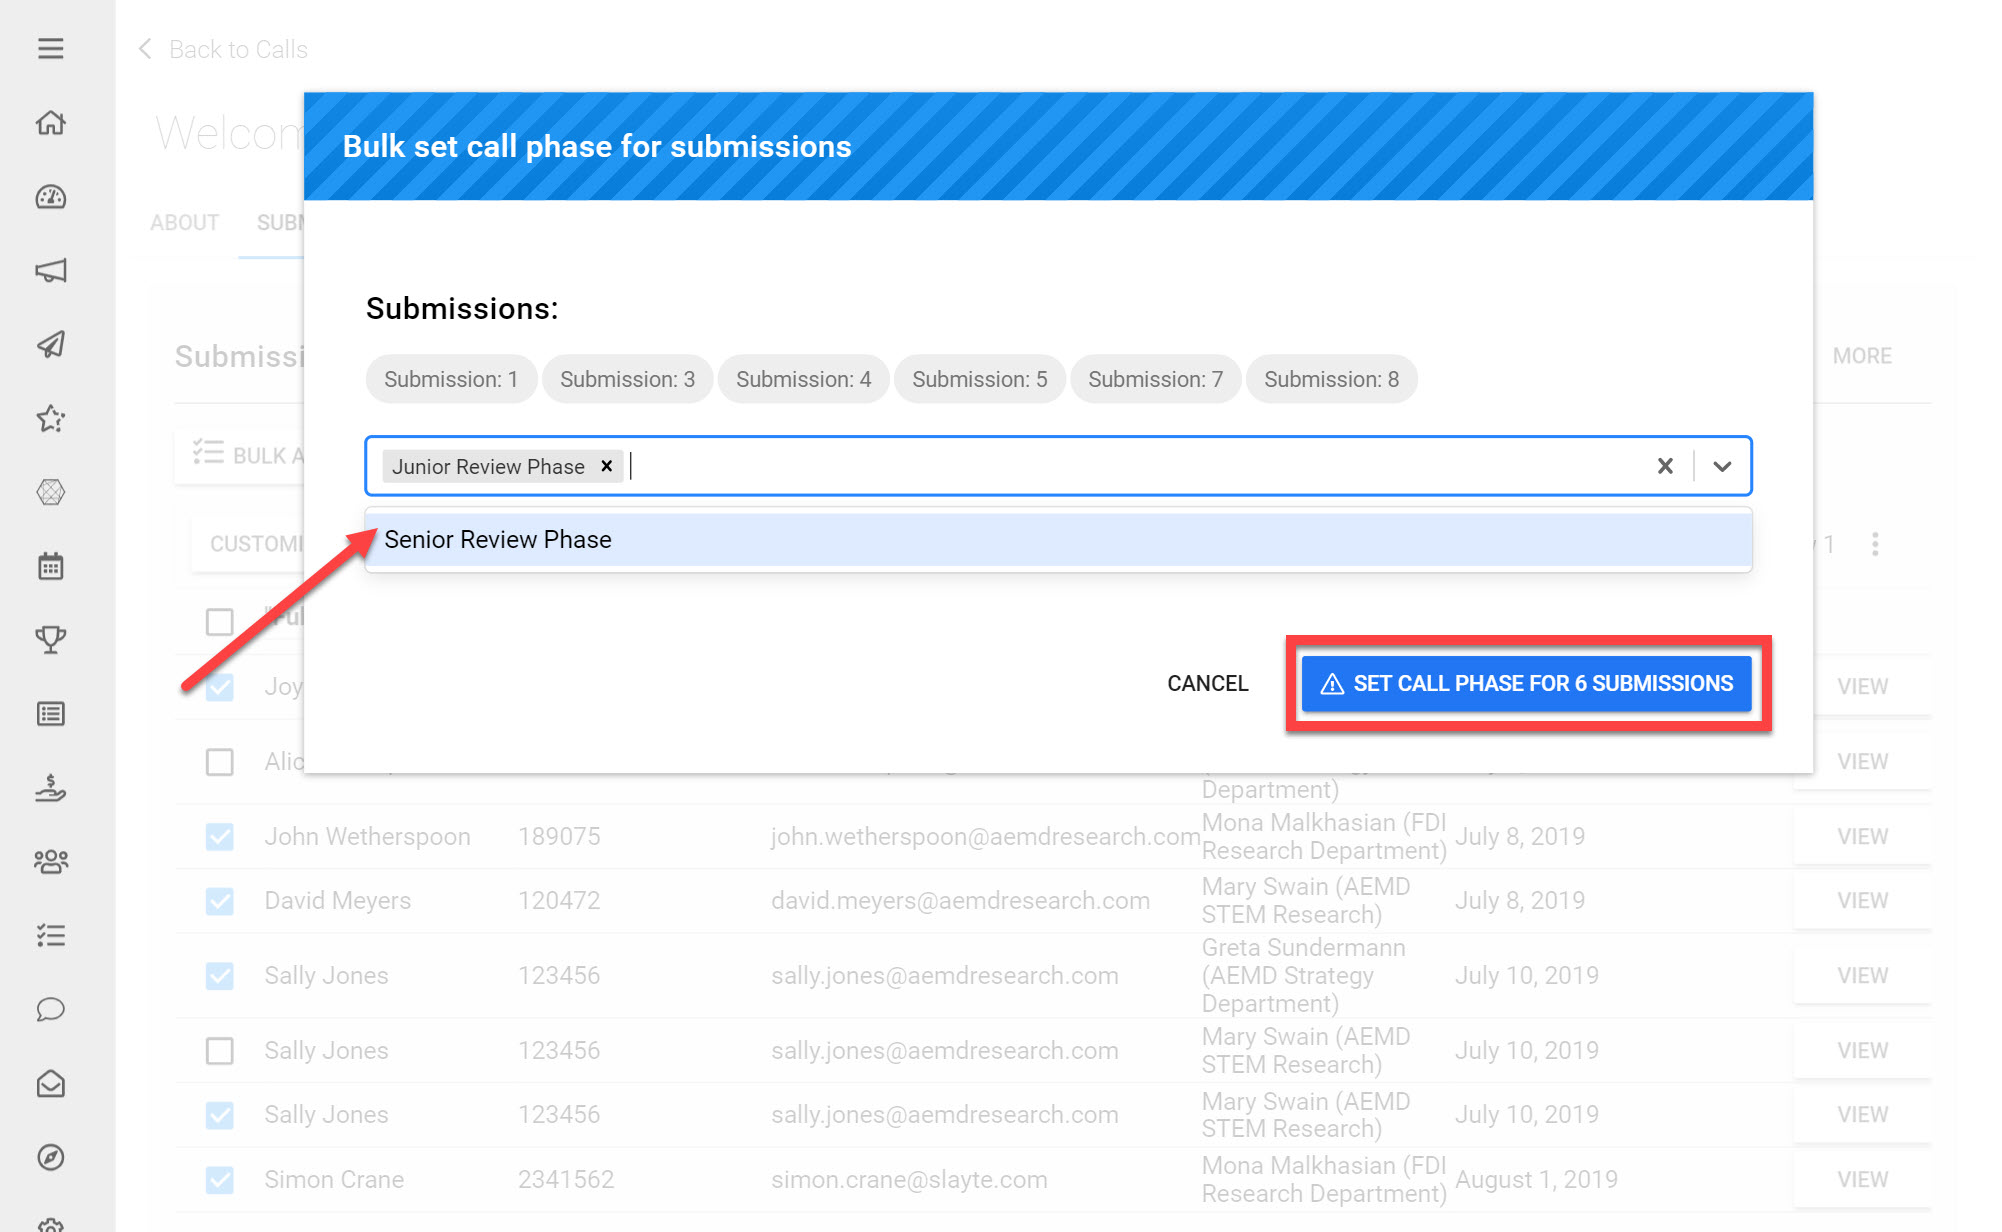
Manage Call Phase
Your Call may have multiple Phases that Submissions will need to go through. This option allows you to select which Phase a Submission should belong to at any given point in time. If for example a Call has a Junior and Senior Review Phase, after Reviews have been completed in the Junior Review Phase the Administrator will need to move the selected Submissions to the Senior Review Phase, as shown below.
*Note: At this point Submissions cannot be automatically moved to different Phases once certain actions have been completed, so as Administrator you will need to assign these changes yourself. This article provides more advanced information on Managing Multiple Phases.
Accept/Reject Submissions
You can set the status of Submissions to Accepted, Rejected or Editable (the default status will be Open). Setting the status to Accepted or Rejected will not trigger any actions in Slayte, this is more of an internal note for Administrators. Setting the status of a Submission to Editable allows the Submitter to make one round of changes to their Submission, after it has been received. This article provides more information on this feature.
*Tip: You are able to Filter by Submission Status and easily perform bulk actions on them (e.g. send Bulk Acceptance emails to Submissions that have been marked Accepted).
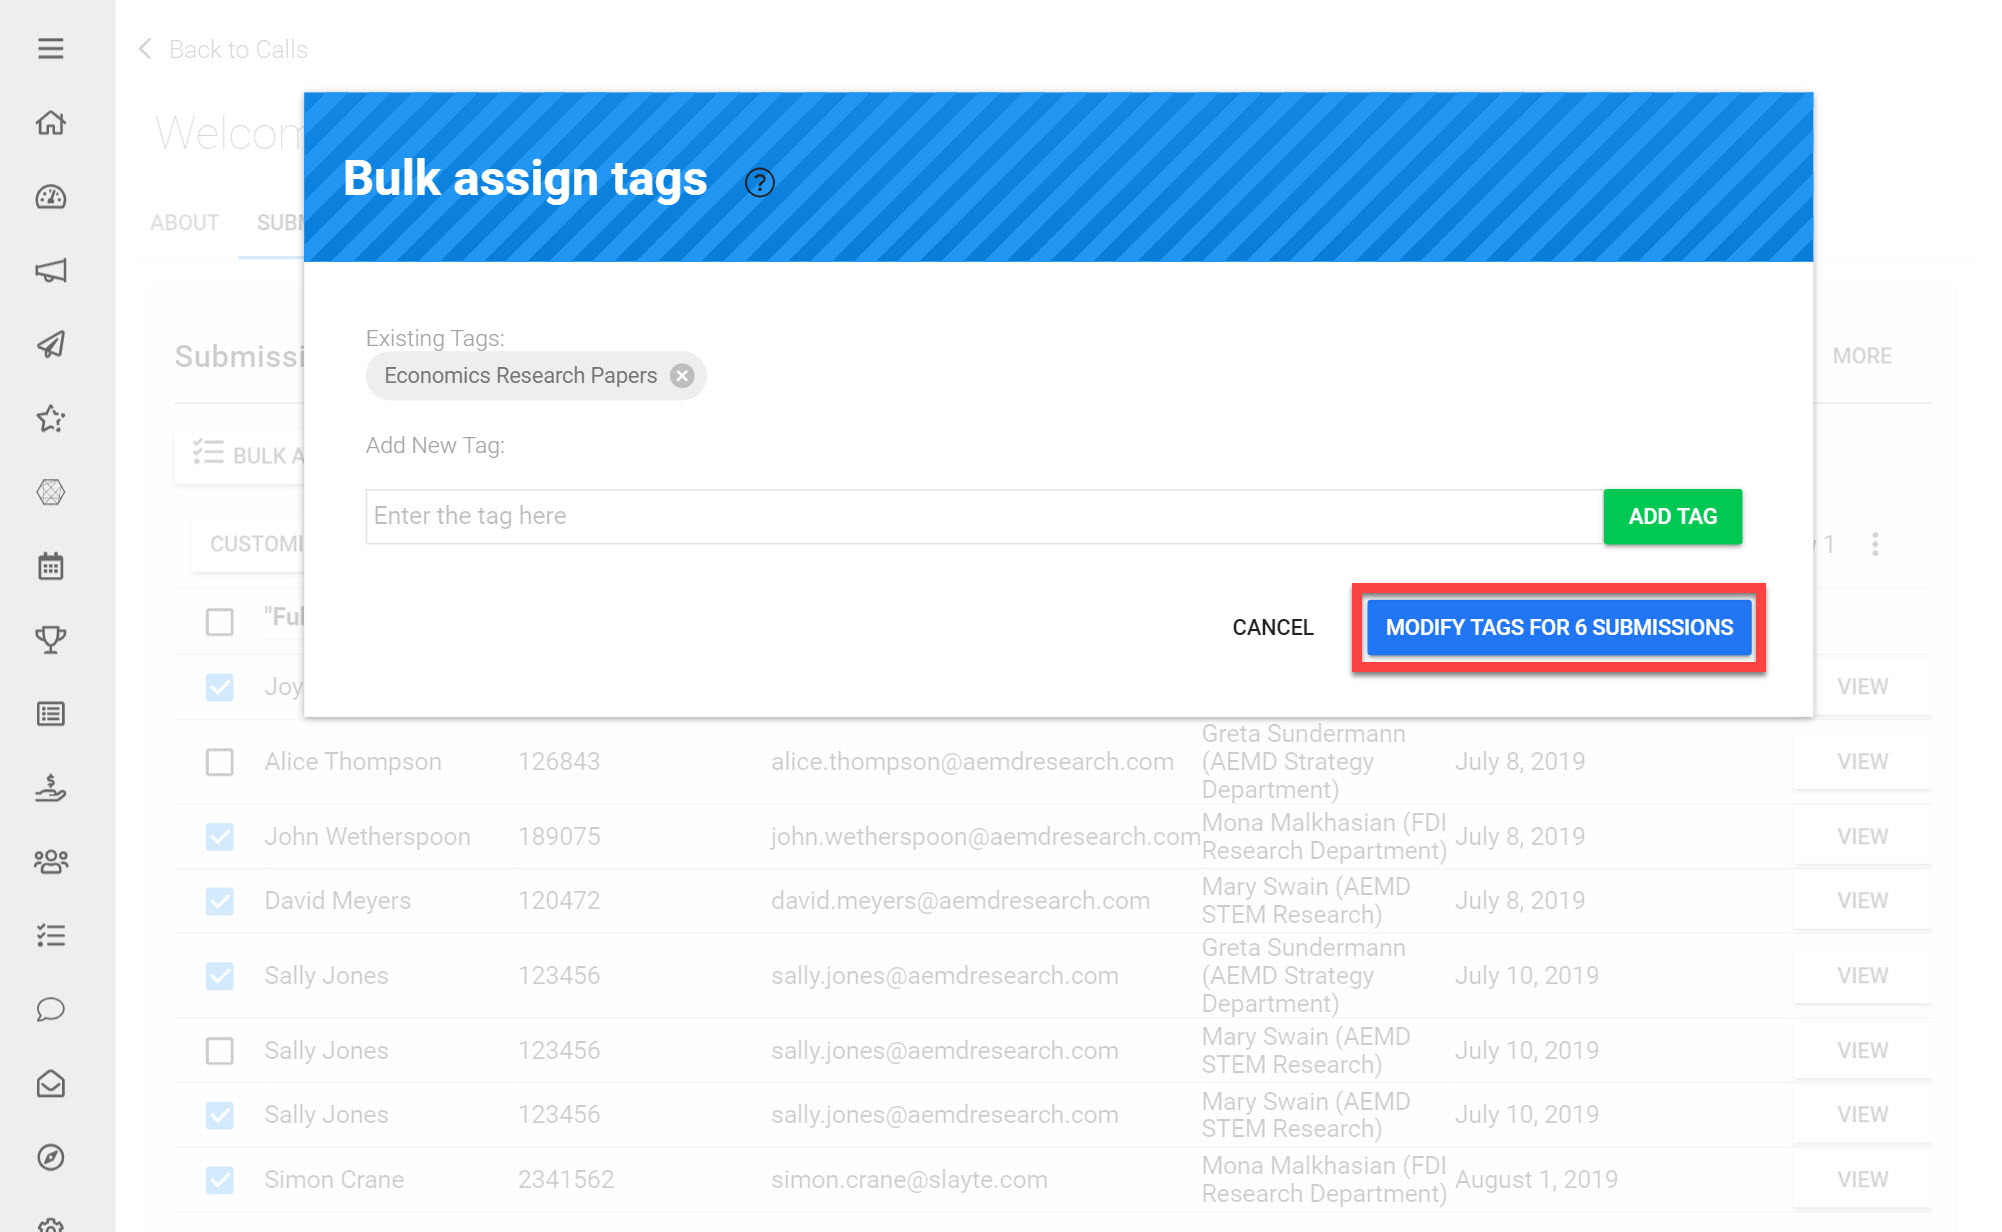
Tag Submissions
Tags allow you to categorize Submissions based on keywords of your choice, You can use Tags to group similar submissions together and can filter Submissions using assigned tags.
To add a new Tag:
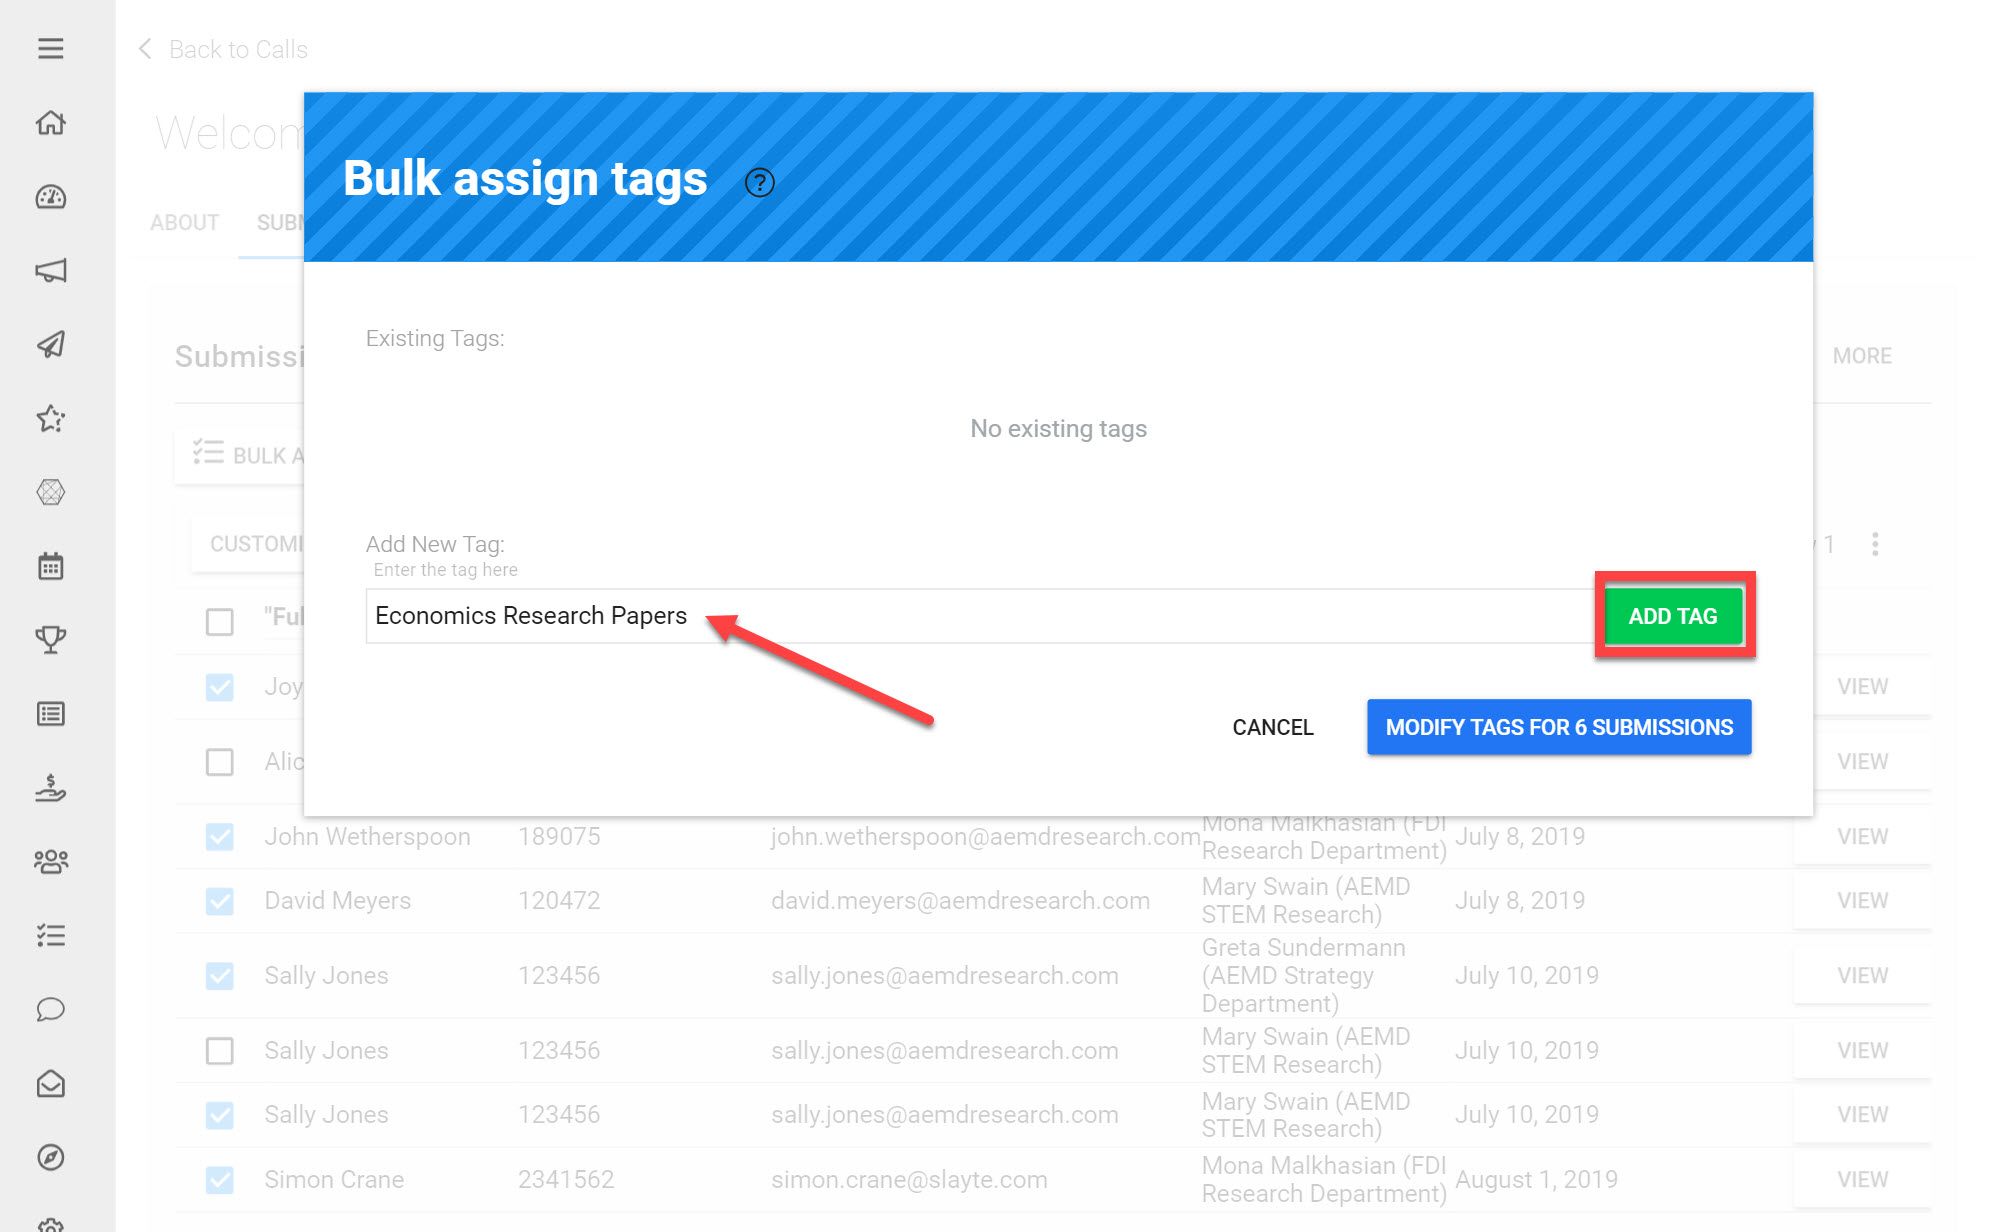
Click Tag Submissions
Enter in a keyword(s) to help categorize the selected Submissions
Click Add Tag
Re-send “Submission Received” Confirmation to Submitters
If you would like to resend Submission Confirmation emails to Submitters you should use this option.
Message to Submitters
This allows you to send a custom message to the selected Submission authors. You can either write your own message to send or you can use a pre-existing Message Template. This article provides more information on Communicating with Submitters.
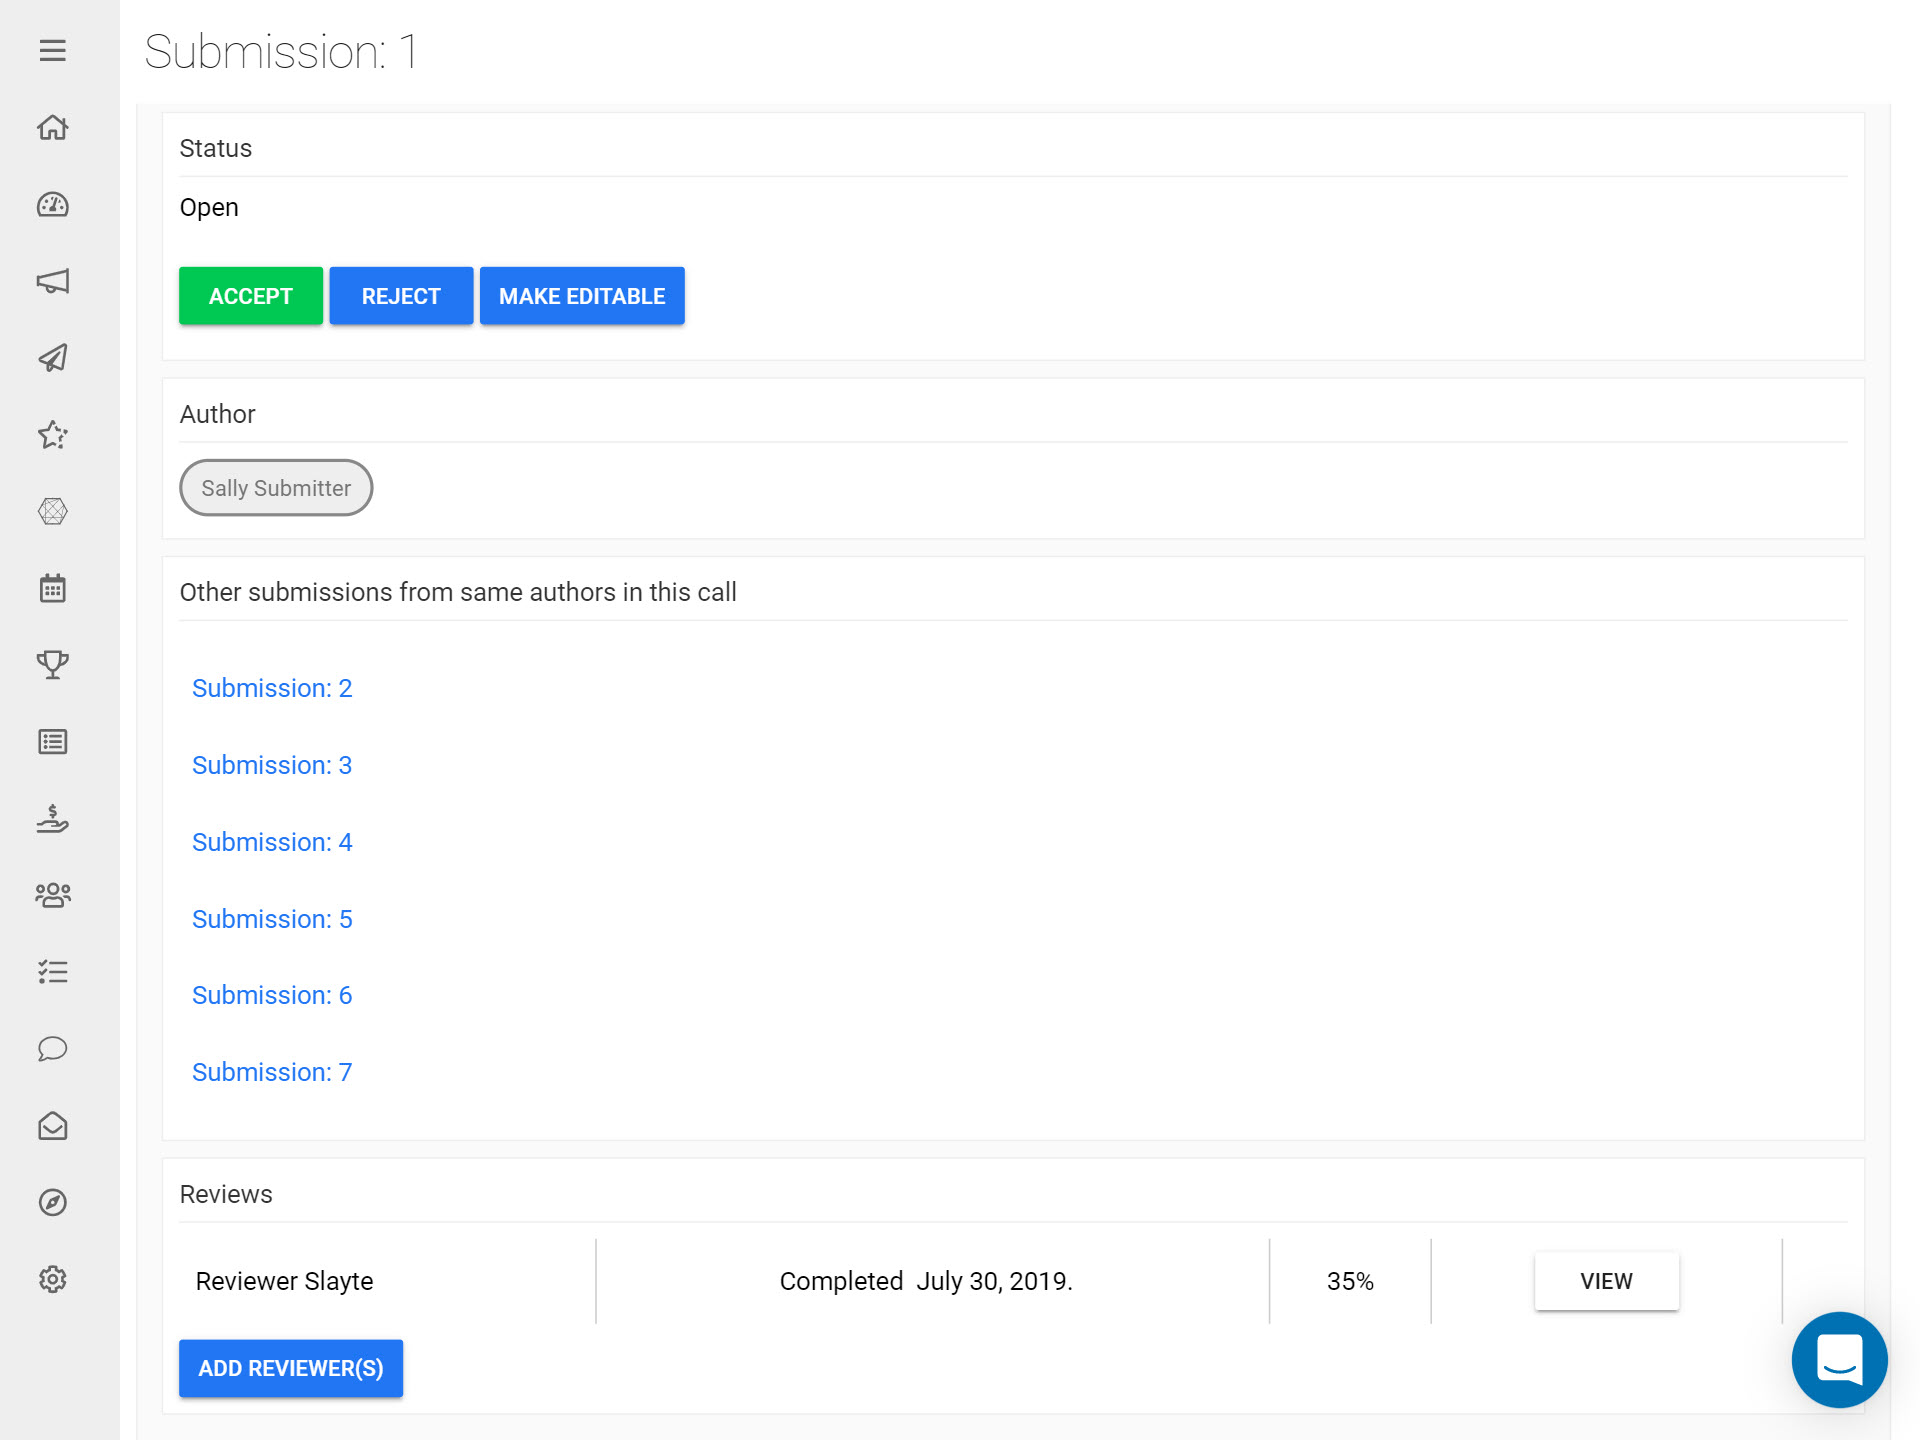
Managing Submissions Individually
Alternatively, you can manage Submissions individually on the Submission Detail. To do this:

Go to the Call you would like to edit a Submission in
Click on the Submissions Tab
Click View for the Submission you would like to manage
On this Submission Detail page you can:
- Accept/Reject the individual Submission
- Make the Submission Editable
- Manage which Phase the Submission is in
- Add a Tag to a Submission
- Edit the Submission
- Print / Withdraw / Export the Submission
- View and manage which Reviewers have been assigned to the Submission (if any)
- View other Submissions from the same authors in the Call