
The Submission Phase covers the period where Submissions can be submitted to your Call. You are able to design a custom Submission Form that will be filled in by Submitters, decide which dates to accept Submissions, and only allow certain users in Slayte to submit to your Call.
In this article we will walk you through how to:
- Add a Submission Phase to your Call
- Fill in the Phase Details
- Configure your Phase Settings
- Communicate with Submitters
1. Add a Submission Phase
The first step will be adding a Submission Phase to your Call. Whether you are creating a new Call or adding a Phase to a pre-existing Call, you will need to add the Submission Phase to the Call Template.
In this example we will be adding a Submission Phase to a pre-existing Call.
To complete this step:
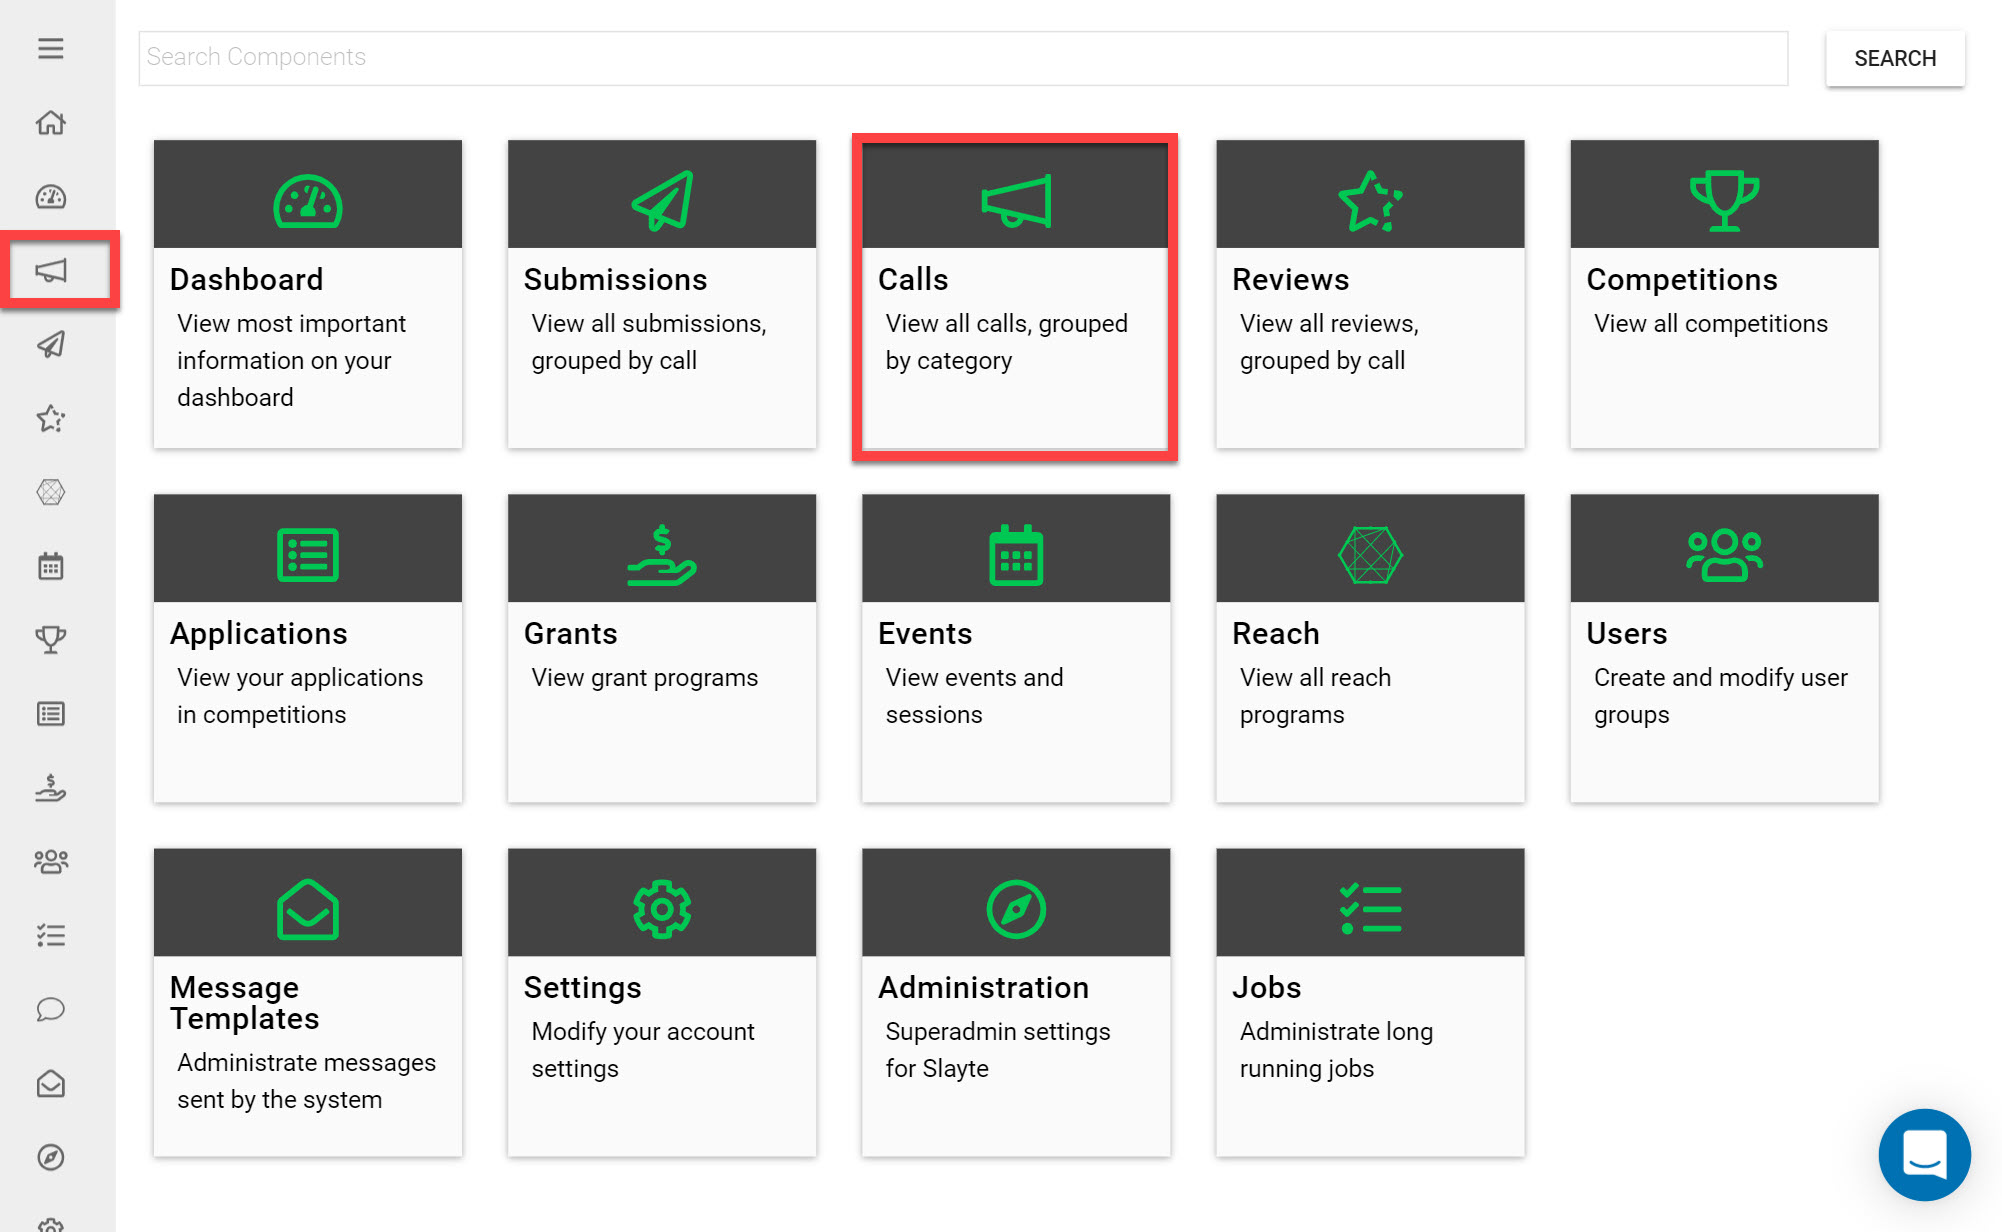
Go to the Homepage and click on the Calls icon
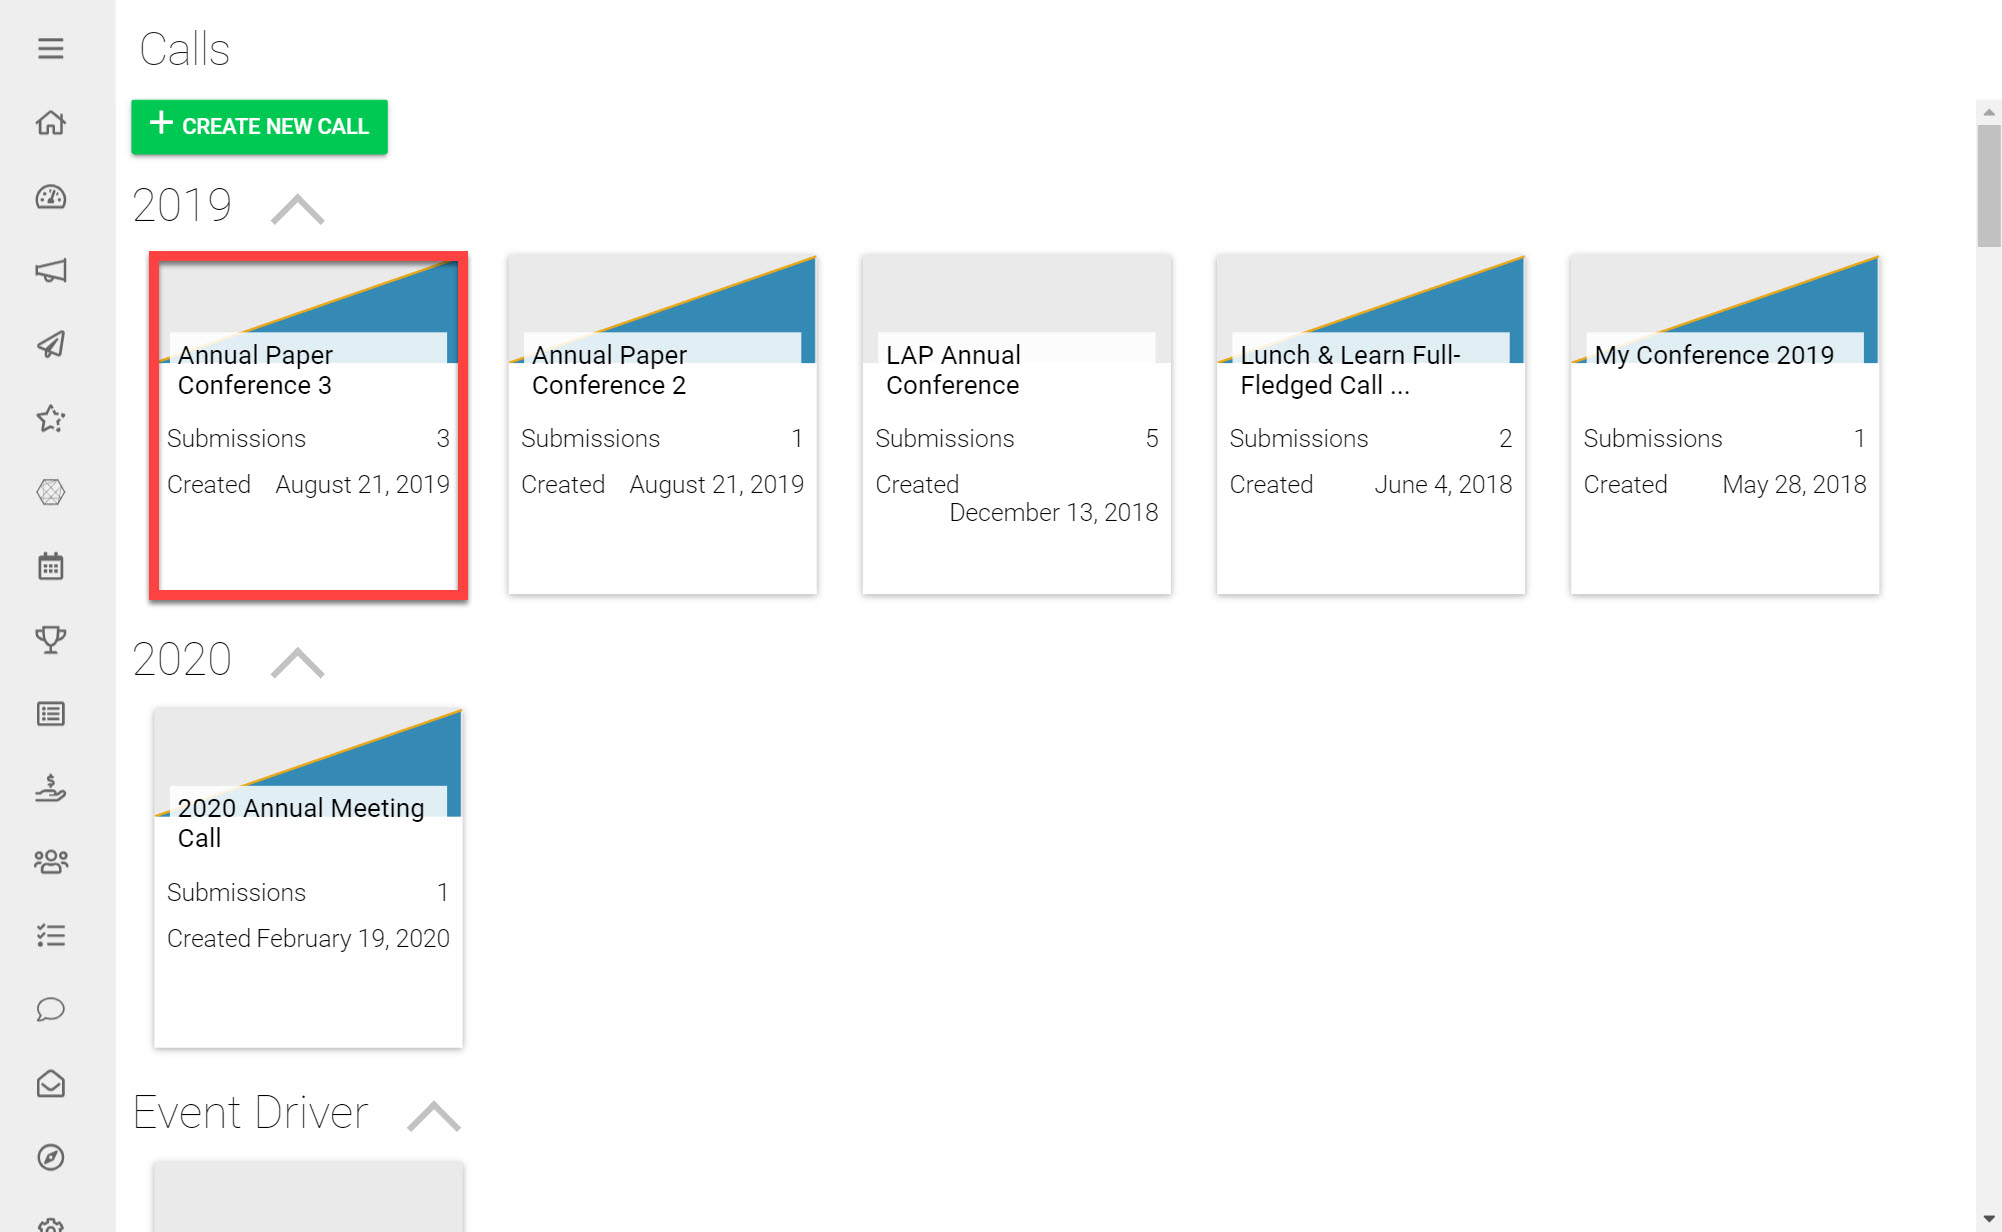
Click on the Call you would like to add a Submission Phase to (if you do not have a pre-existing Call you can Create a New Call and follow this Guide once on Step 3 of the Call Creation process).
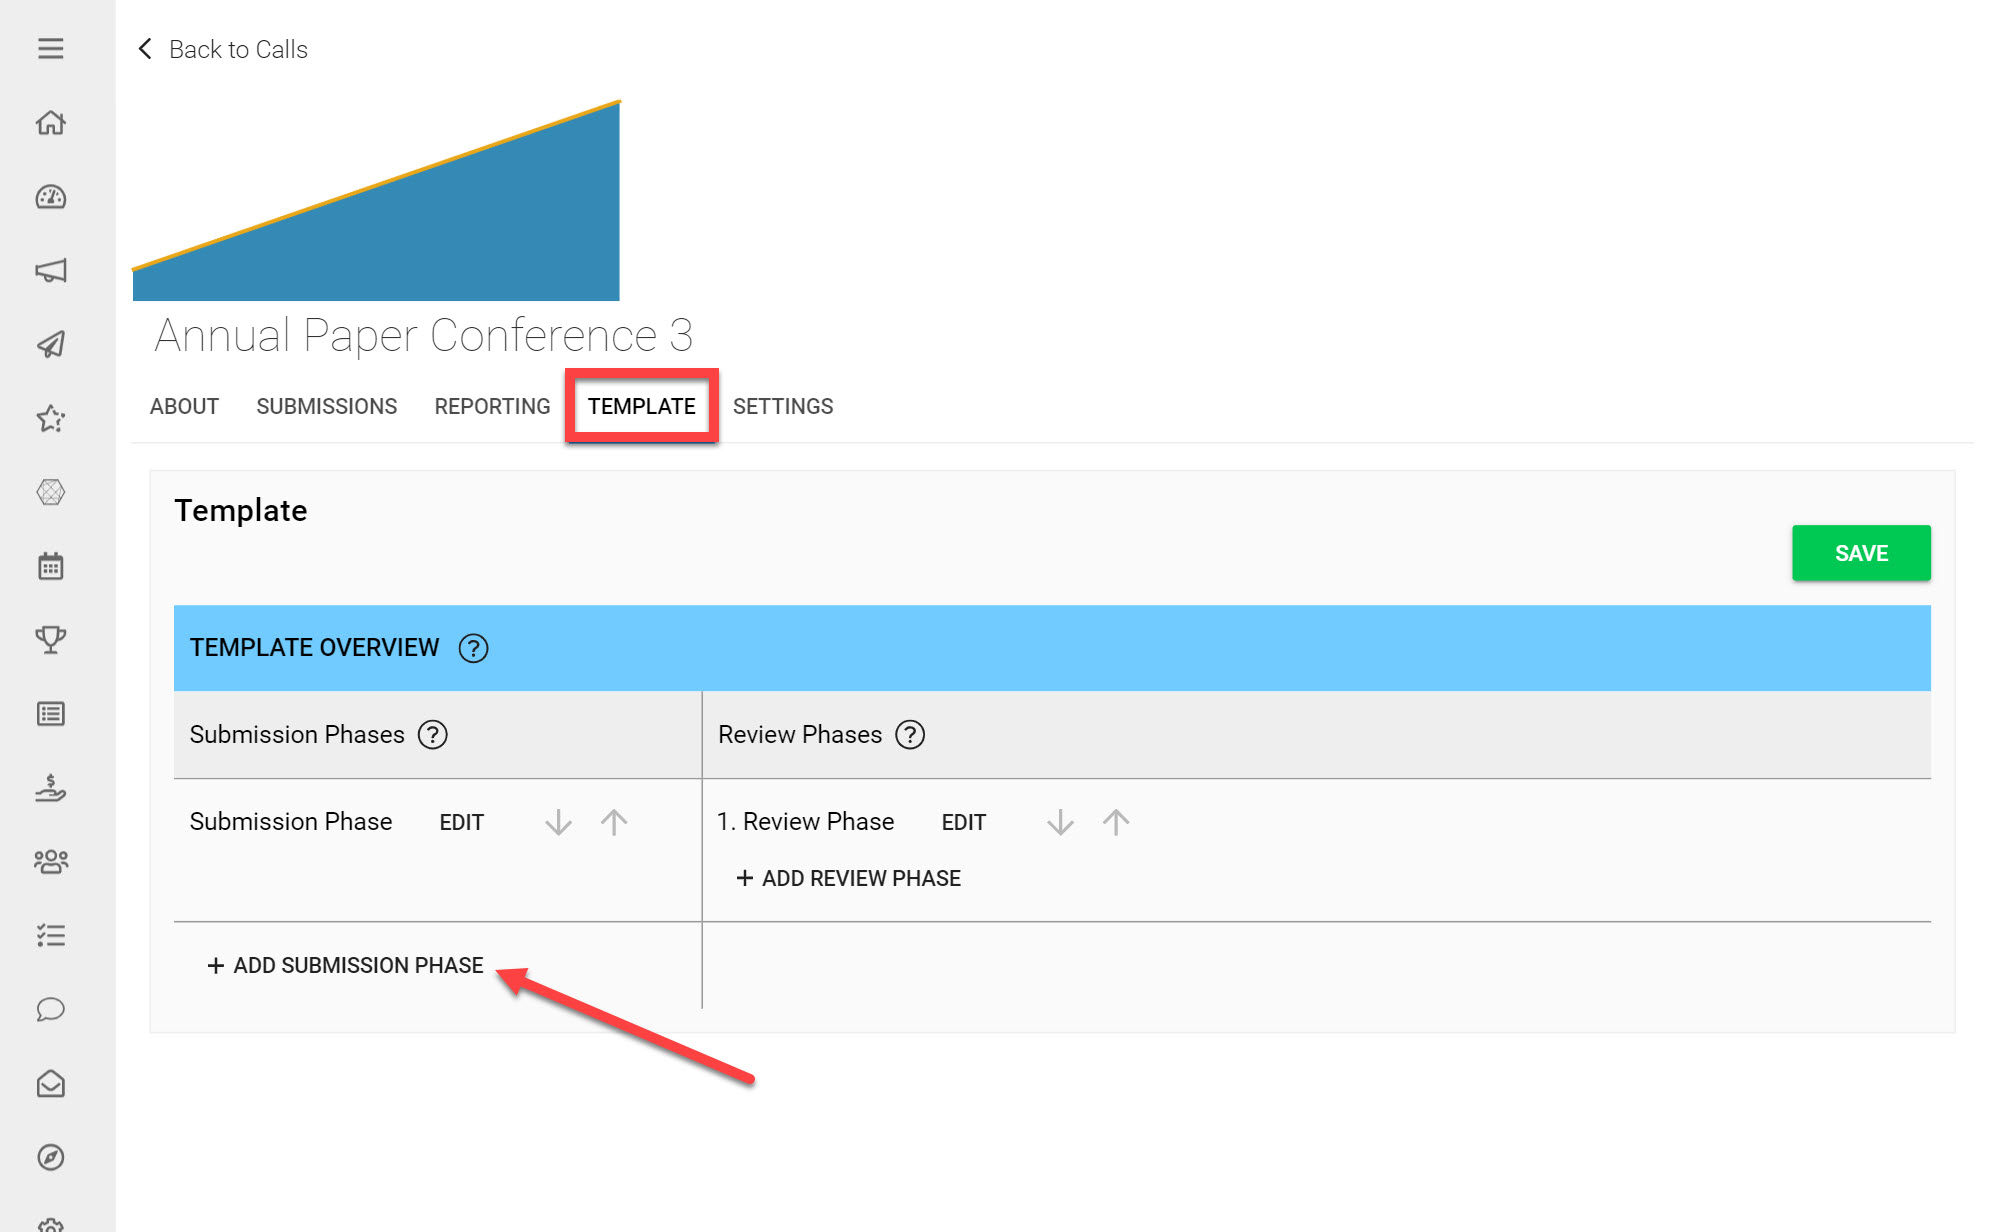
Click on the Template tab
Under Submission Phases click Add Submission Phase
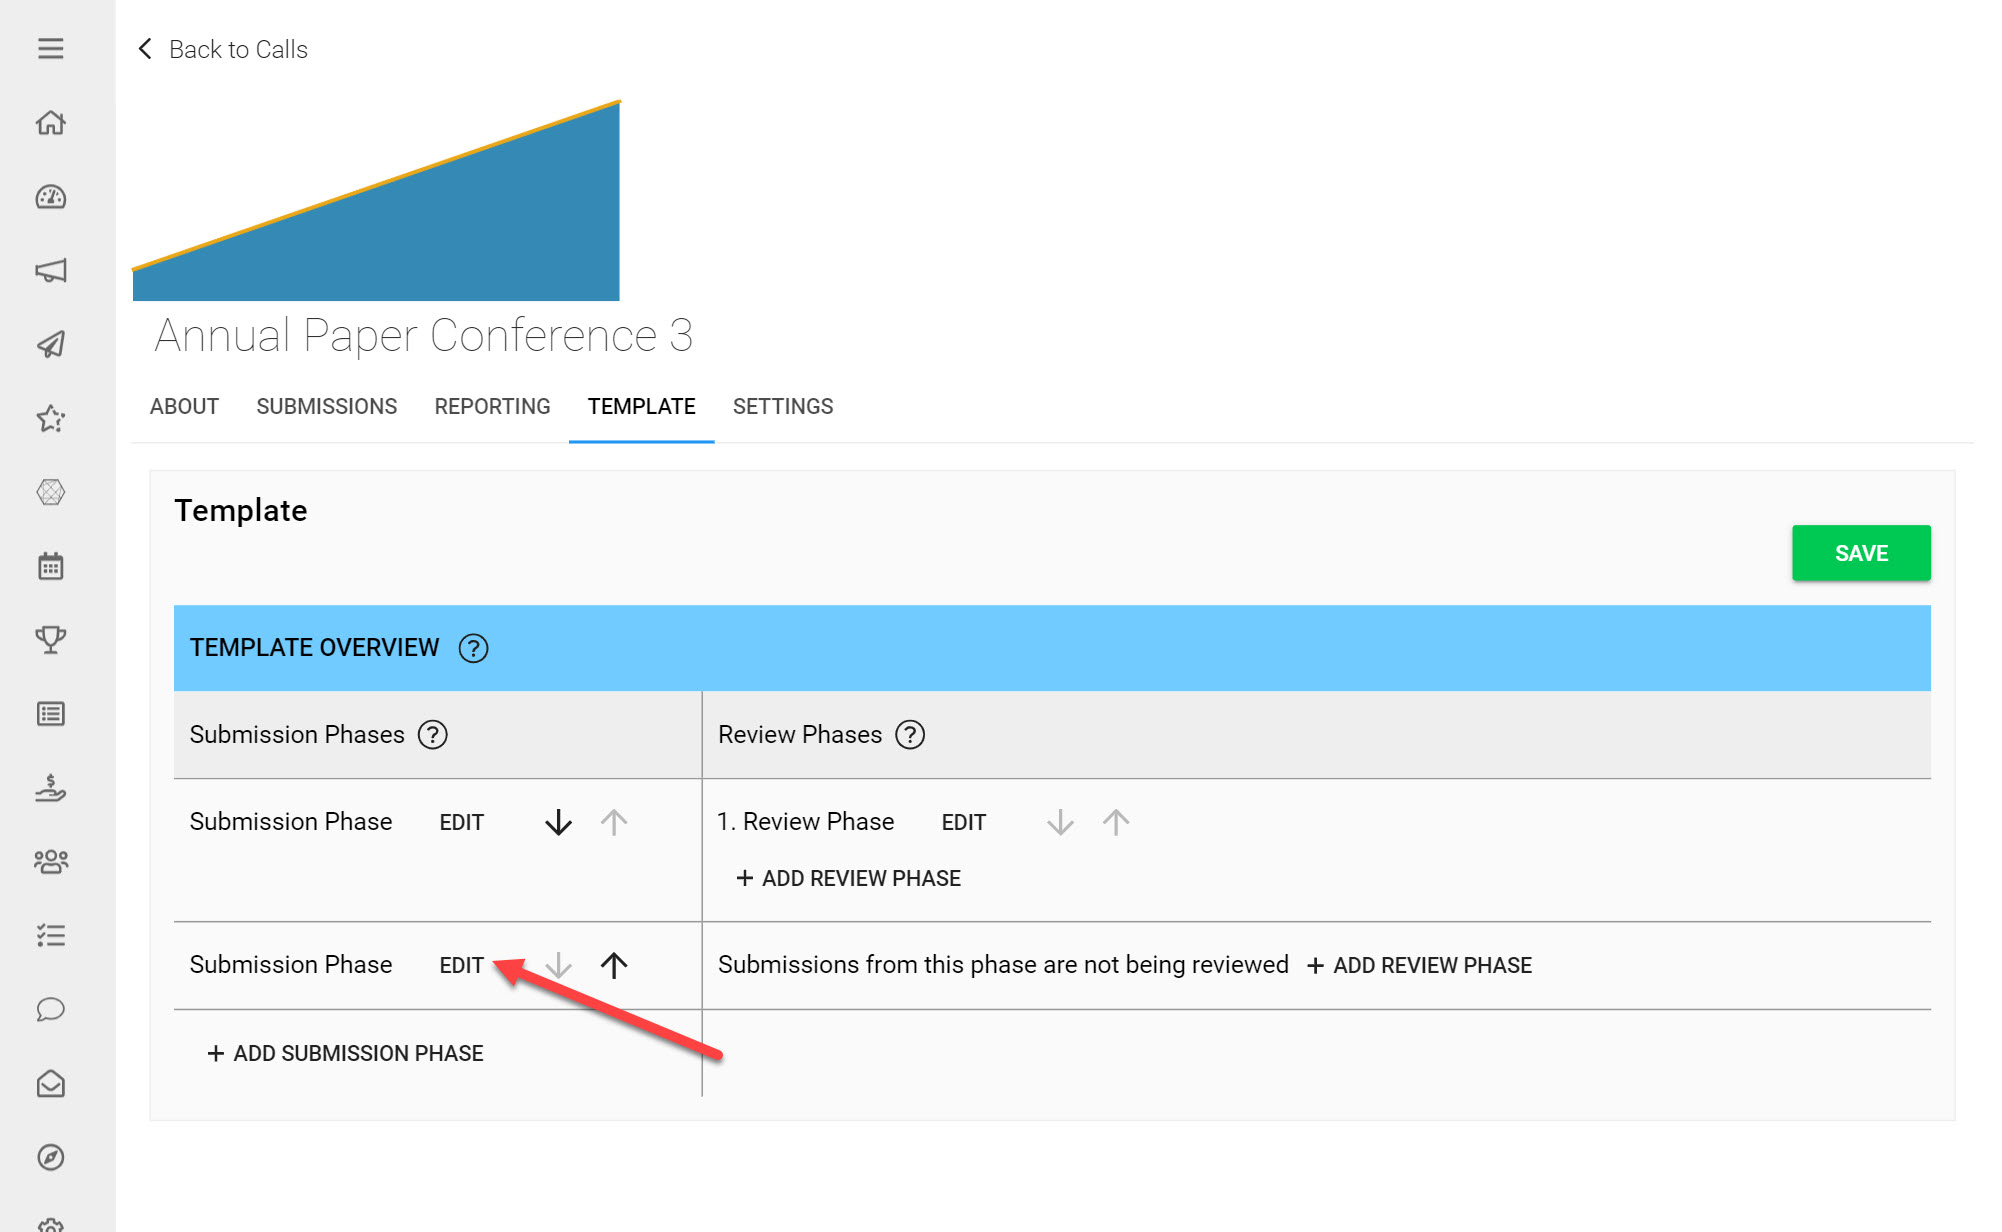
Next to your newly added Submission Phase click Edit
2. Fill in Phase Details
You are now on the Phase Editor. This controls the dates your Submission Phase will run, the Submission Form that will be used, the Settings of this Phase and your Communication Settings. All settings configured here will apply to this Submission Phase in particular.
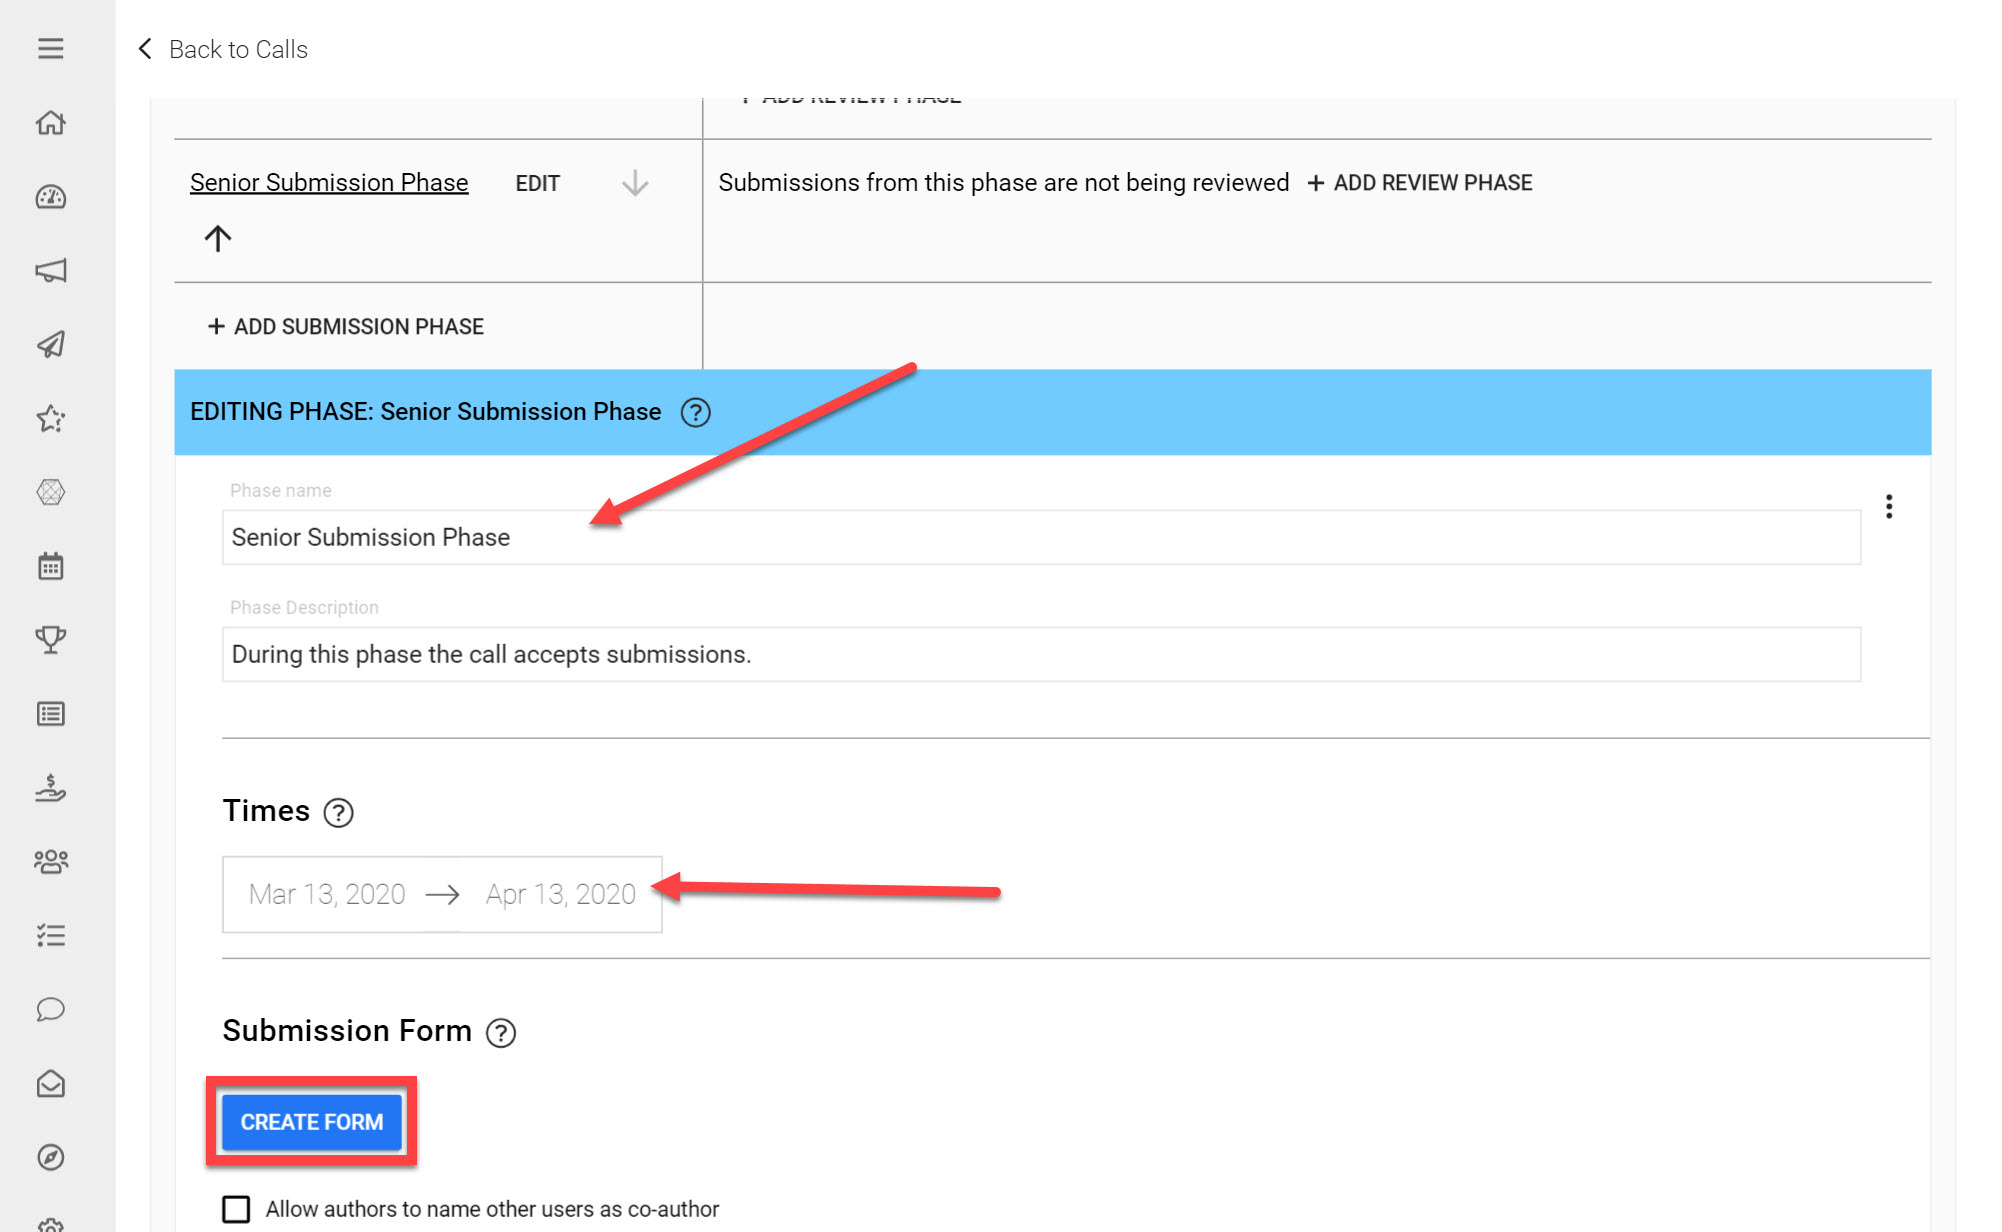
Fill in a Phase Name and a Description to define what this Phase will be used for.
Choose the Times you would like to start accepting Submissions and the deadline for receiving all Submissions.
Click Create Form
*Note: If you have multiple Submission Phases in your Call, you must ensure that no Submission Phases have overlapping dates, as this will cause Submitters to run into an Error Message when Submitting. Review phases may overlap however. This article on Managing Multiple Phases provides more insights on this.
Add a Submission Form
Submission Forms allow you to create the Form that Submitters will fill in to complete their Submissions. You can build a custom Submission Form which can be as simple or complex as required. Submission Forms are built by adding Form Fields to the Submission Form that allow you to control how information is collected from Submitters. This article provides more information on How to Build your Submission Form.
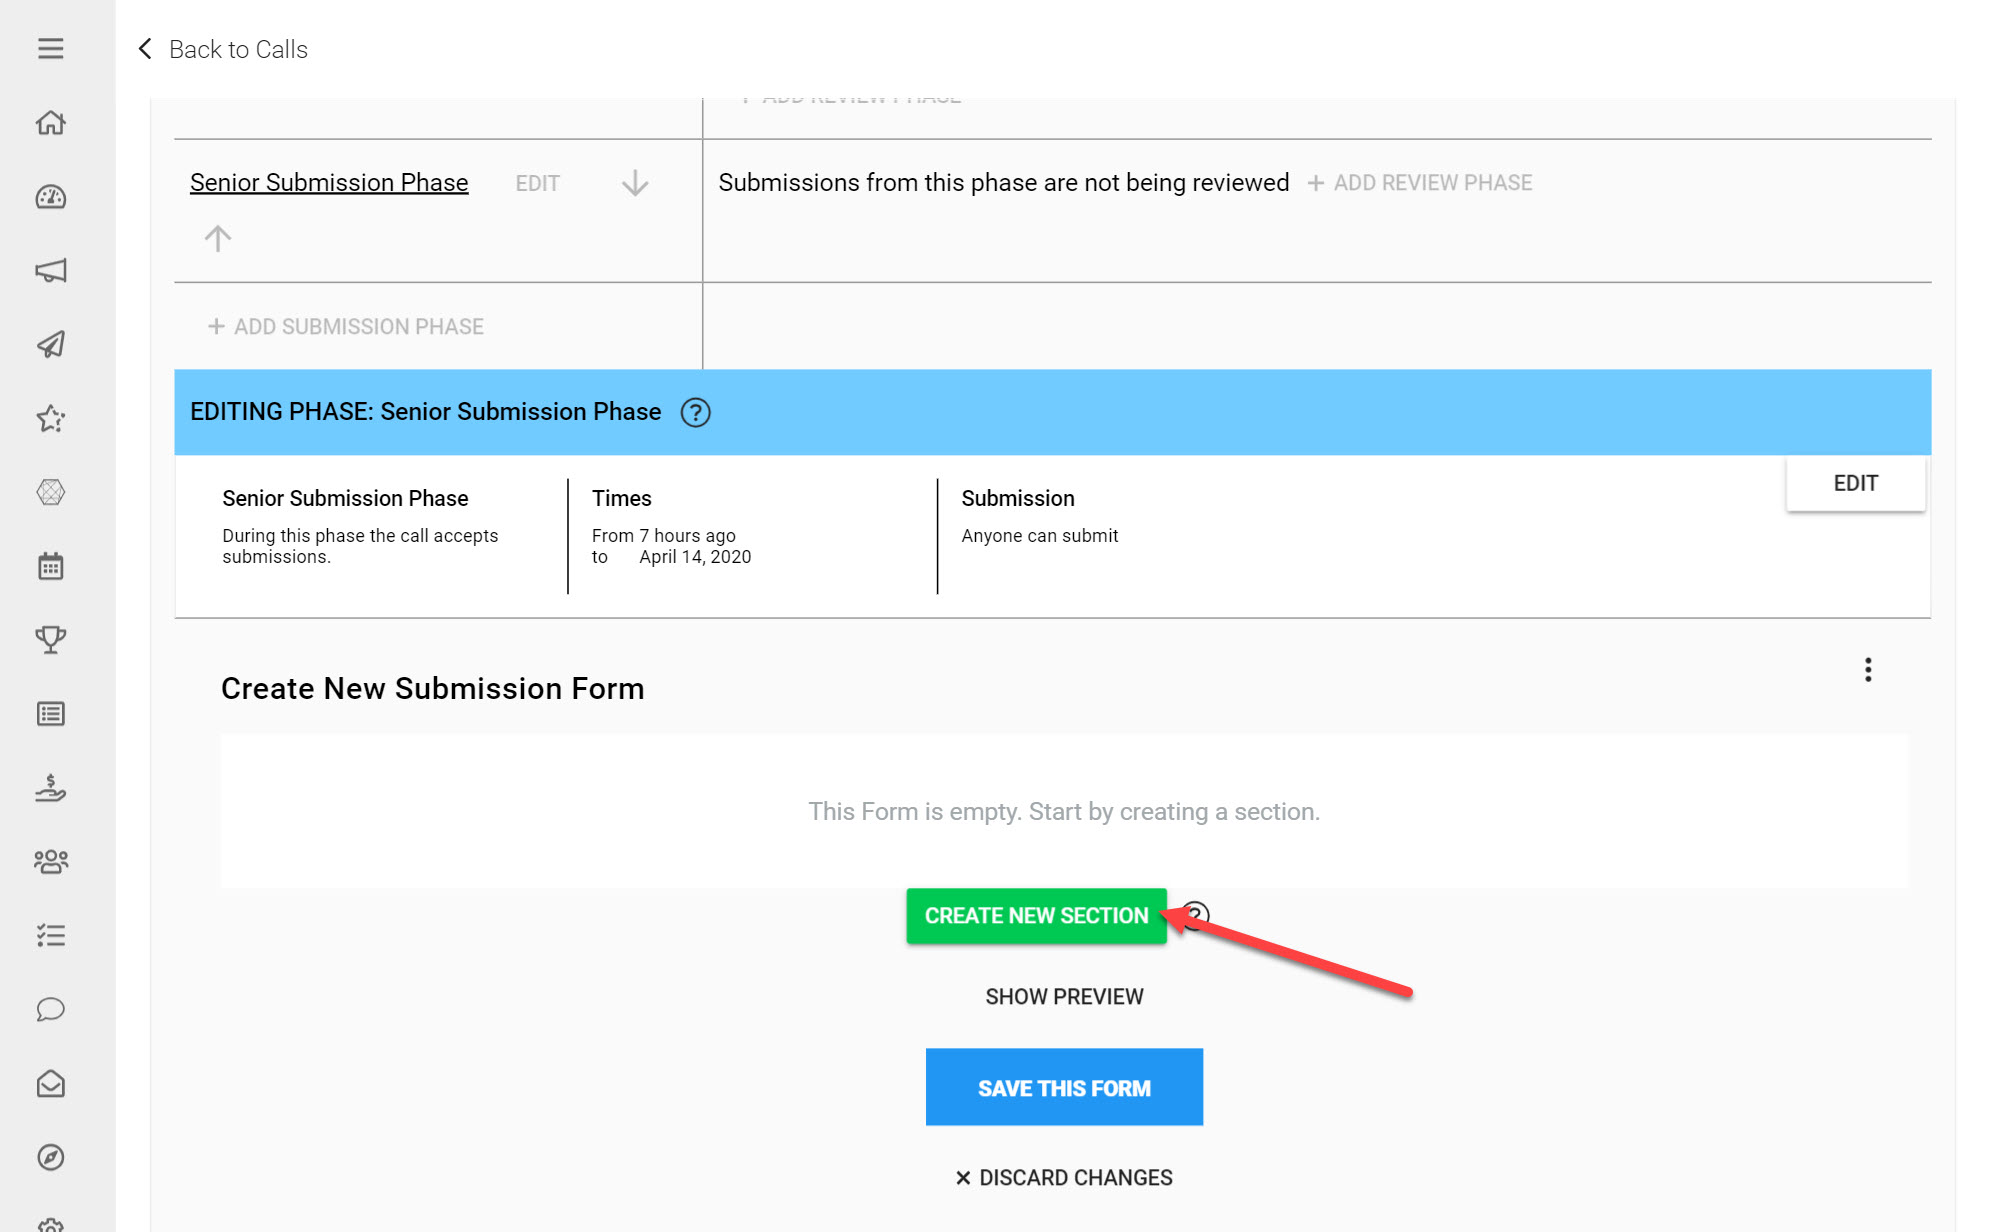
Click Create New Section
You can control the information that will be collected from Submitters, by choosing the relevant Submission Fields and labeling them with the questions you would like Submitters to answer.
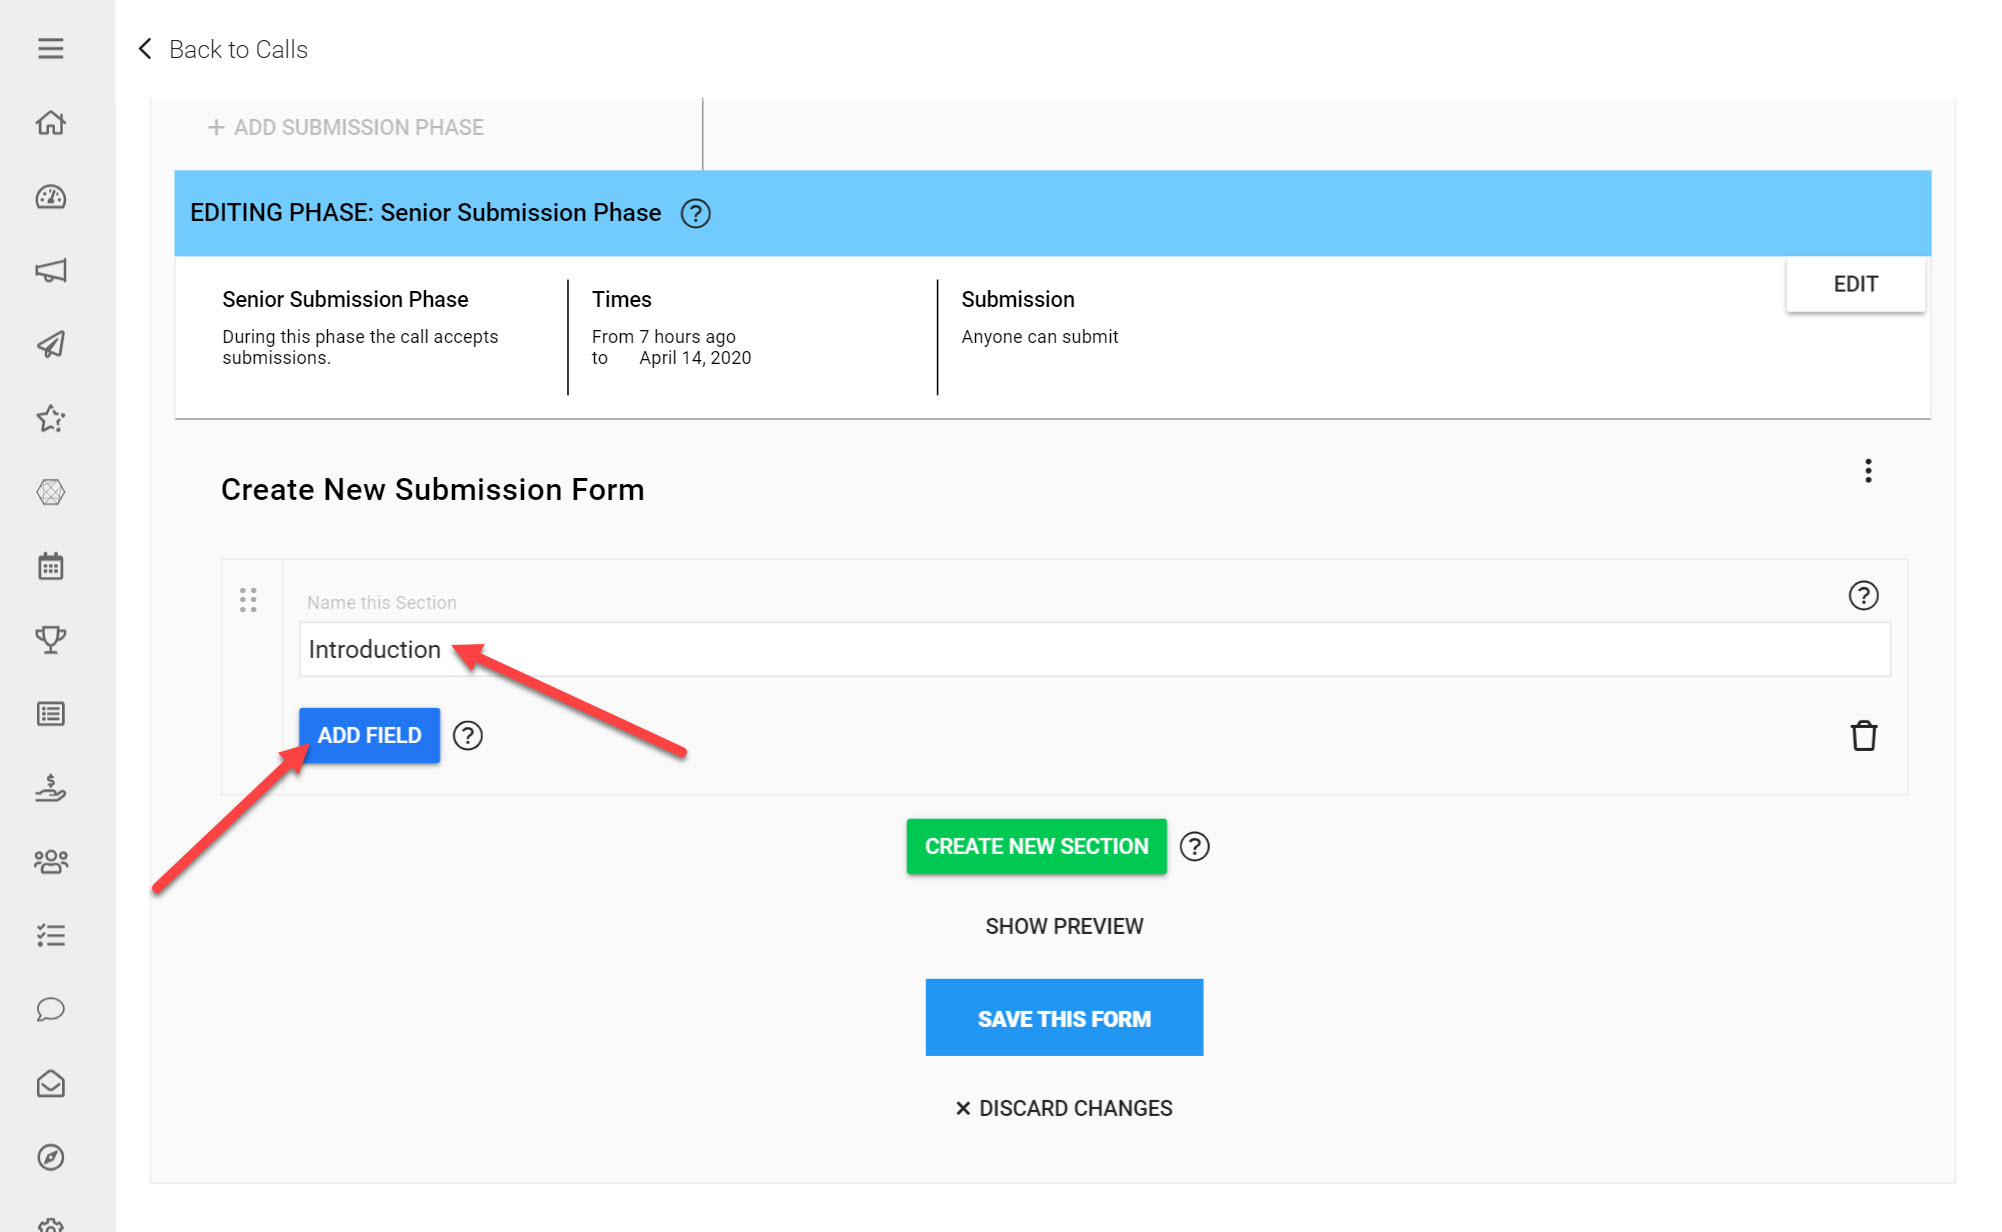
Input a Name for the Section you have just added
Click Add Field
You can add as many Fields as needed to your Submission Form. This article on Submission Form Fields provides more information on which are available to use.
For this example we will add a simple Text Field:
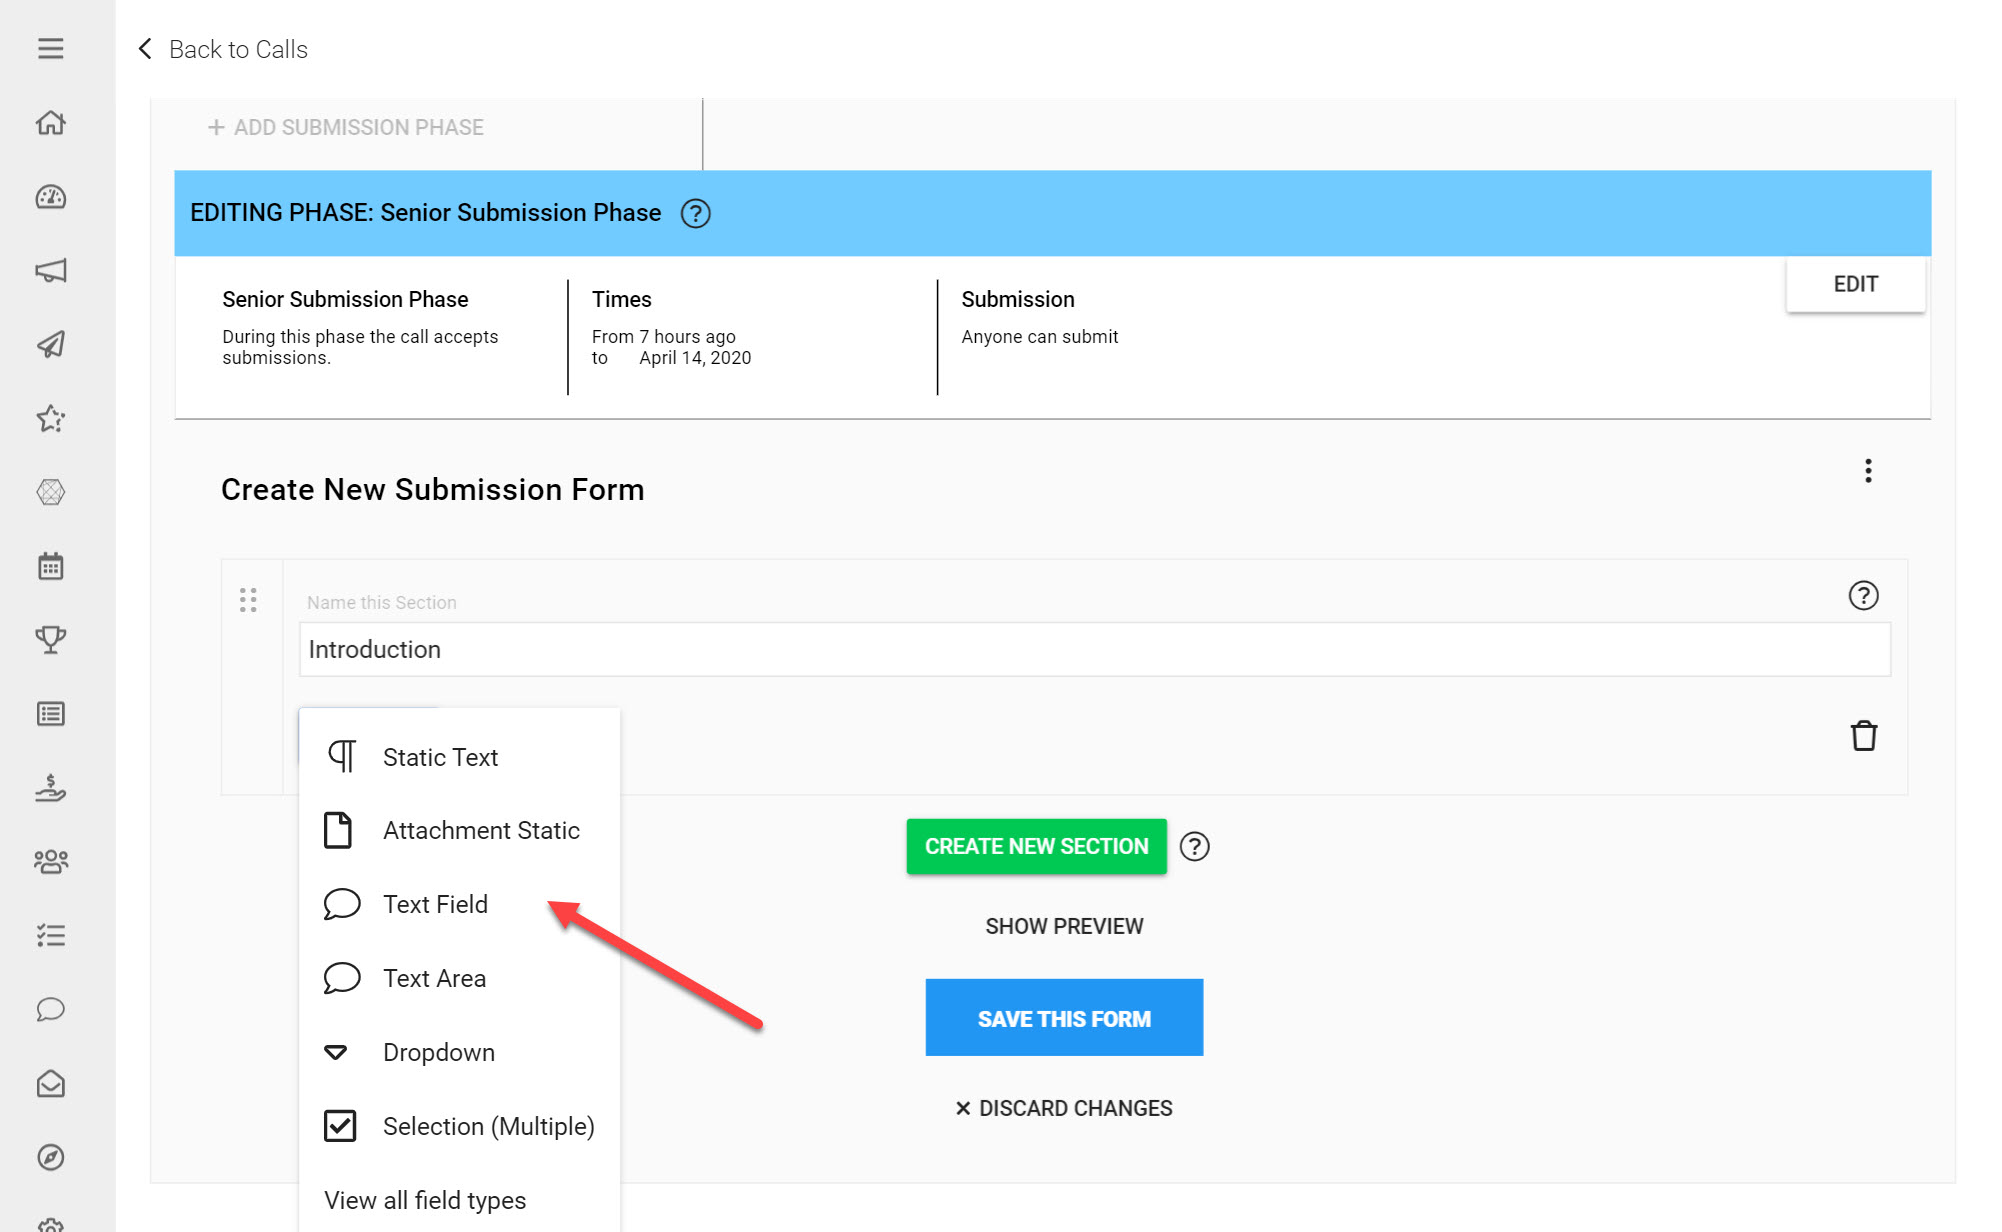
From the list of available Form Fields click Text Field
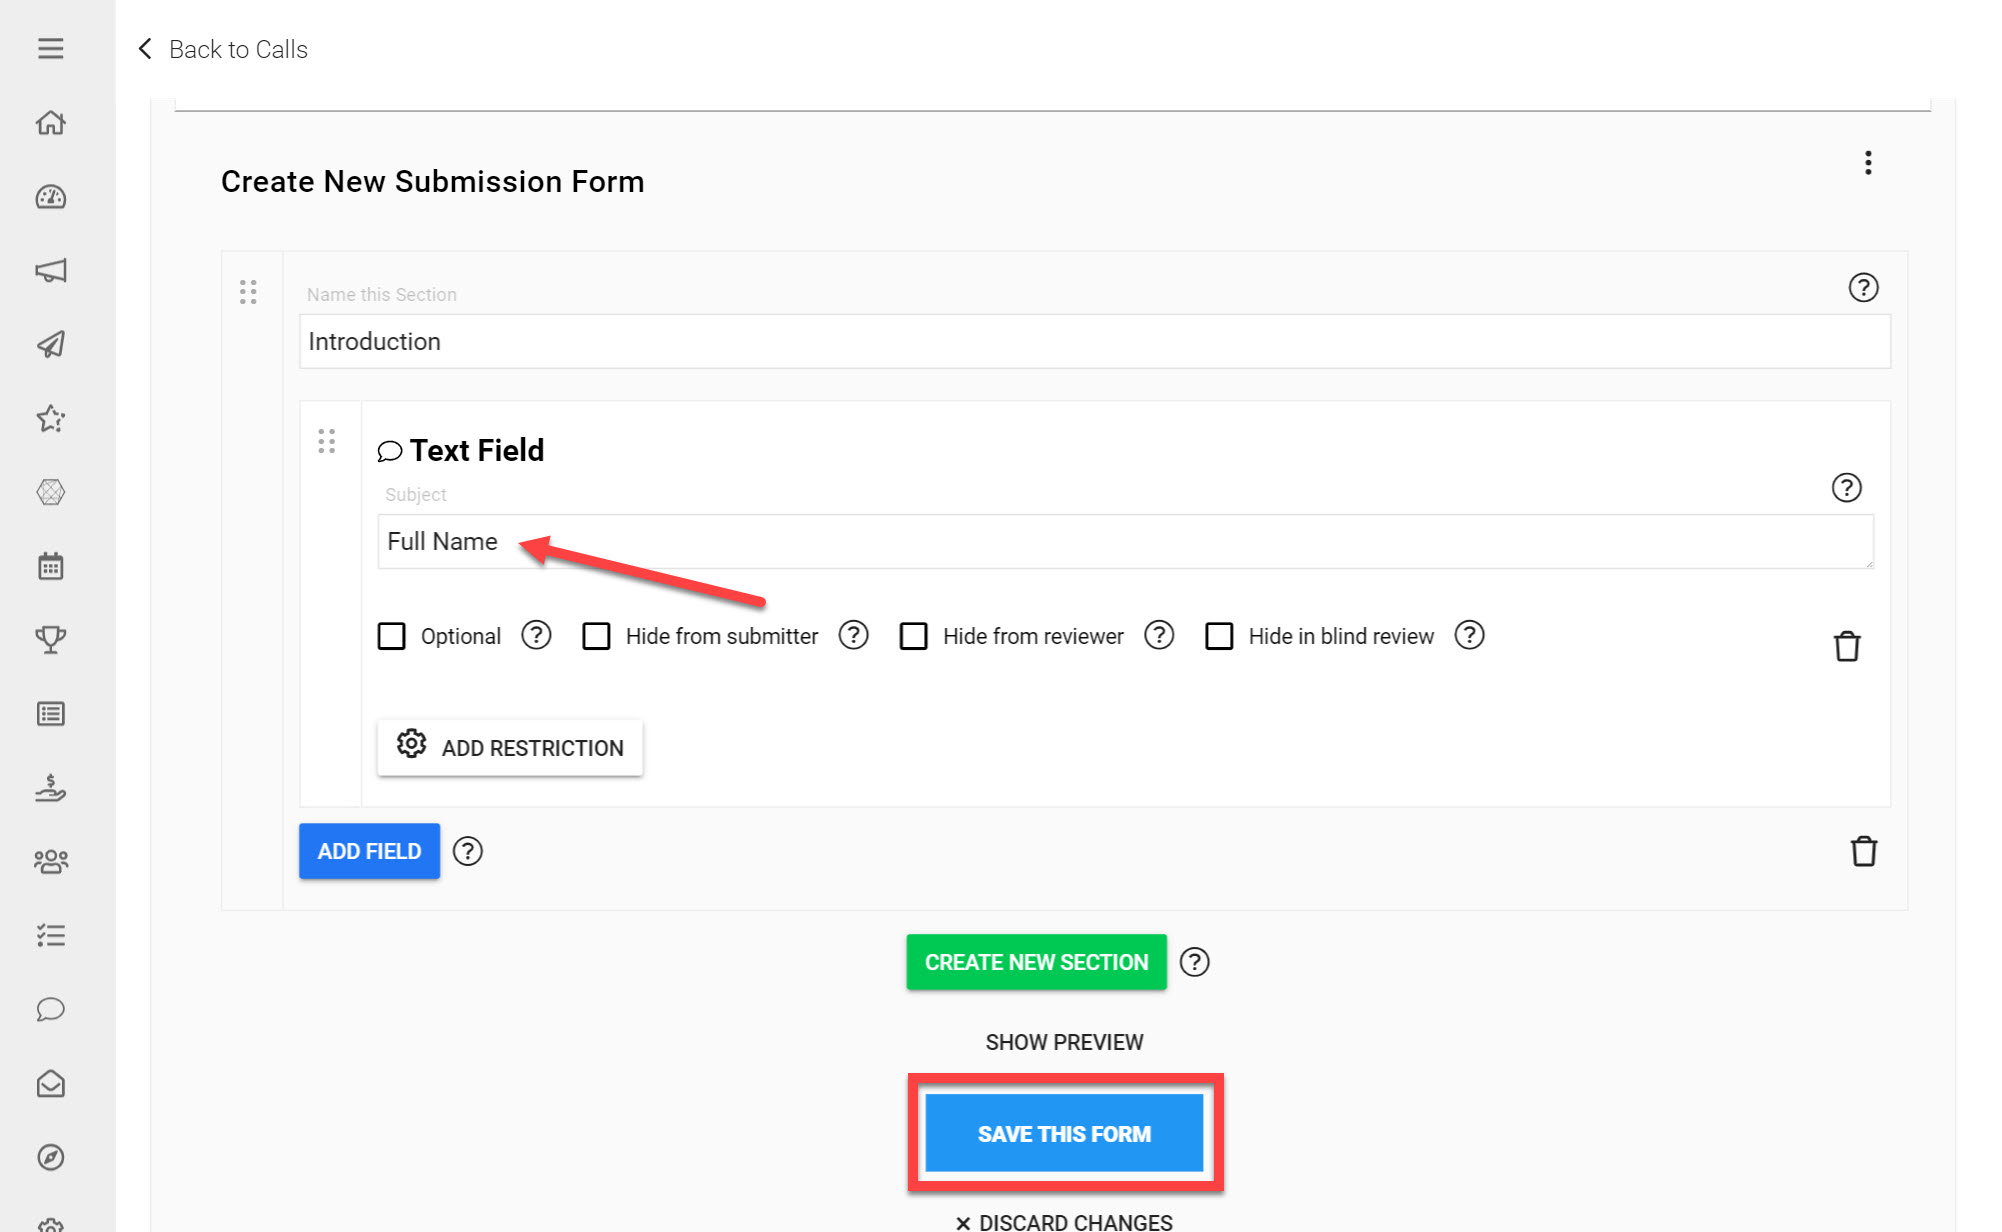
For the Subject fill in Full Name
Click Save this Form at the bottom and input a Name for your Form.
You have now successfully added a Submission Phase to your Call Template and are back on the Phase Editor.
*Note: When creating a new Call, at least one Submission Phase must be added to the Call to complete the Call Creation process.
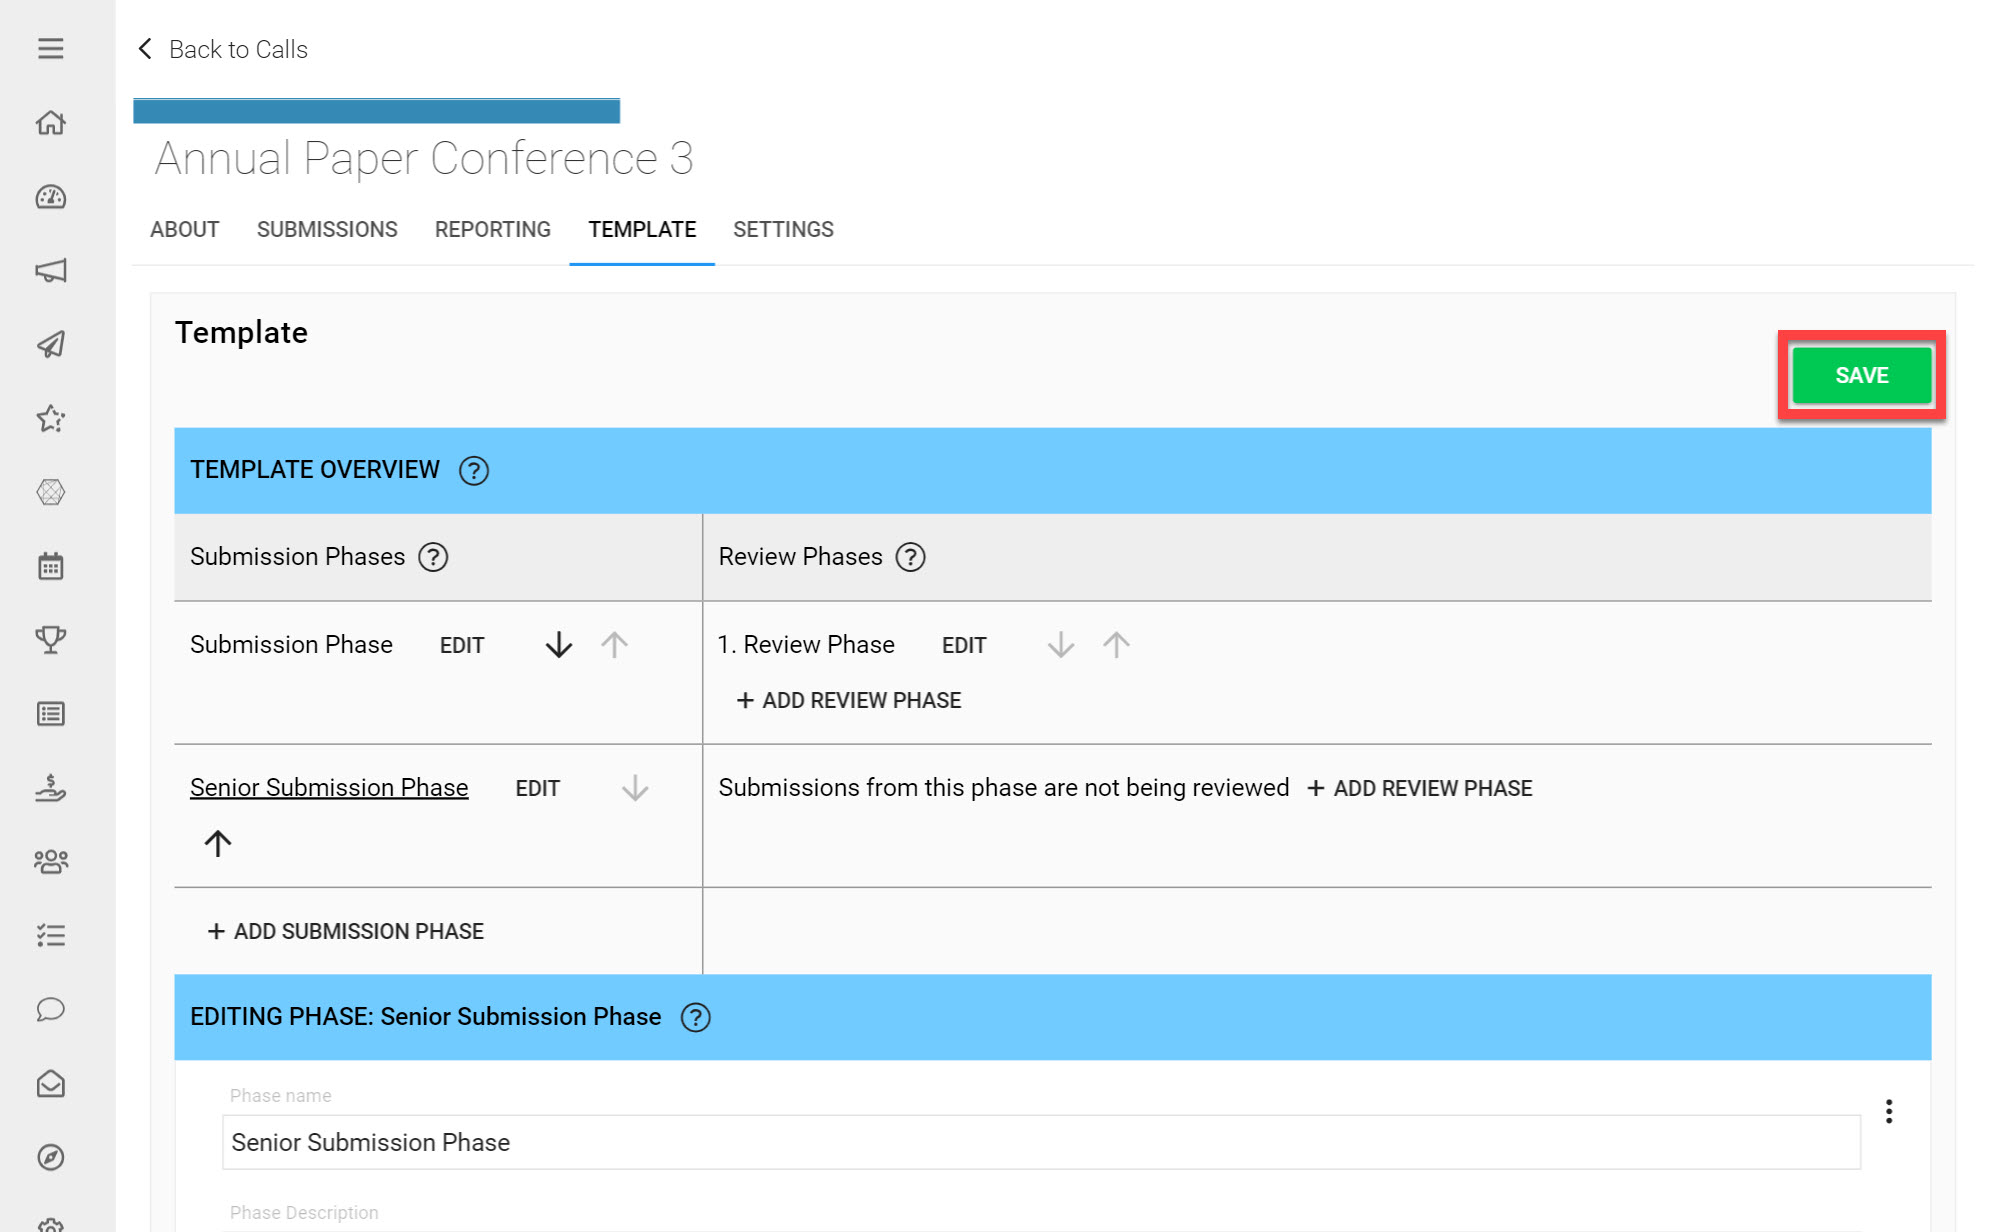
Click Save on the top right of the Call Template to successfully add this Phase to your Call Template.
Now that we have added a Submission Phase with a basic setup, we will run you through the Phase Settings you can configure.
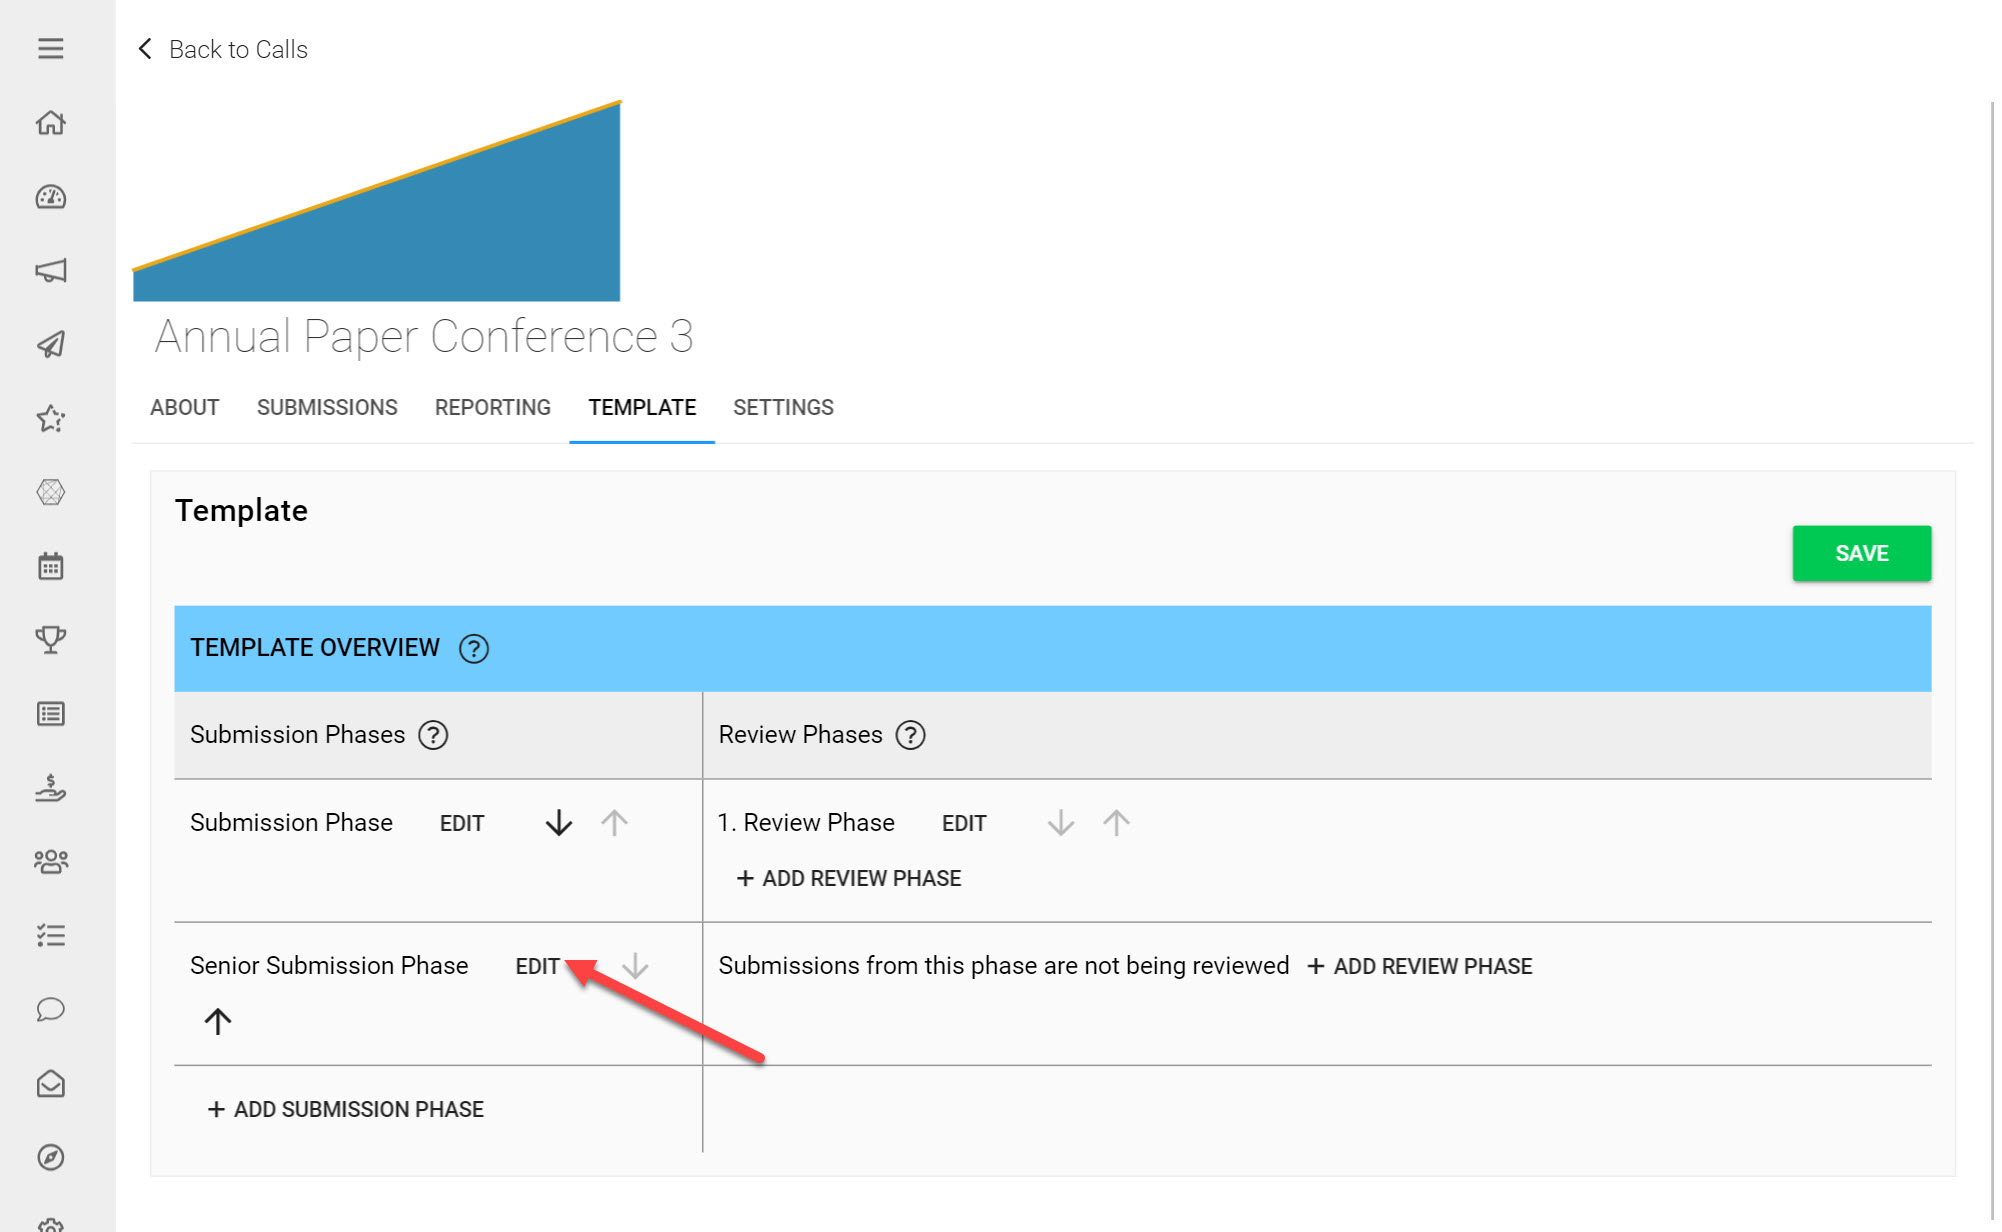
Click Edit once more on the Submission Phase last added.
*Note: Any changes made to your Phase Settings will only be saved once you click Save on the top-right of the Call Template.
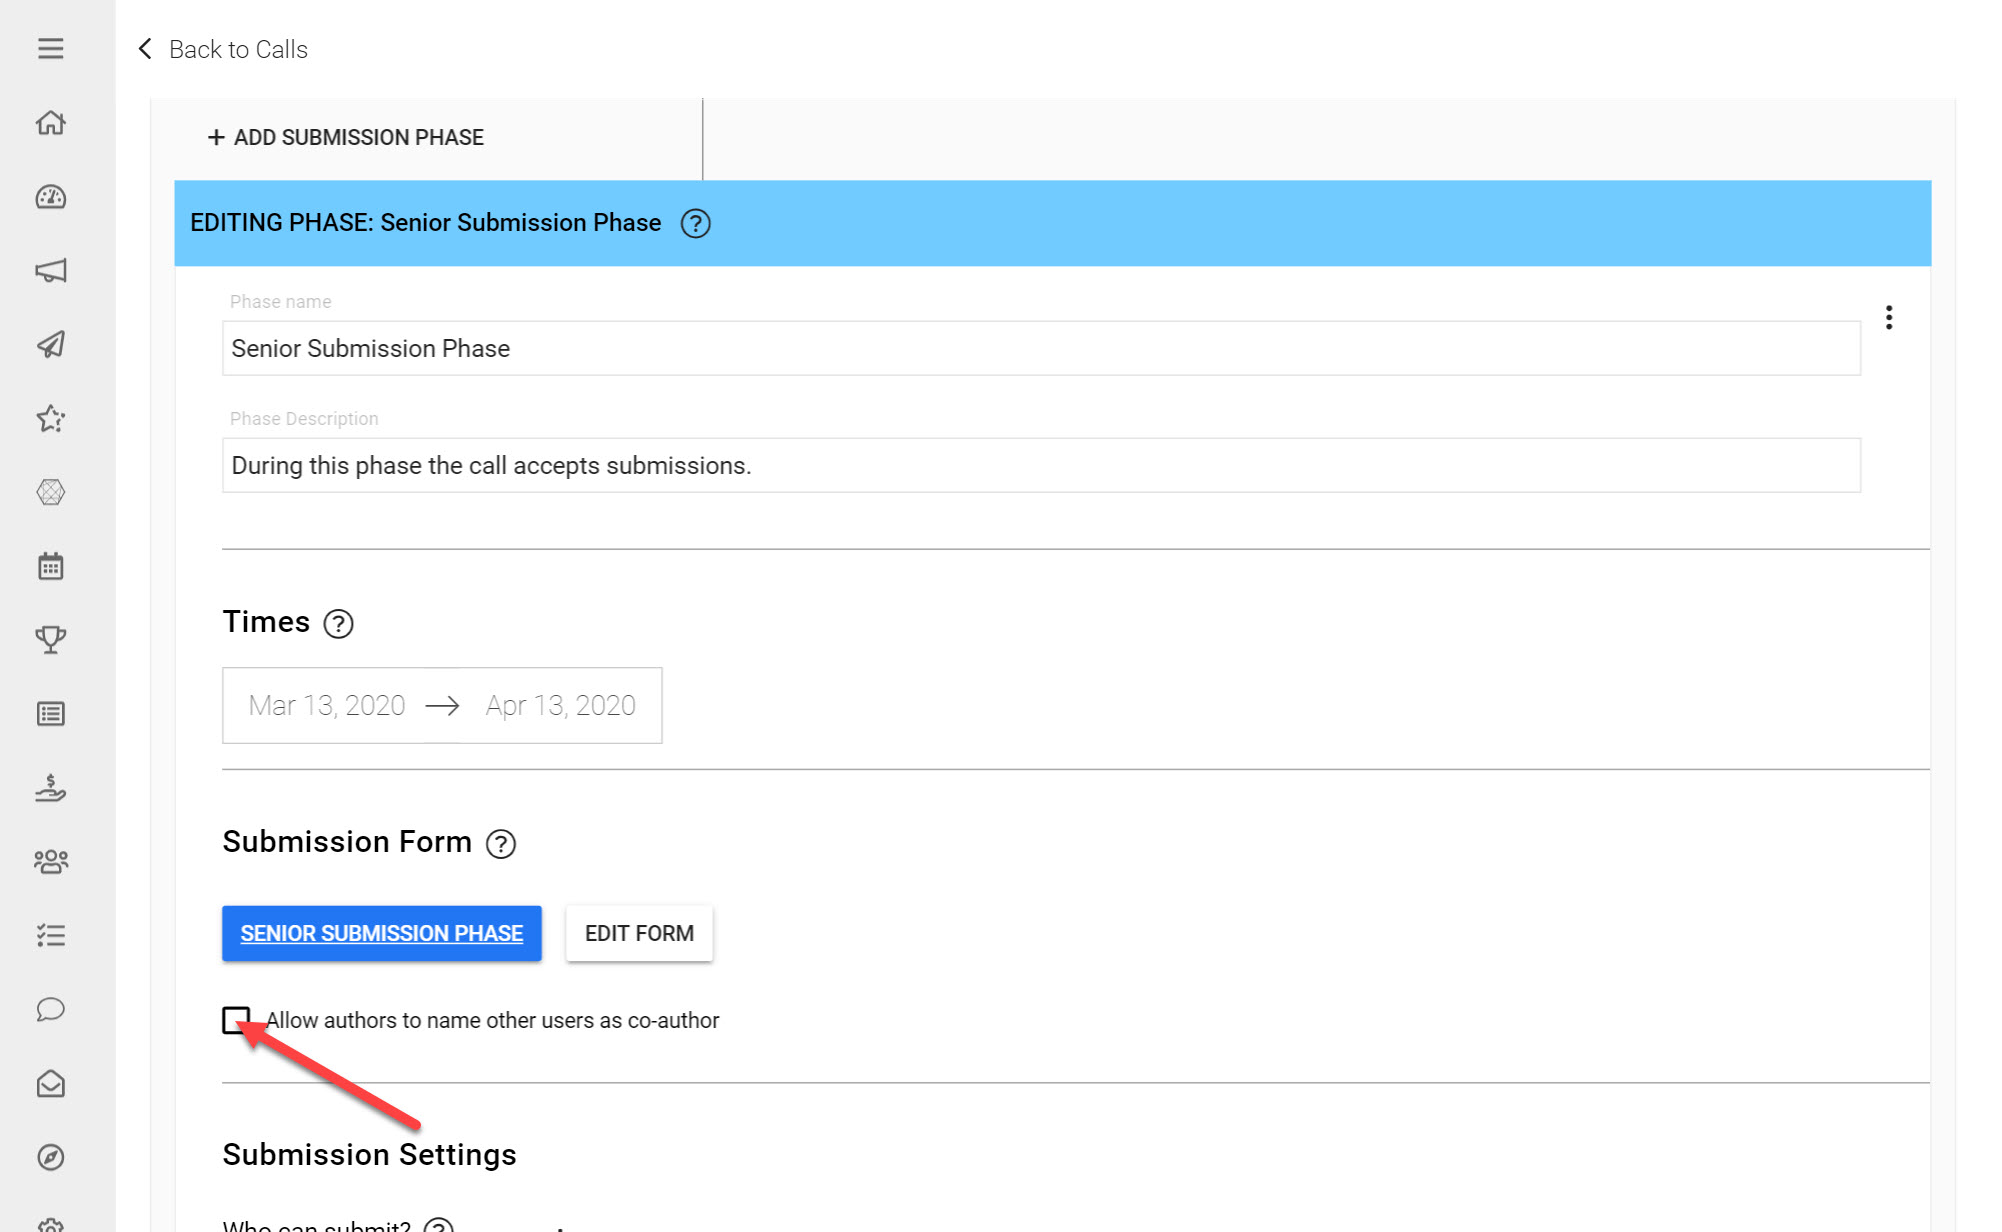
Co-Author Collaboration
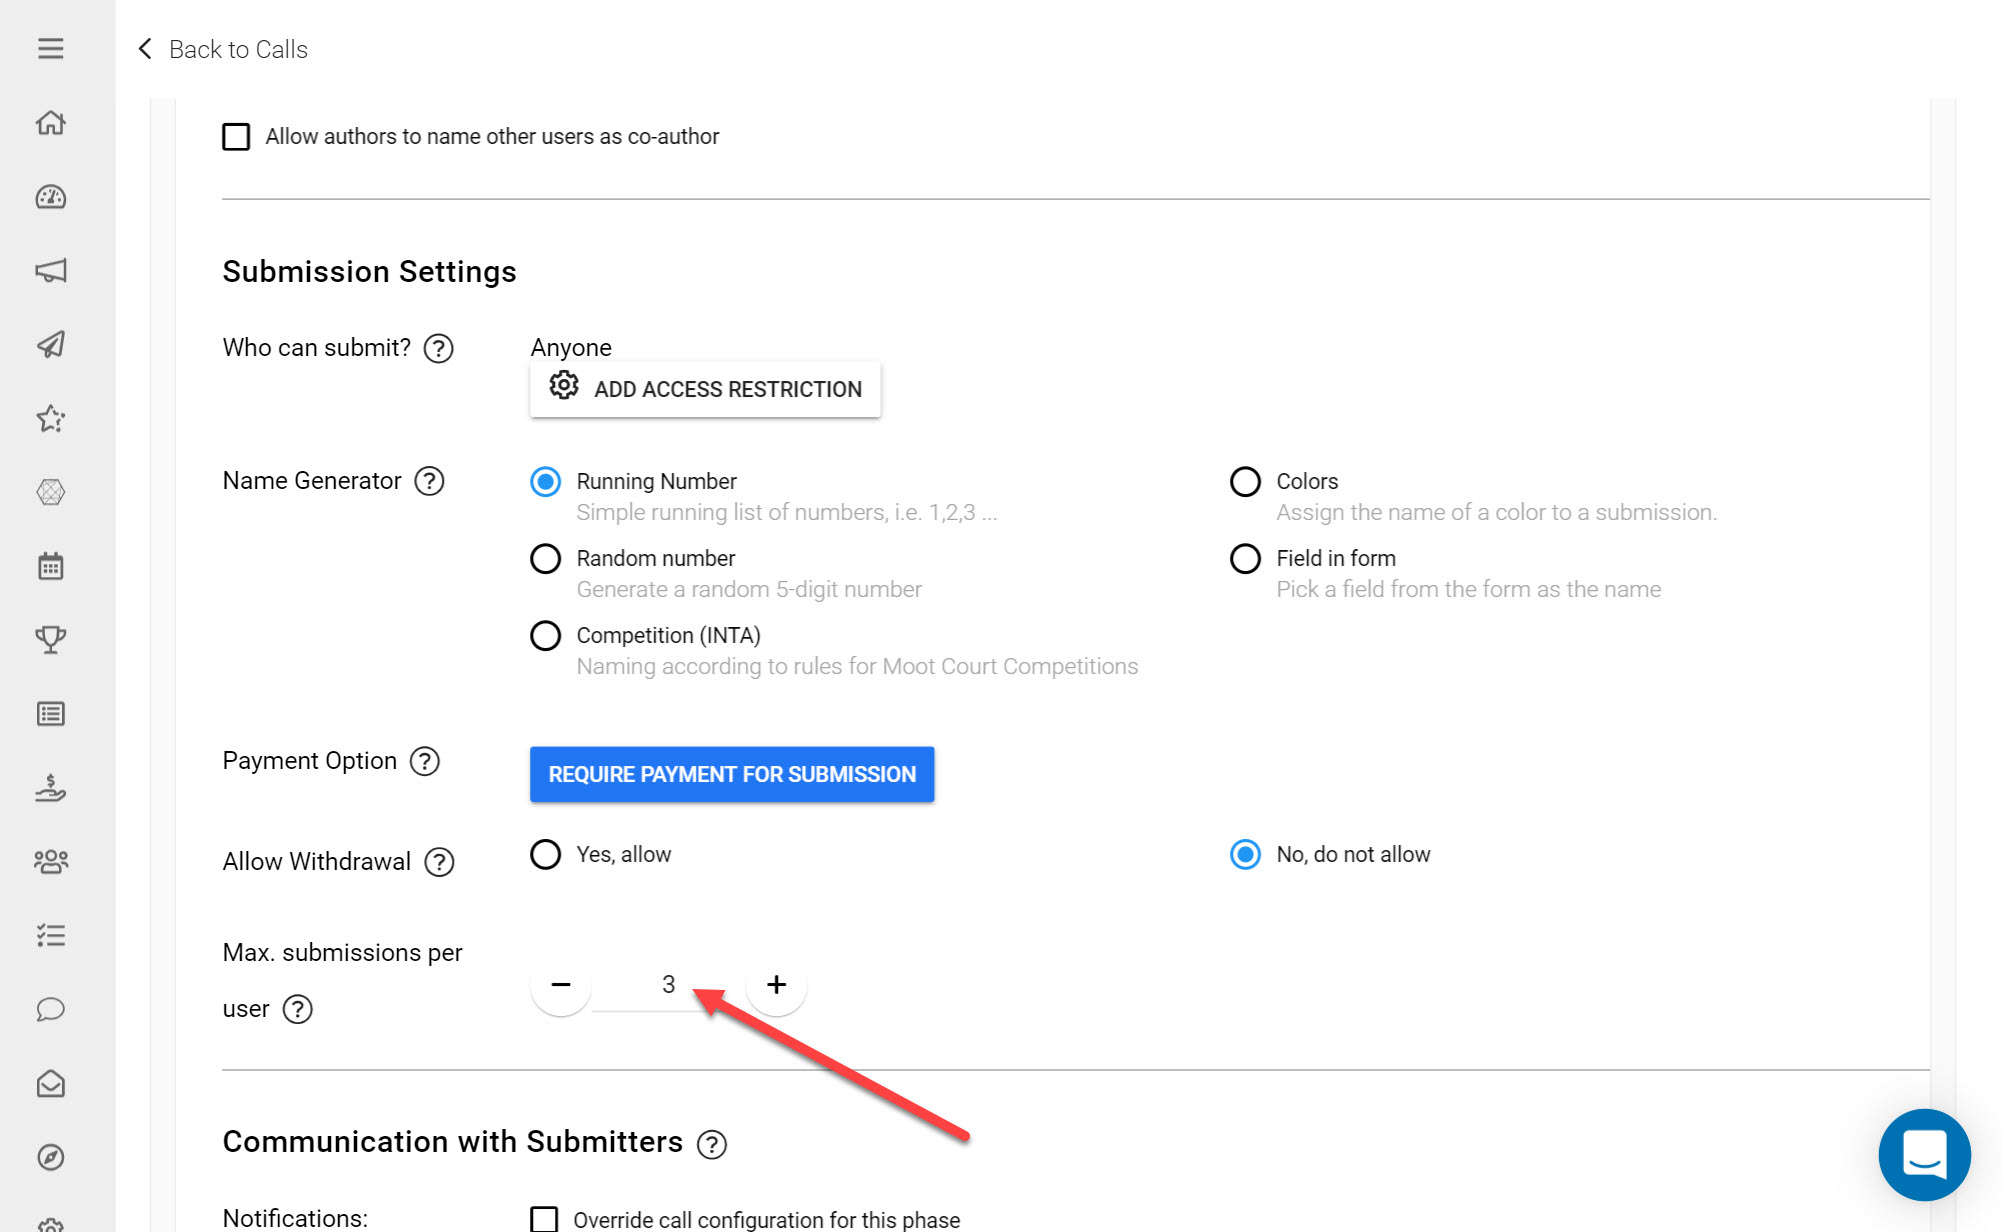
Directly below the Submission Form you have just added, you will see a checkbox labelled 'Allow authors to name other users as co-author'. For the cases where more than one user worked on a Submission (e.g. if two researchers worked together on a Research Proposal), you can tick this checkbox to allow Submitters to list other users as co-authors. More information on our Co-author Feature can be found here.
3. Configure Submission Phase Settings
Now that you have added a Submission Phase and designed the Form that Submitters will fill in, you may want to control which users can submit to your Call, how many Submissions each user can submit and grant users the ability to withdraw their Submissions, if preferred.
Who can Submit?
You can control which users can submit to this specific Phase by adding Submission Access Restrictions. These are criteria that users will have to meet to submit to your Call.
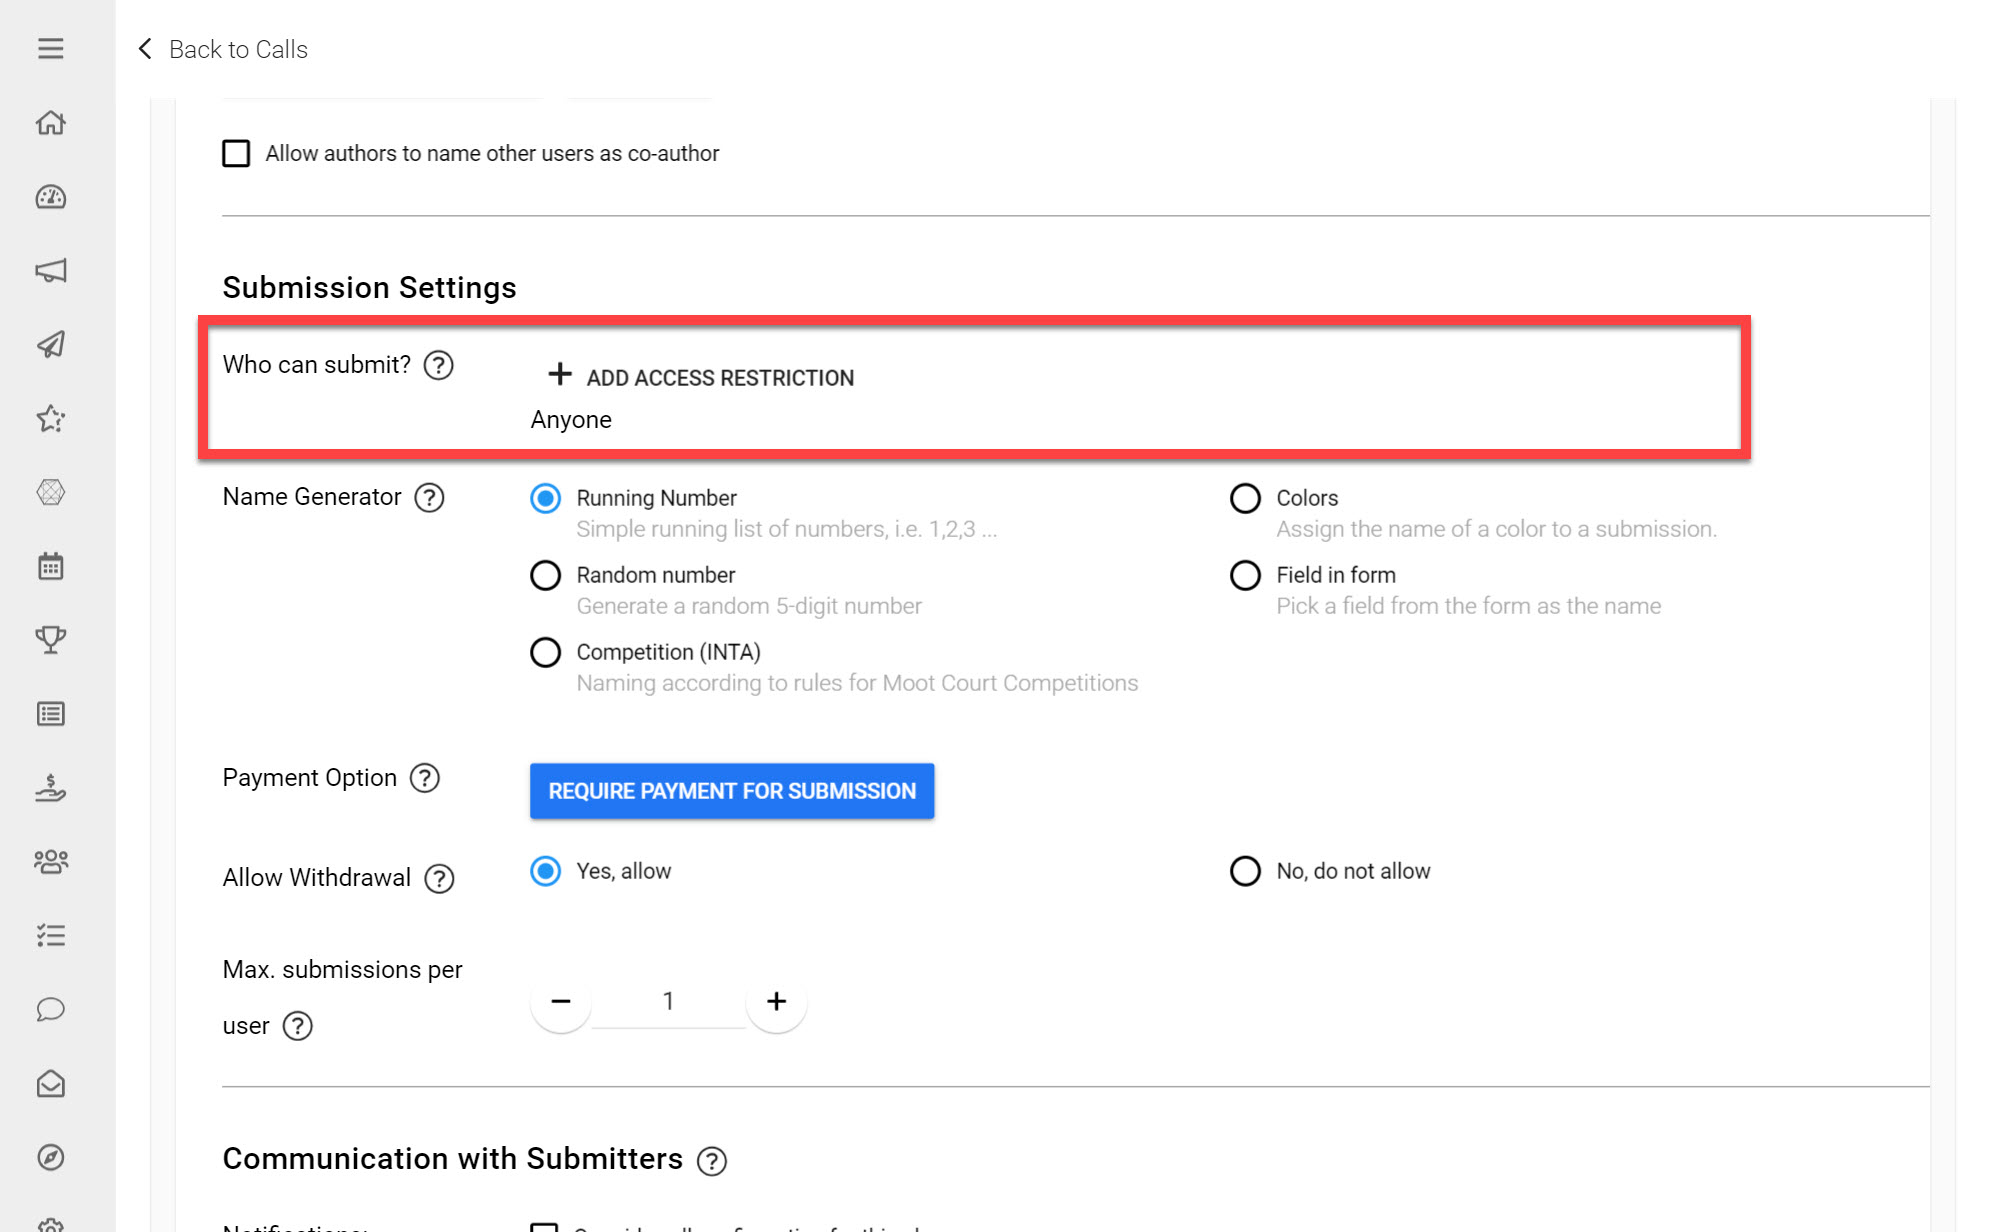
The Submission Access Restrictions available to add are:
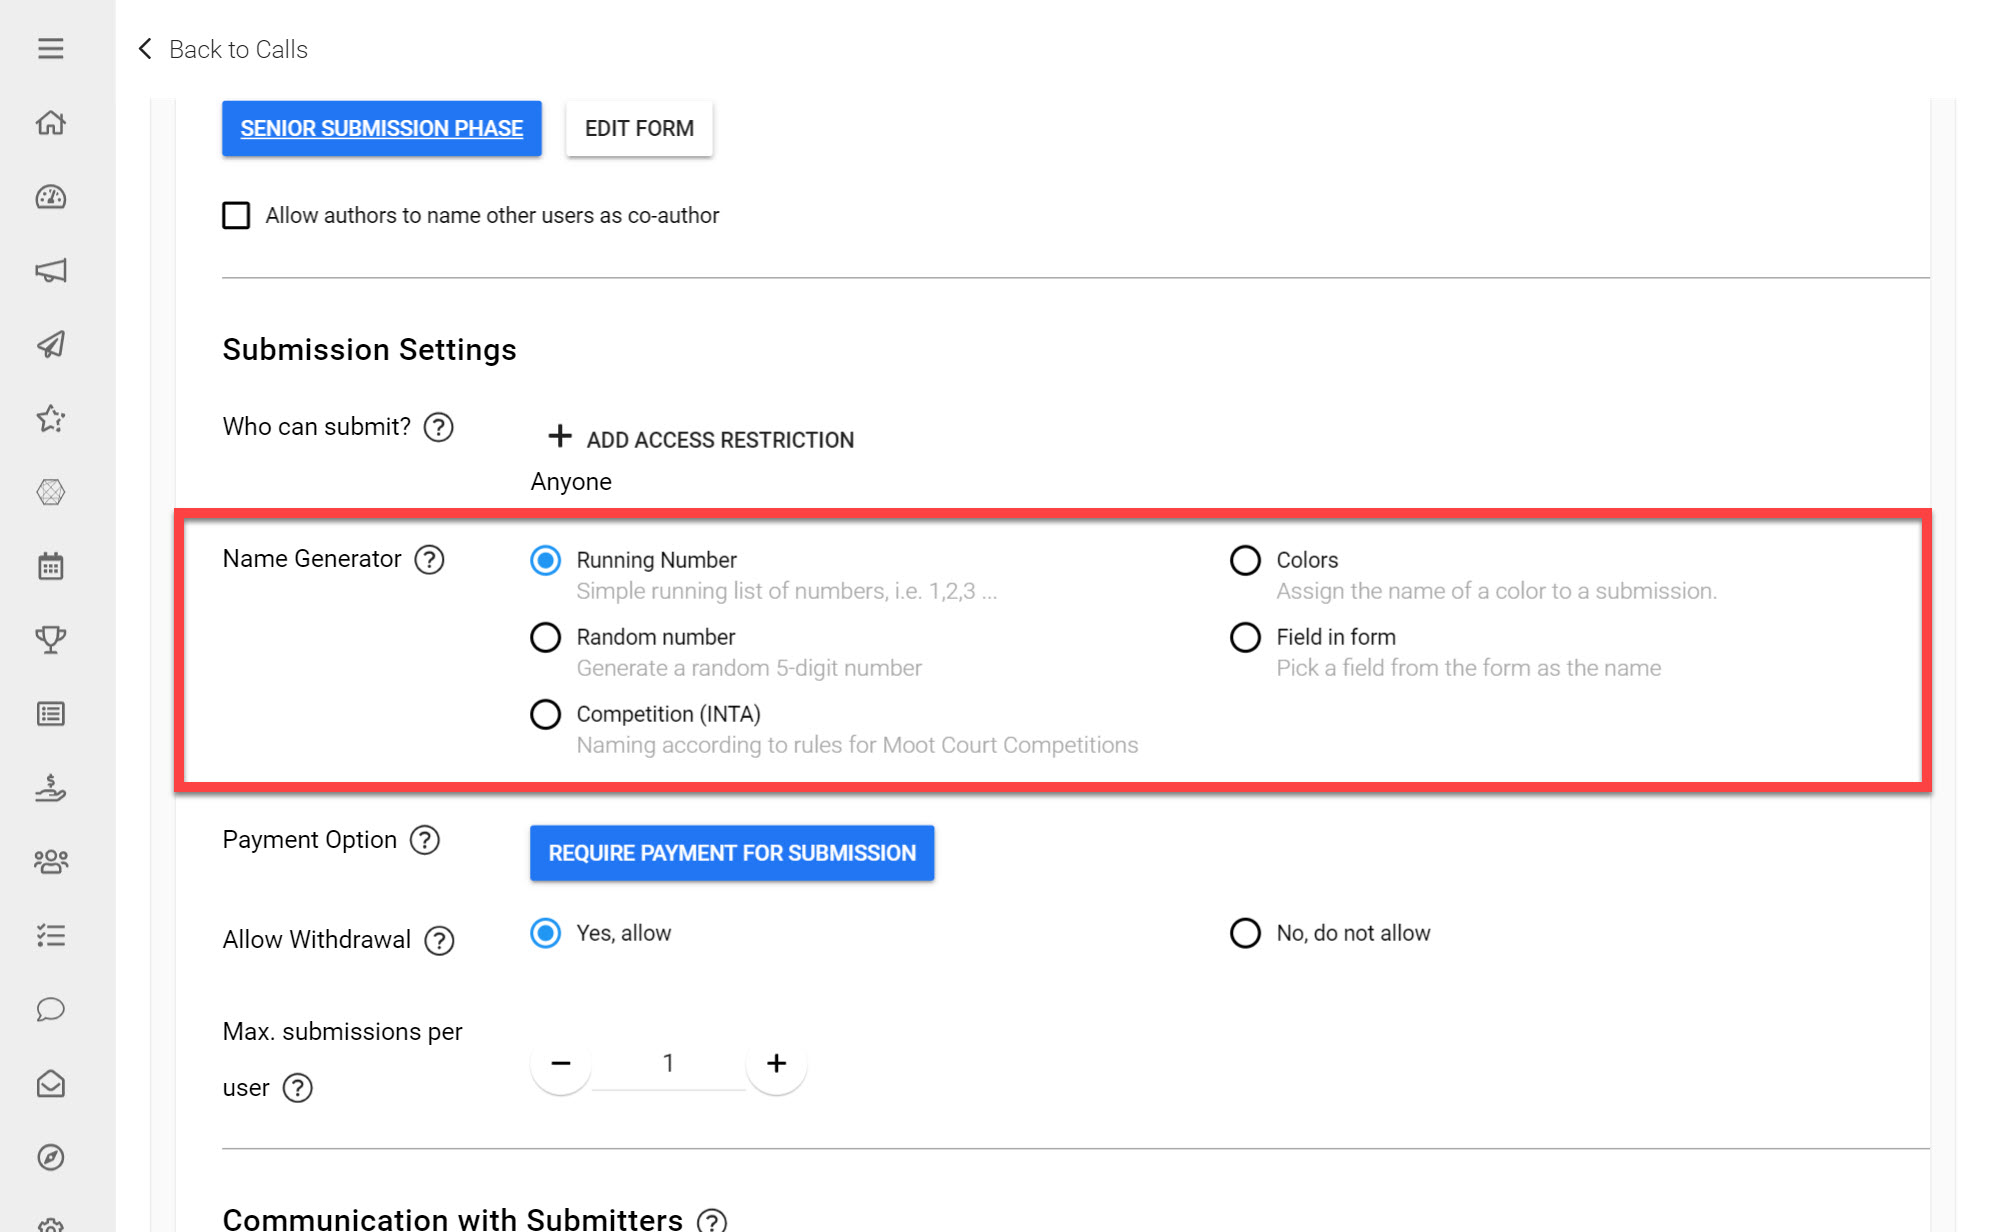
Name Generator
You can choose how Submissions will be named for administrative purposes. Here are the following options:
Running Number: This will name Submissions using a running list of numbers, useful if Submissions need to have unique numbers that can be easily ordered and searched for.
Field in Form: This will use a response from a Submitter that was filled in on their Submission. If you launch a Call for Board Nominations e.g. and added a Field: Full Name, you could choose to name Submissions by this Field to easily identify applications by author name in the Submission List View.
Random Number: This generates a random 5 digit number that will be unique for each Submission.
Colors: This will assign the name of a color to a Submission (e.g. charcoal grey).
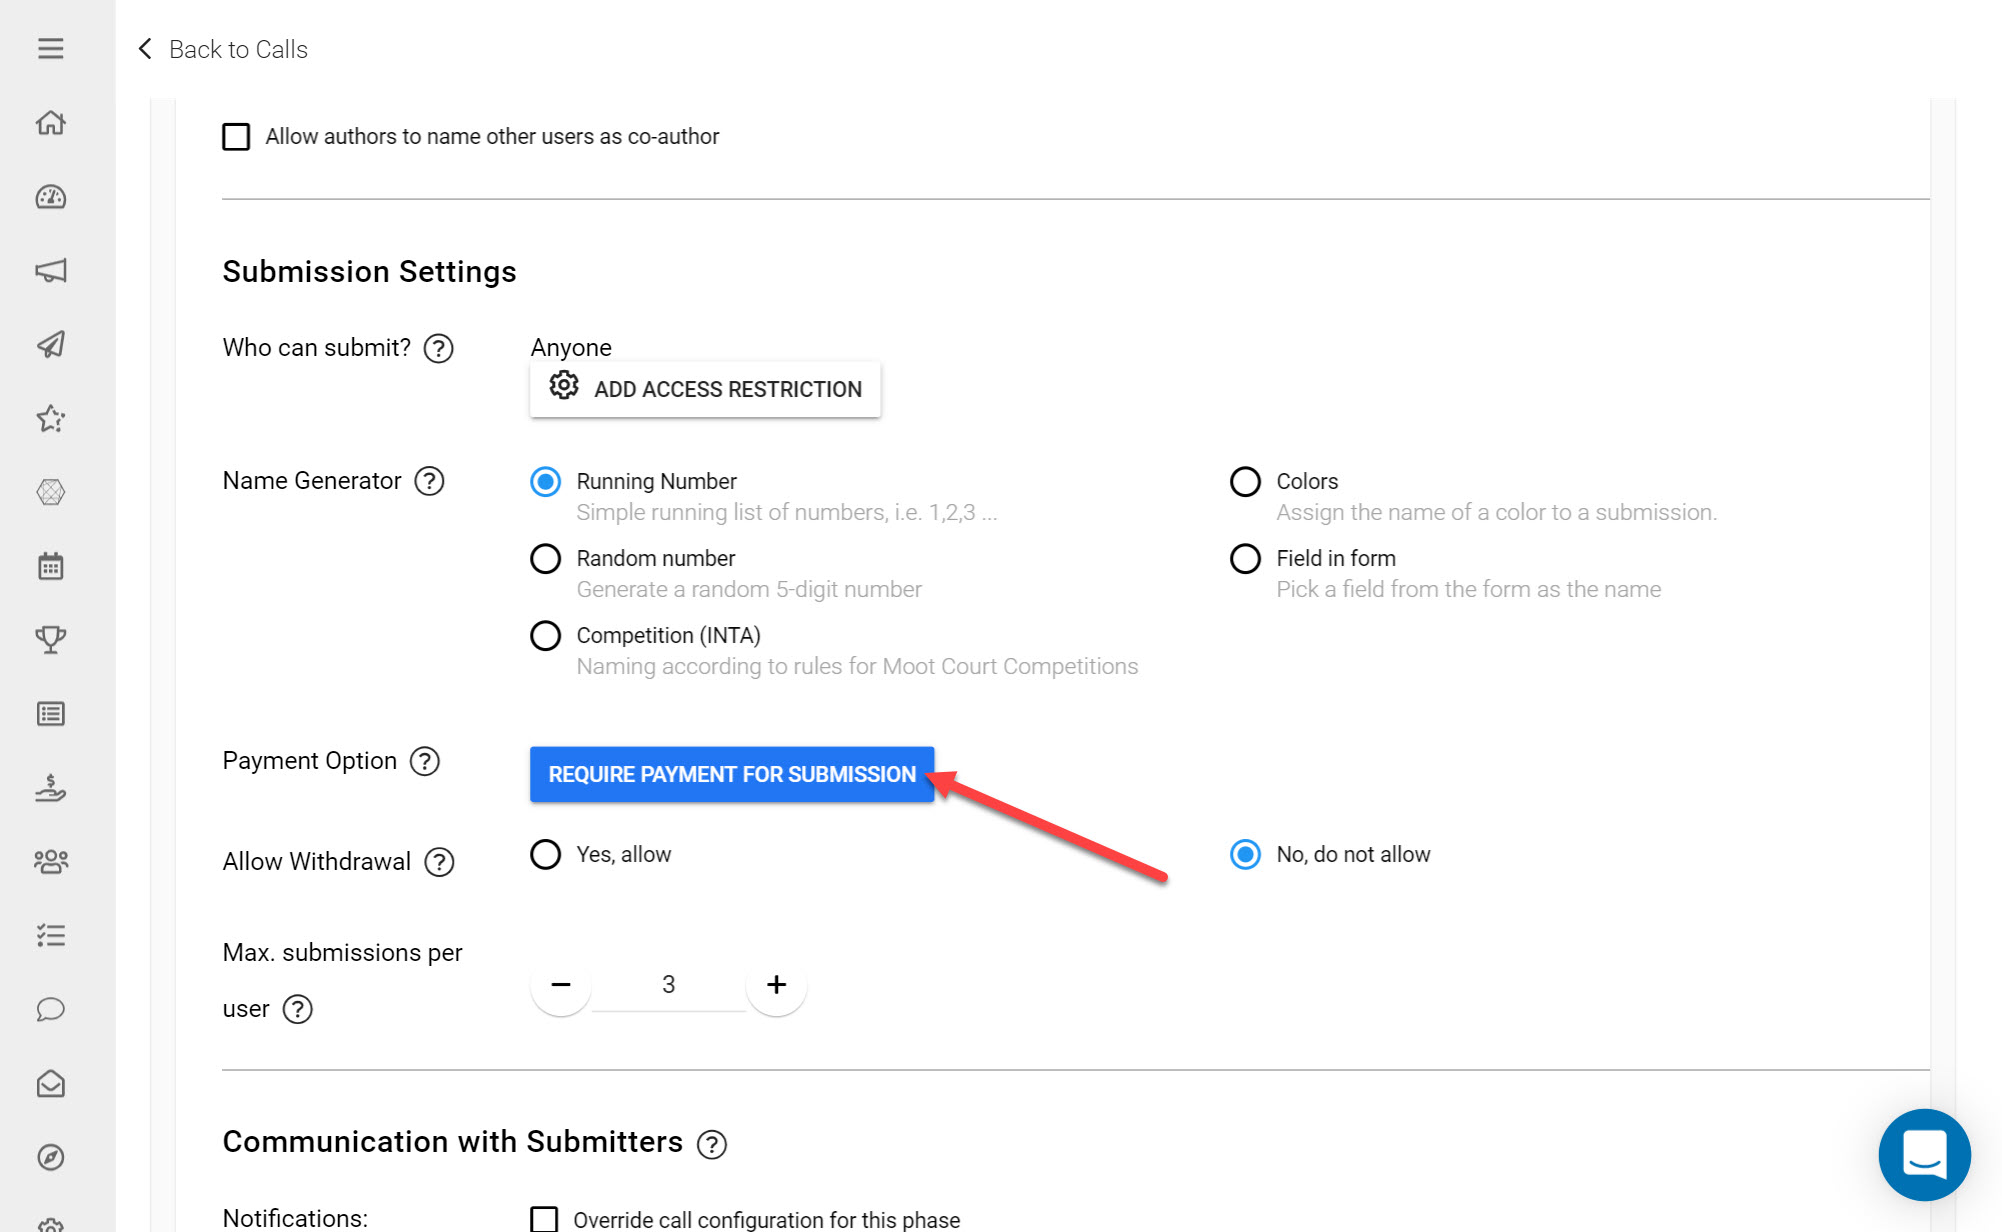
Payment Option
If you would only like to permit users who have completed payment for a particular item, you can use this option. Select the payment processor to use (e.g. Impexium) and which product should be used to process the payment. This will ensure that only users who have completed this transaction will be able to submit to this Call.
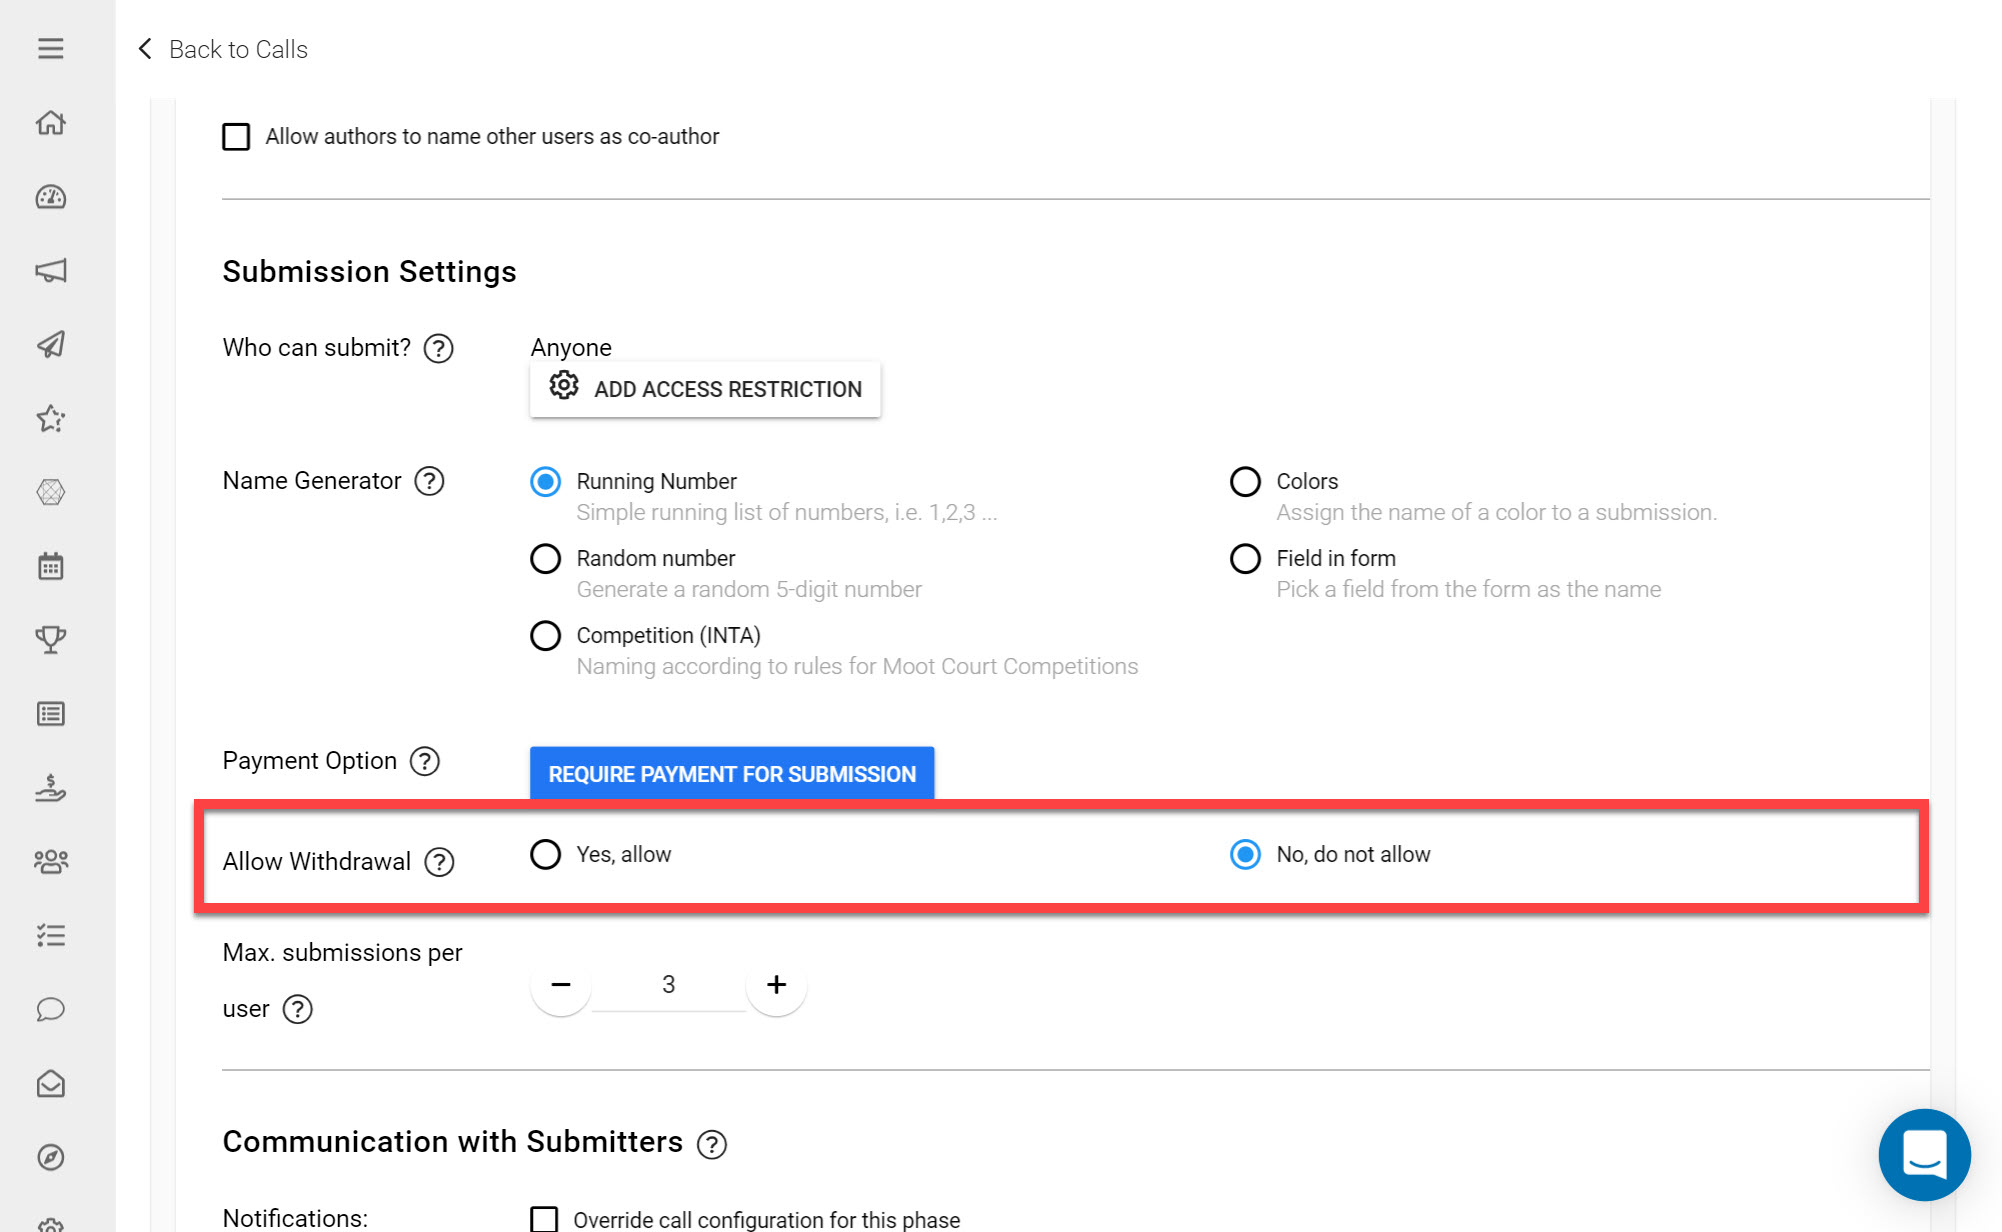
Allow Withdrawal
Indicate whether you would like Submitters to be able to withdraw their Submissions from Calls after submitting or not. The setting you choose here applies to all Submitters on this specific phase.
Max. Submissions per User
Input the maximum number of submissions to allow from each Submitter.
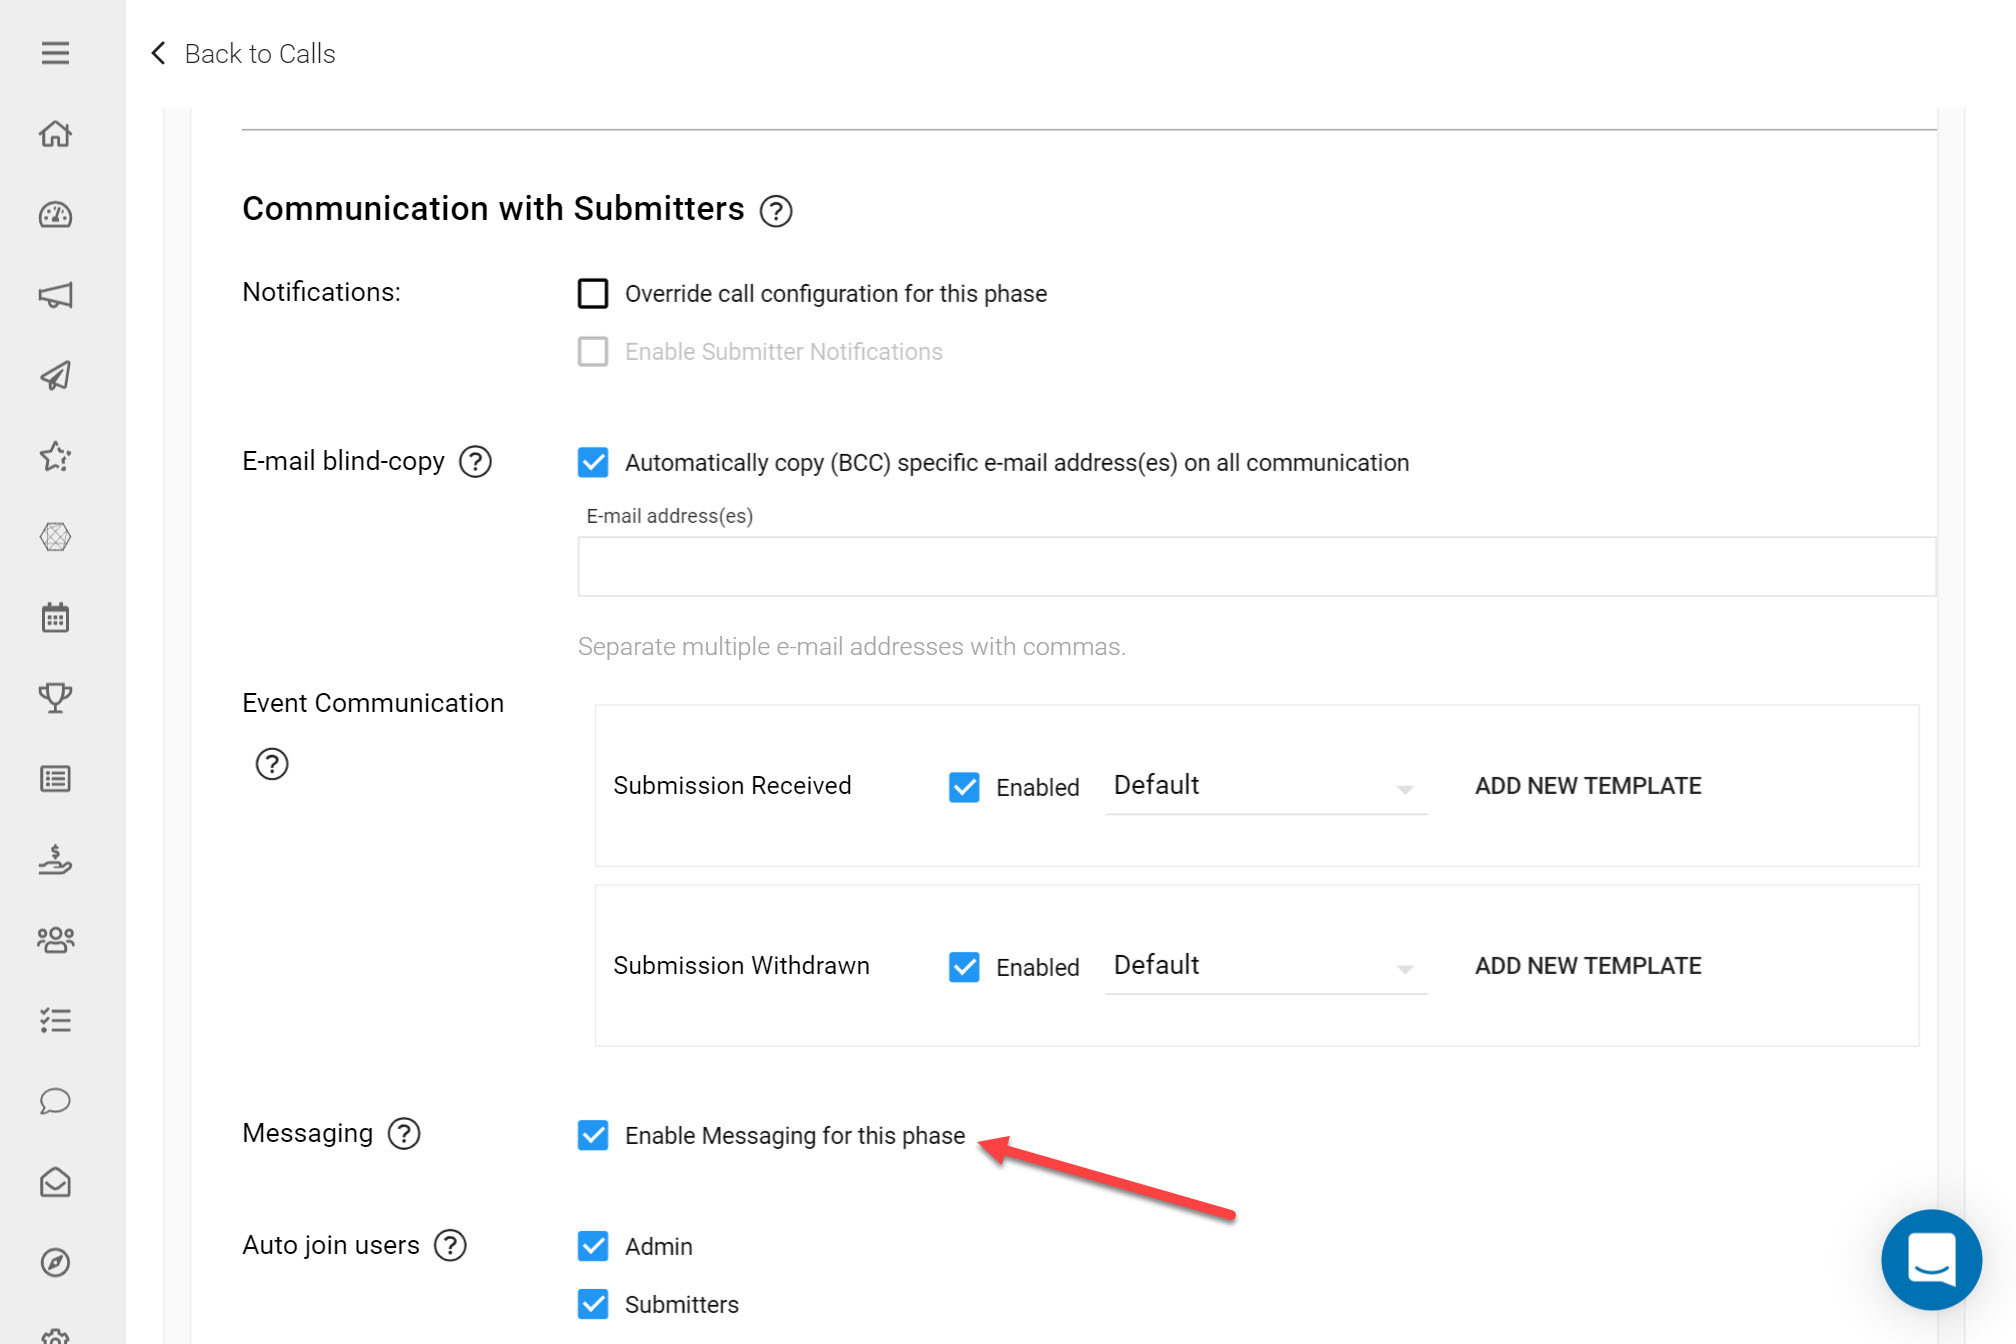
4. Adjust Communication Settings
Communication Settings in your Call Phase control how you communicate with users in Slayte. Updates in the system can trigger notifications to Submitters.
Notifications
This option will enable notifications to be sent out to Submitters based on certain events taking place, e.g. submitting a Submission.
E-mail Blind Copy
Messaging / Chat
Communication between Submitters and Reviewers can help raise the quality of your Submissions, especially if you Allow Submitters to Edit their Submission where they could incorporate any suggestions sent by Reviewers. If a Submitter has a question linked to their Submission e.g., they can send a message that will notify the Administrator and Reviewer in the Chat Channel.
As Reviews left on Submissions are not visible to Submitters, this is a handy feature that allows direct feedback between Reviewers, Administrators and Submitters.
*Note: You will only be able to use this chat component if you have ticked the checkbox 'Enable Messaging for this Phase' under the Submission Phase Settings. If you would like both Submitters and Reviewers to be able to communicate in this channel you would also need to tick this checkbox under the Review Phase.
Select this checkbox if you would like to enable Messaging for this Phase.
This article on Communicating with Submitters provides more information on how to send a message in the Messaging Component.
