
When creating a Call you will need to add a Submission Form which will control the exact information received from Submitters. You can build a custom Submission Form which can be as simple or complex as required. Submission Forms are built by adding Form Fields to the Submission Form that allow you to design the questions that will be asked to Submitters during your Call.
You can decide the dates to receive Submissions, how many Submissions each Submitter can send in, control exactly which users are able to submit to your Call and much more.
In this article you will learn how to:
- Create a Submission Form
- Adjust Form Fields Options
- Modify your Submission Form
- Add Scenario-based Questions
- Edit an Existing Submission Form
Create a Submission Form
Submission Forms can be customized to suit your requirements by adding the relevant Form Fields to the Form Builder.
Submission Forms will need to be added on a Submission Phase, to do so:
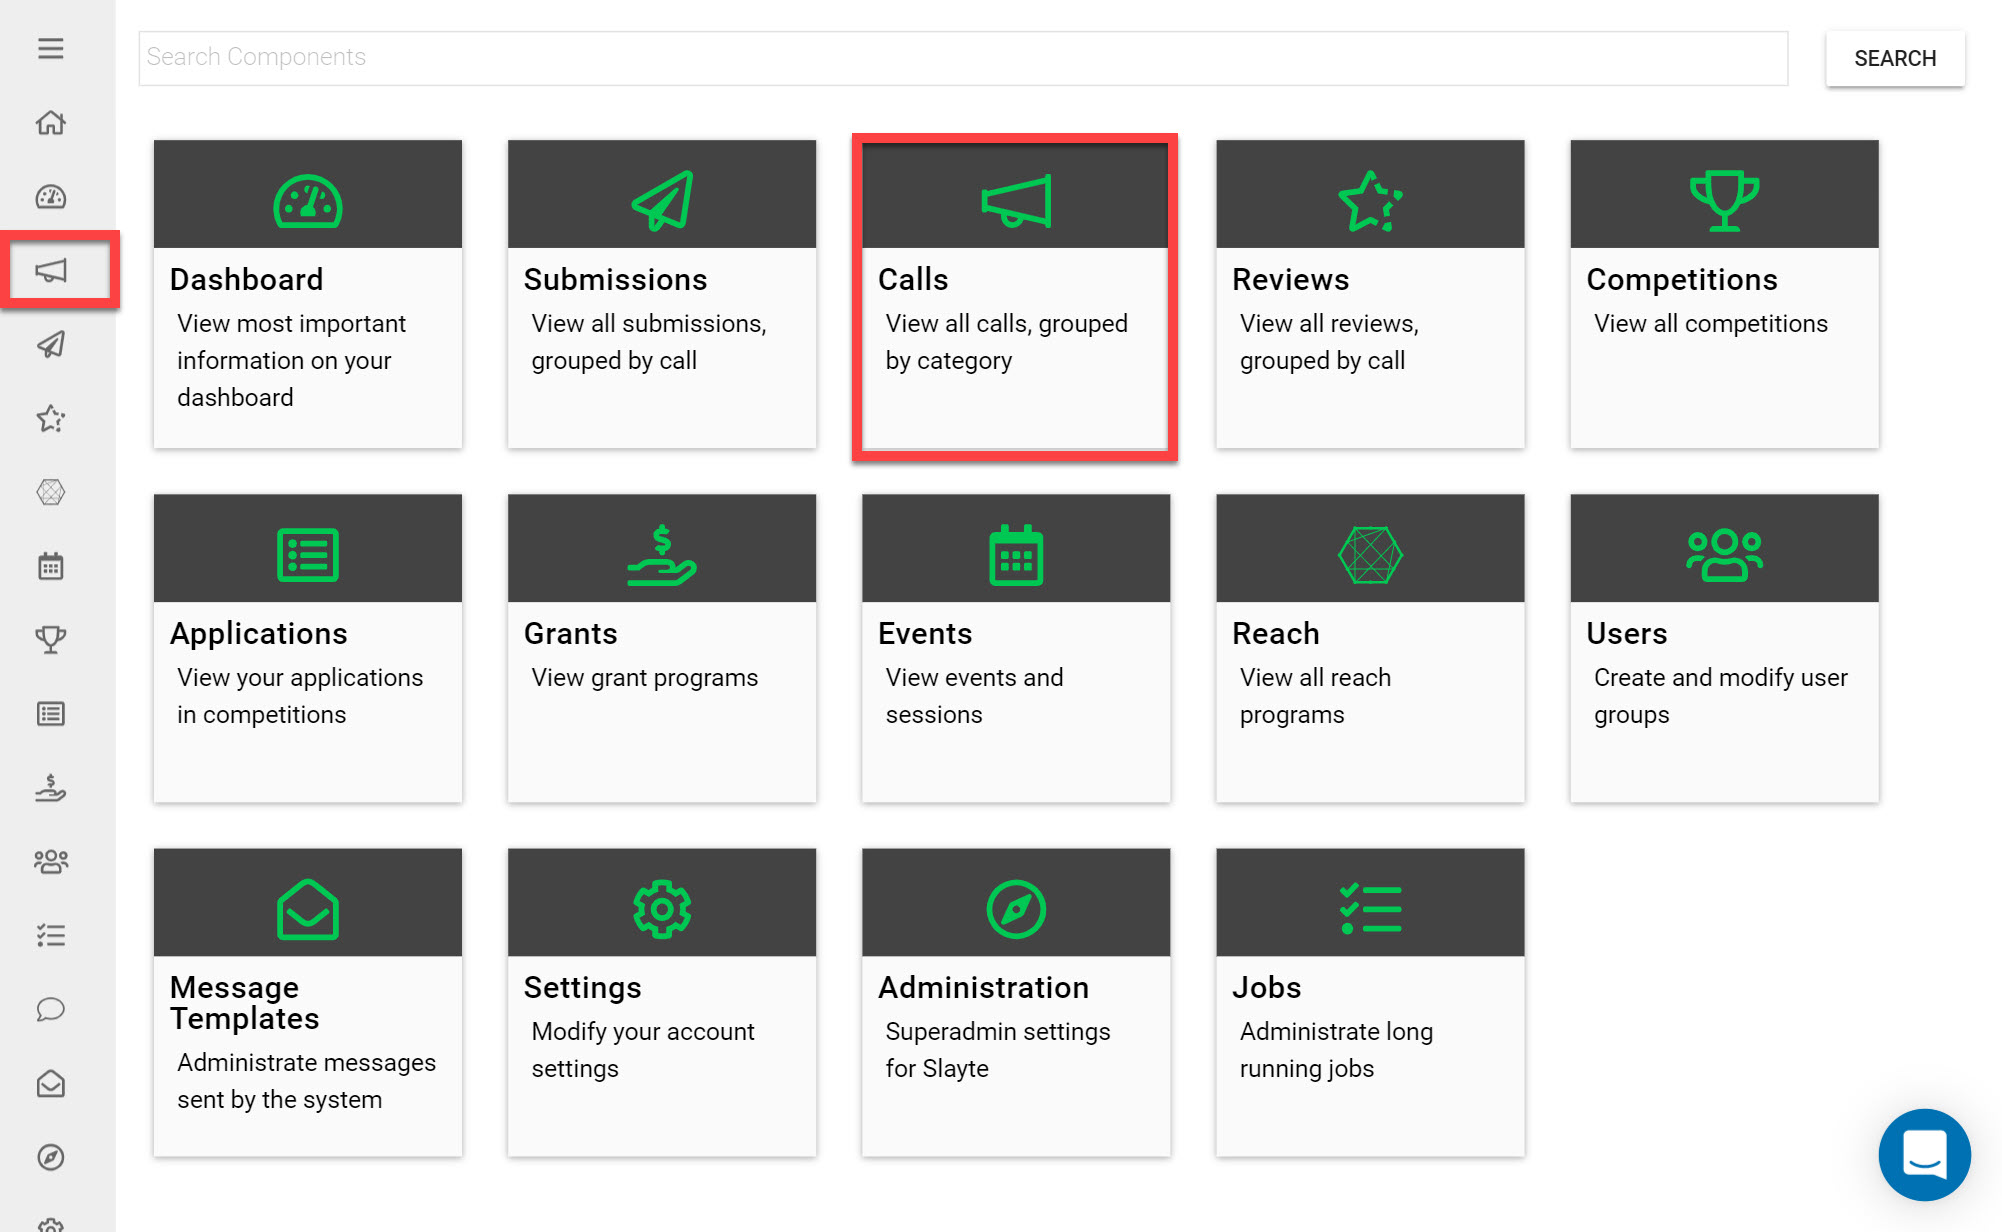
Go to the Homepage and click on the Calls icon
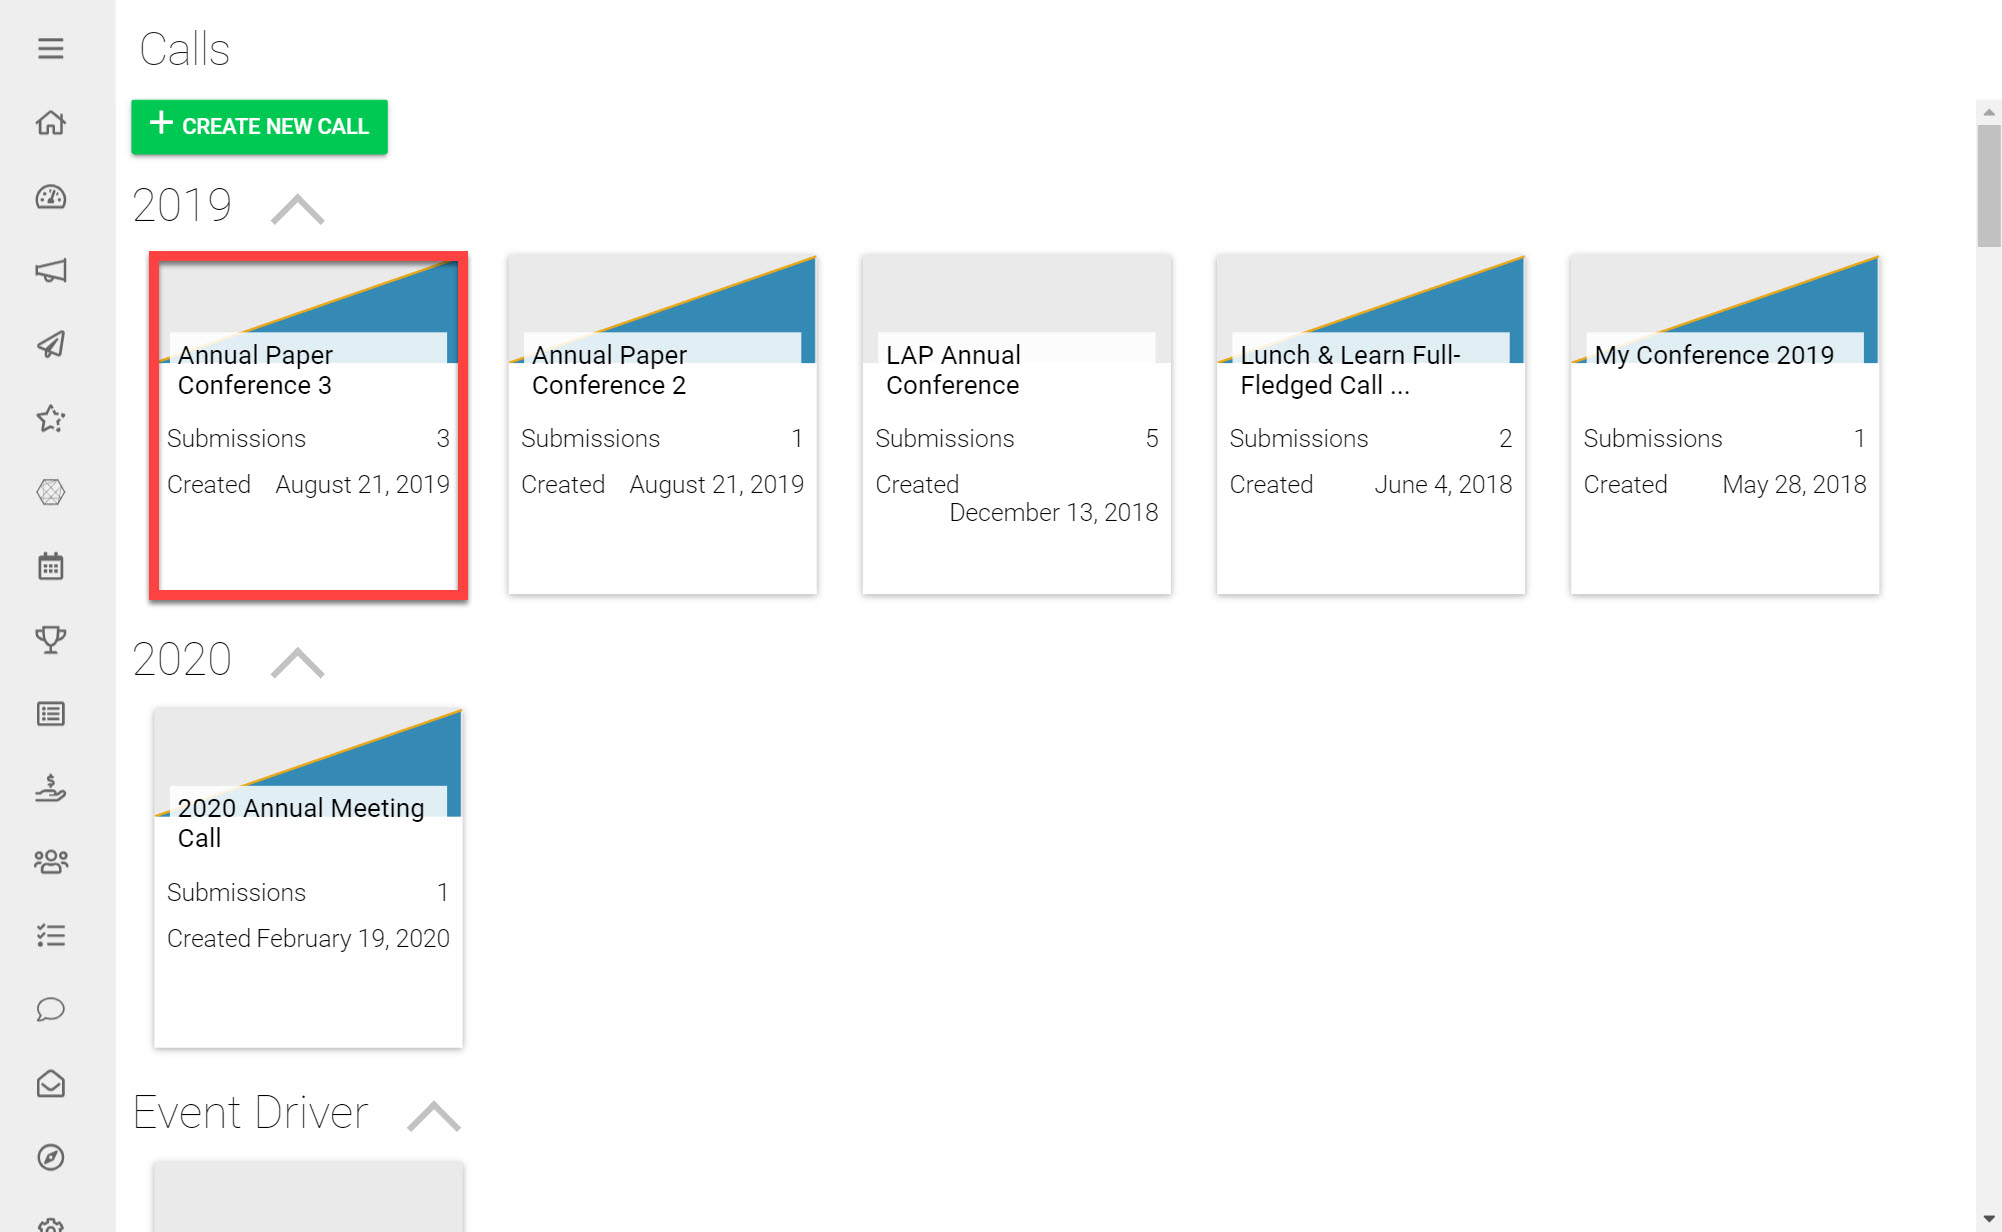
Click on the Call you would like to add a Submission Phase to (if you do not have a pre-existing Call you can Create a New Call and follow this Guide once on Step 3 of the Call Creation process).
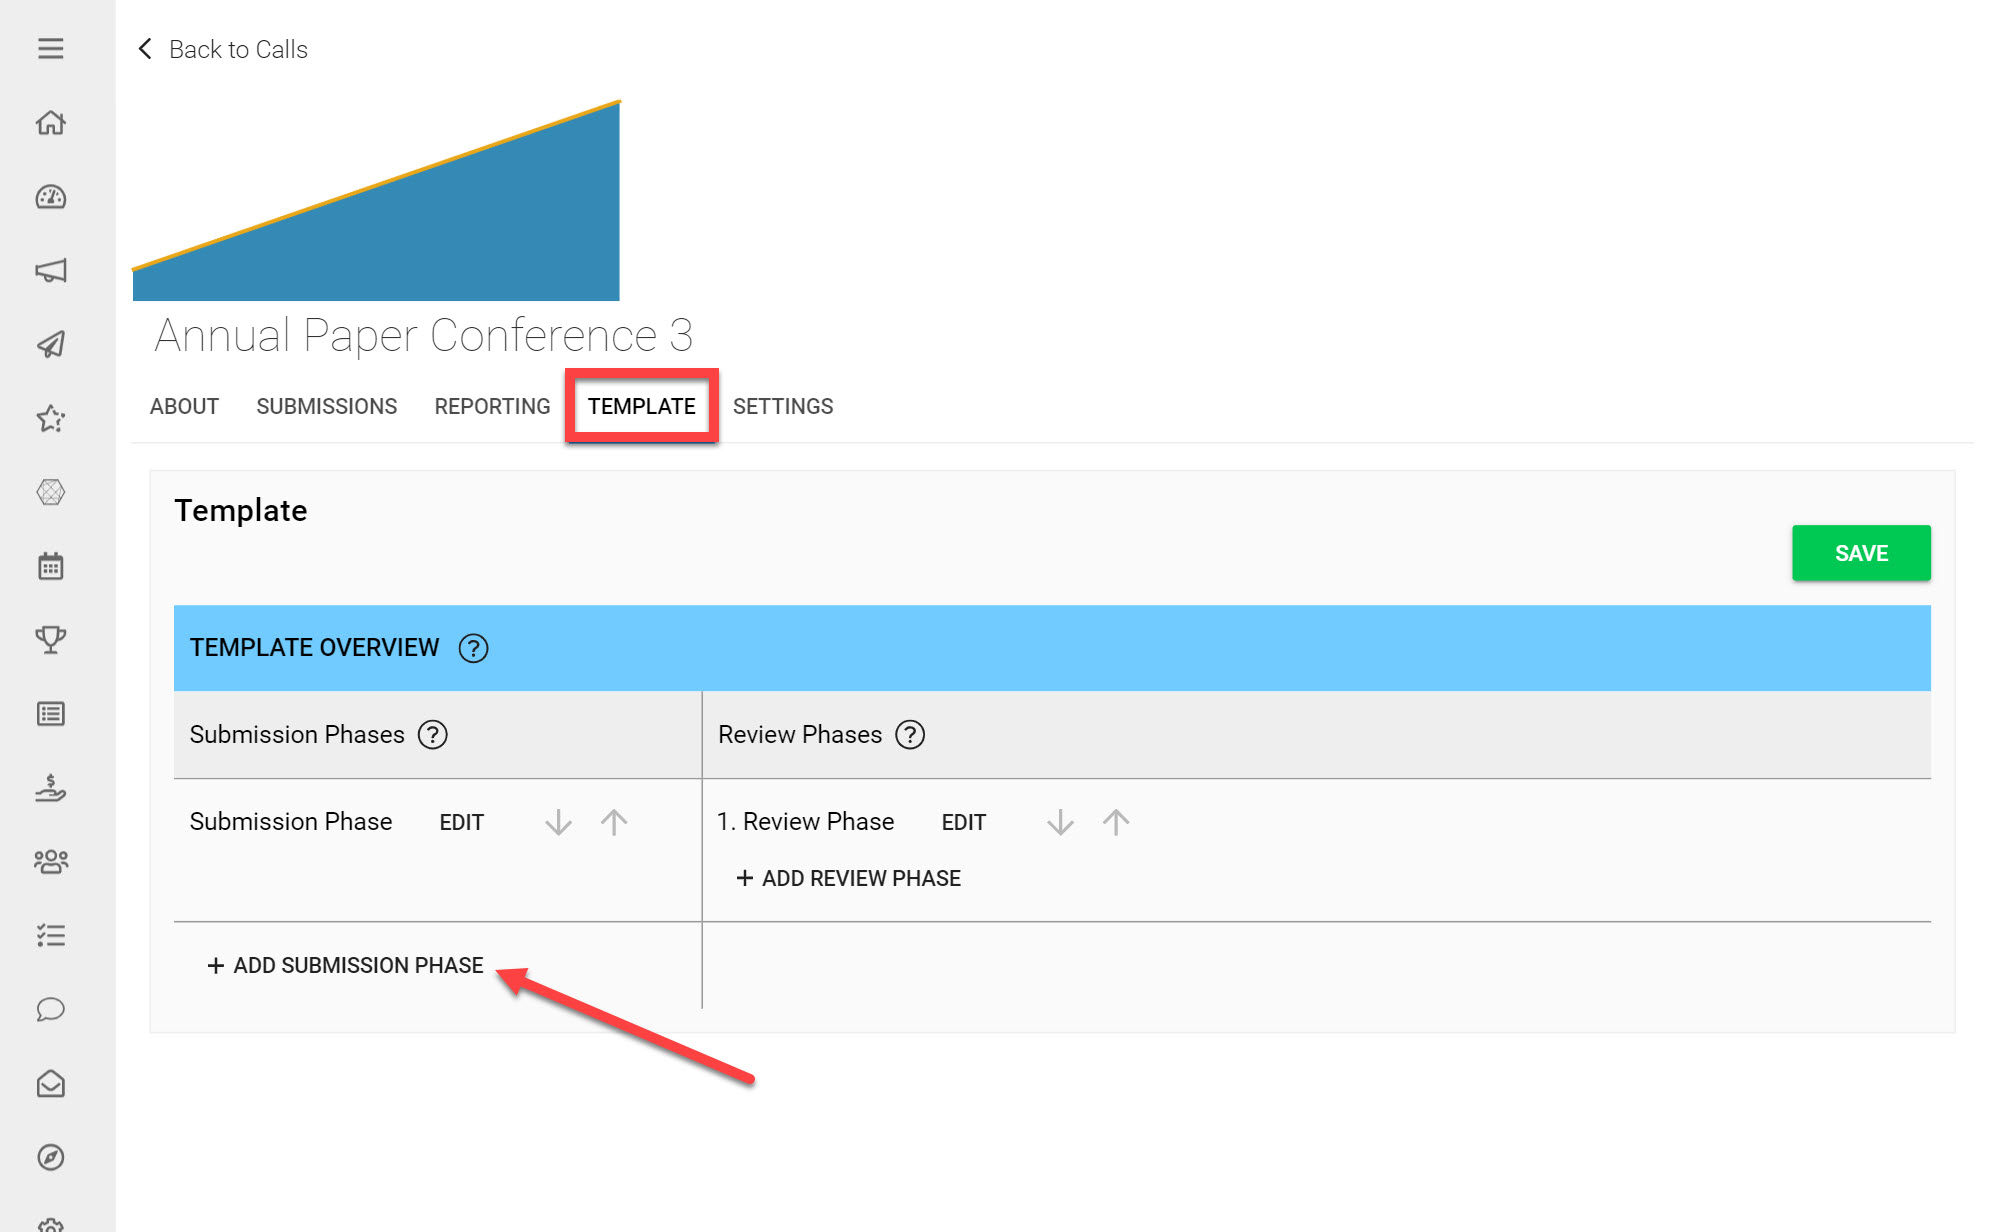
Click on the Template tab
Under Submission Phases click Add Submission Phase
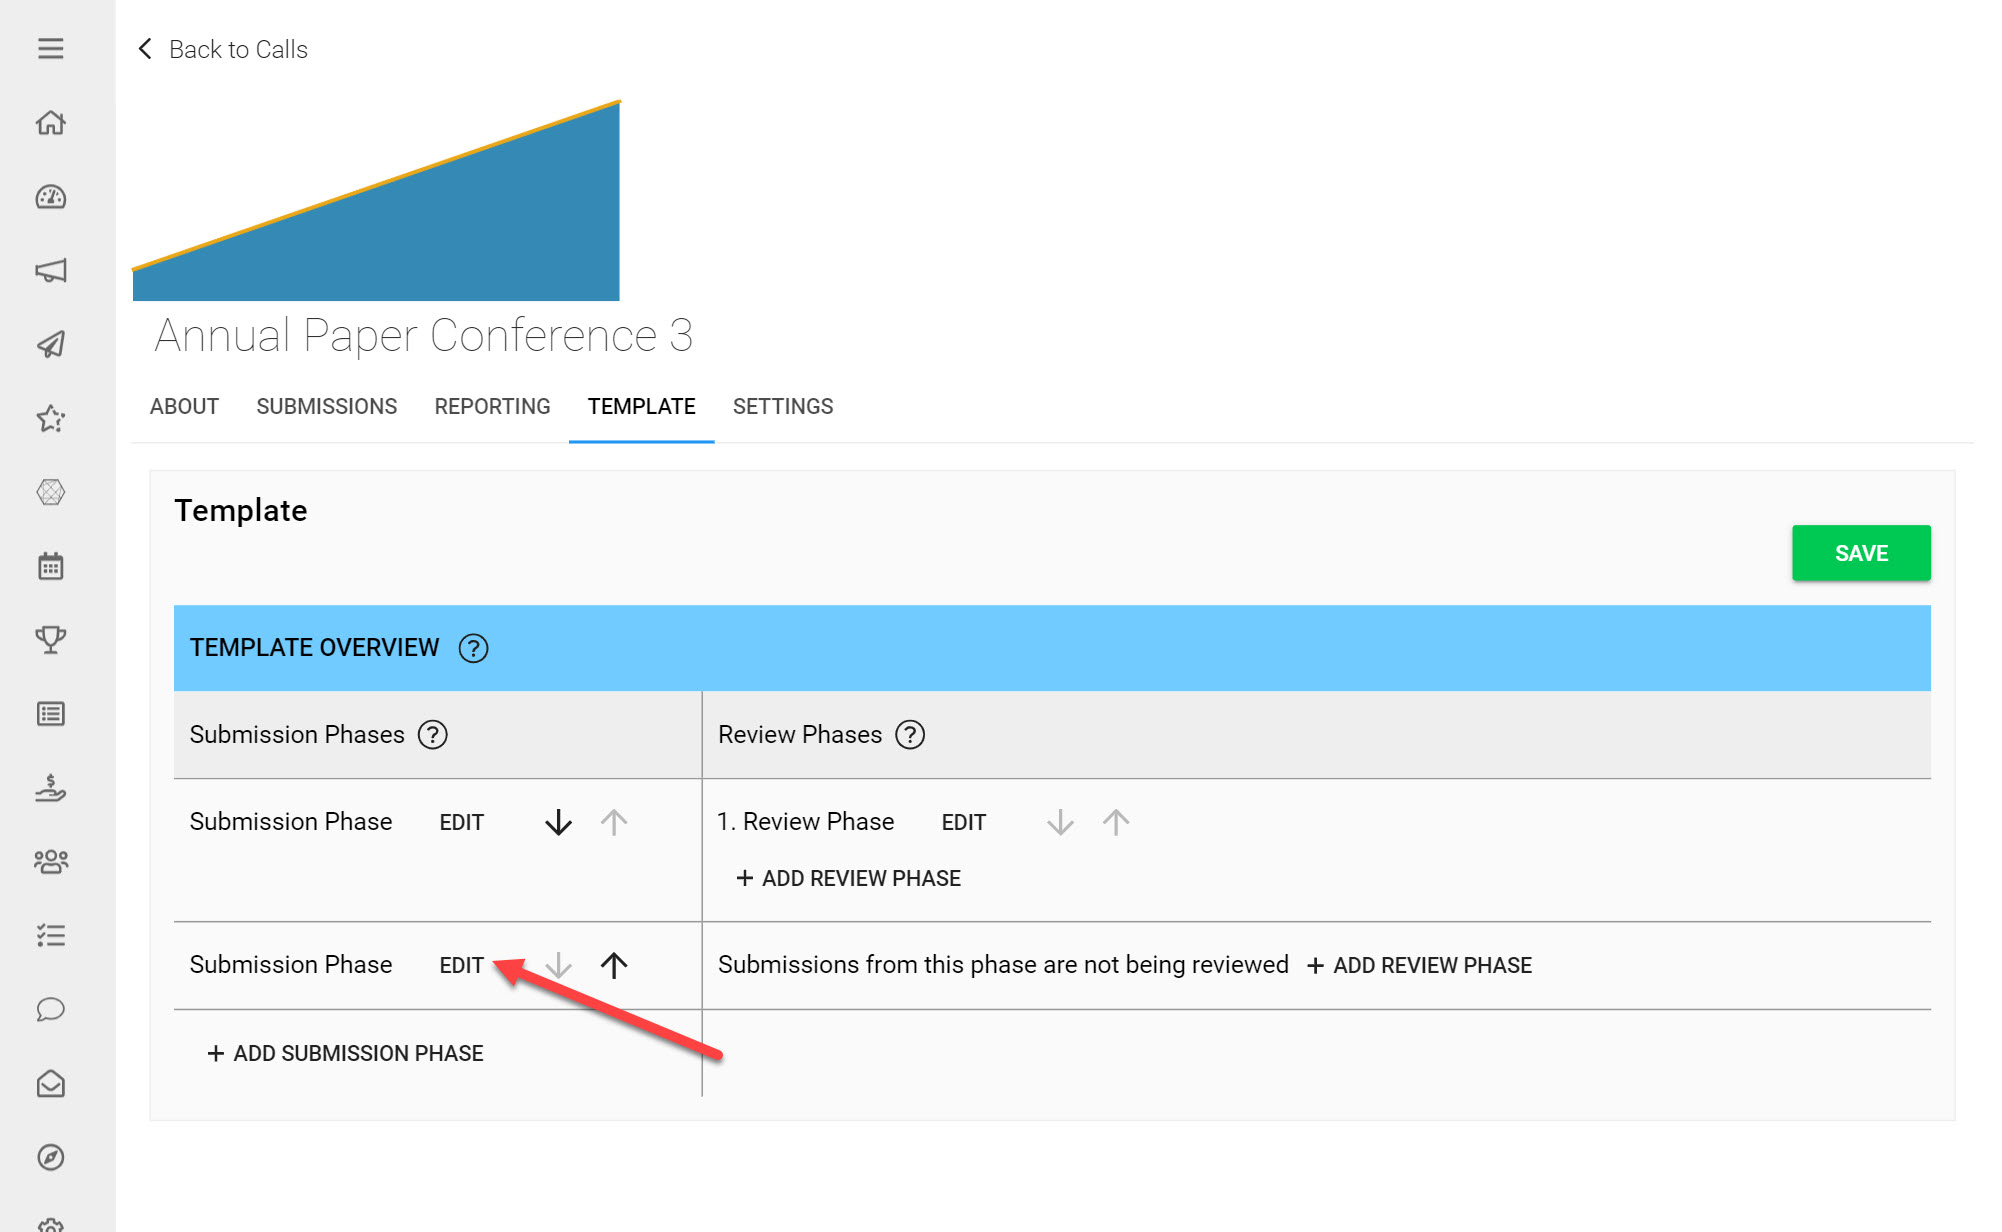
Next to your newly added Submission Phase click Edit
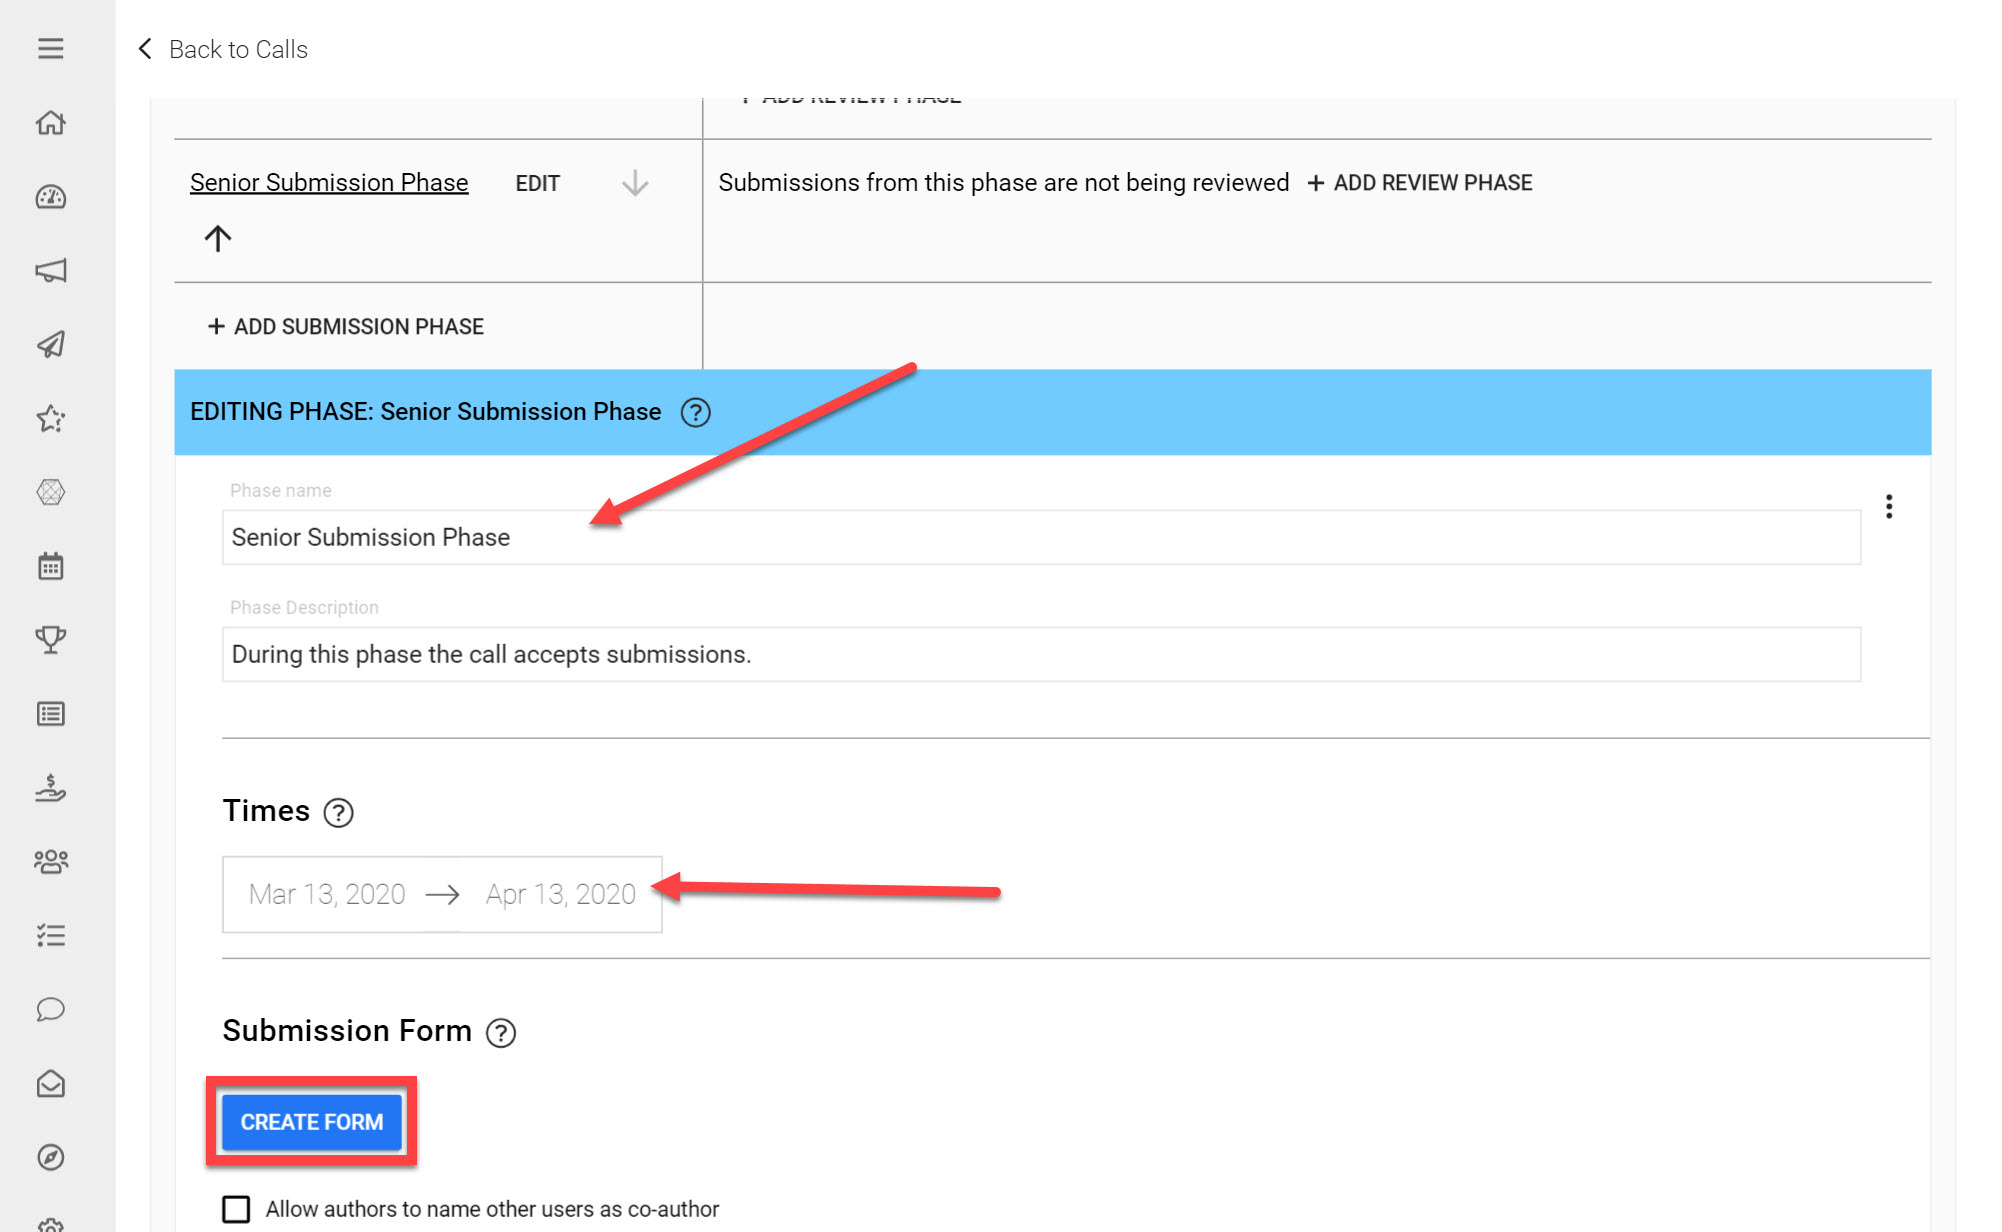
Fill in a Phase Name and a Description to define what this Phase will be used for.
Choose the Times you would like to start accepting Submissions and the deadline for receiving all Submissions.
Click Create Form
*Note: If you have multiple Submission Phases in your Call, you must ensure that no Submission Phases have overlapping dates, as this will cause Submitters to run into an Error Message when Submitting. Review phases may overlap however. This article on Managing Multiple Phases provides more insights on this.
You are now on the Submission Form Editor.
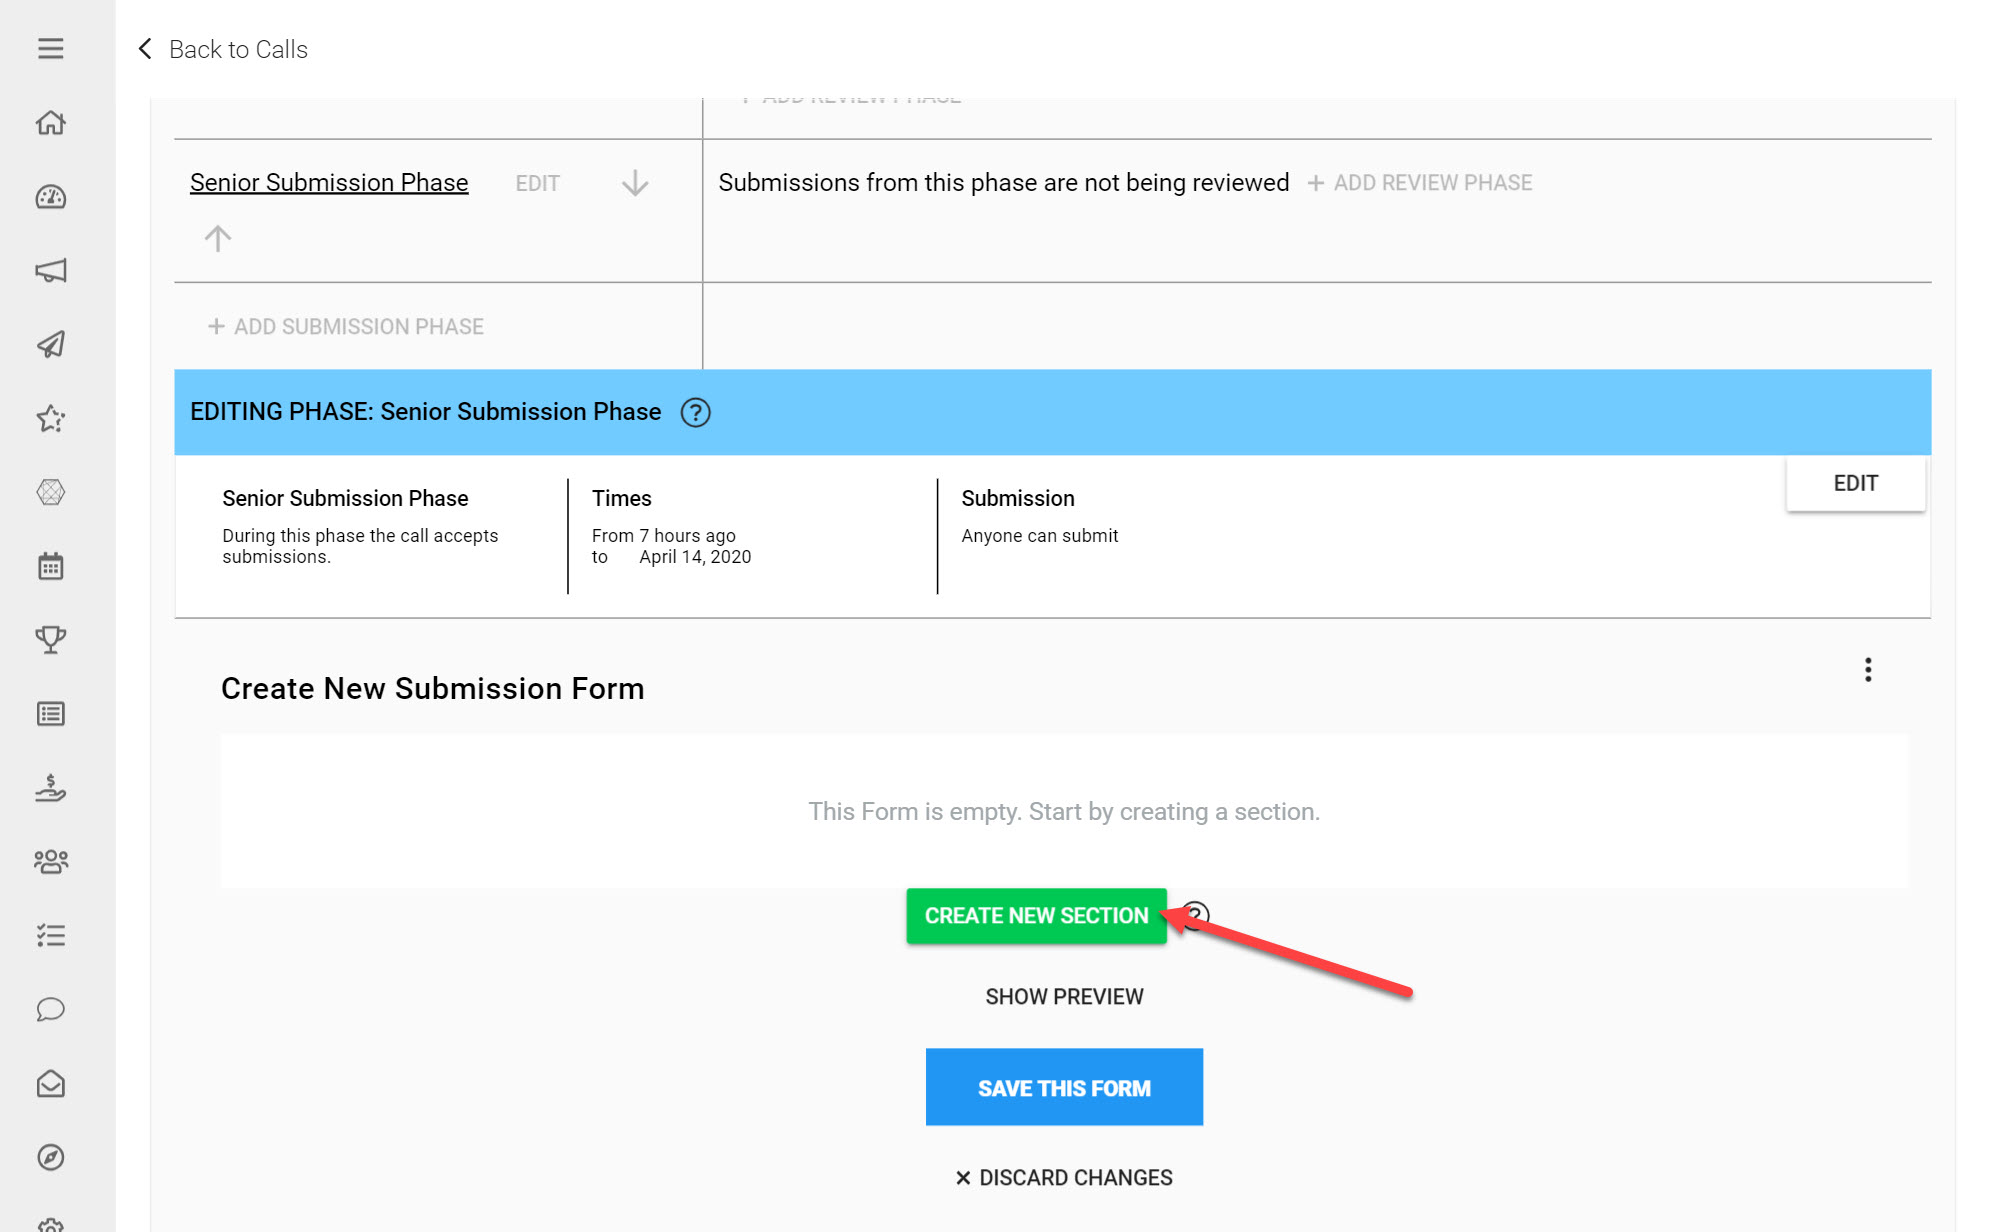
Click Create New Section
You can control the information that will be collected from Submitters, by choosing the relevant Submission Fields and labeling them with the questions you would like Submitters to answer.
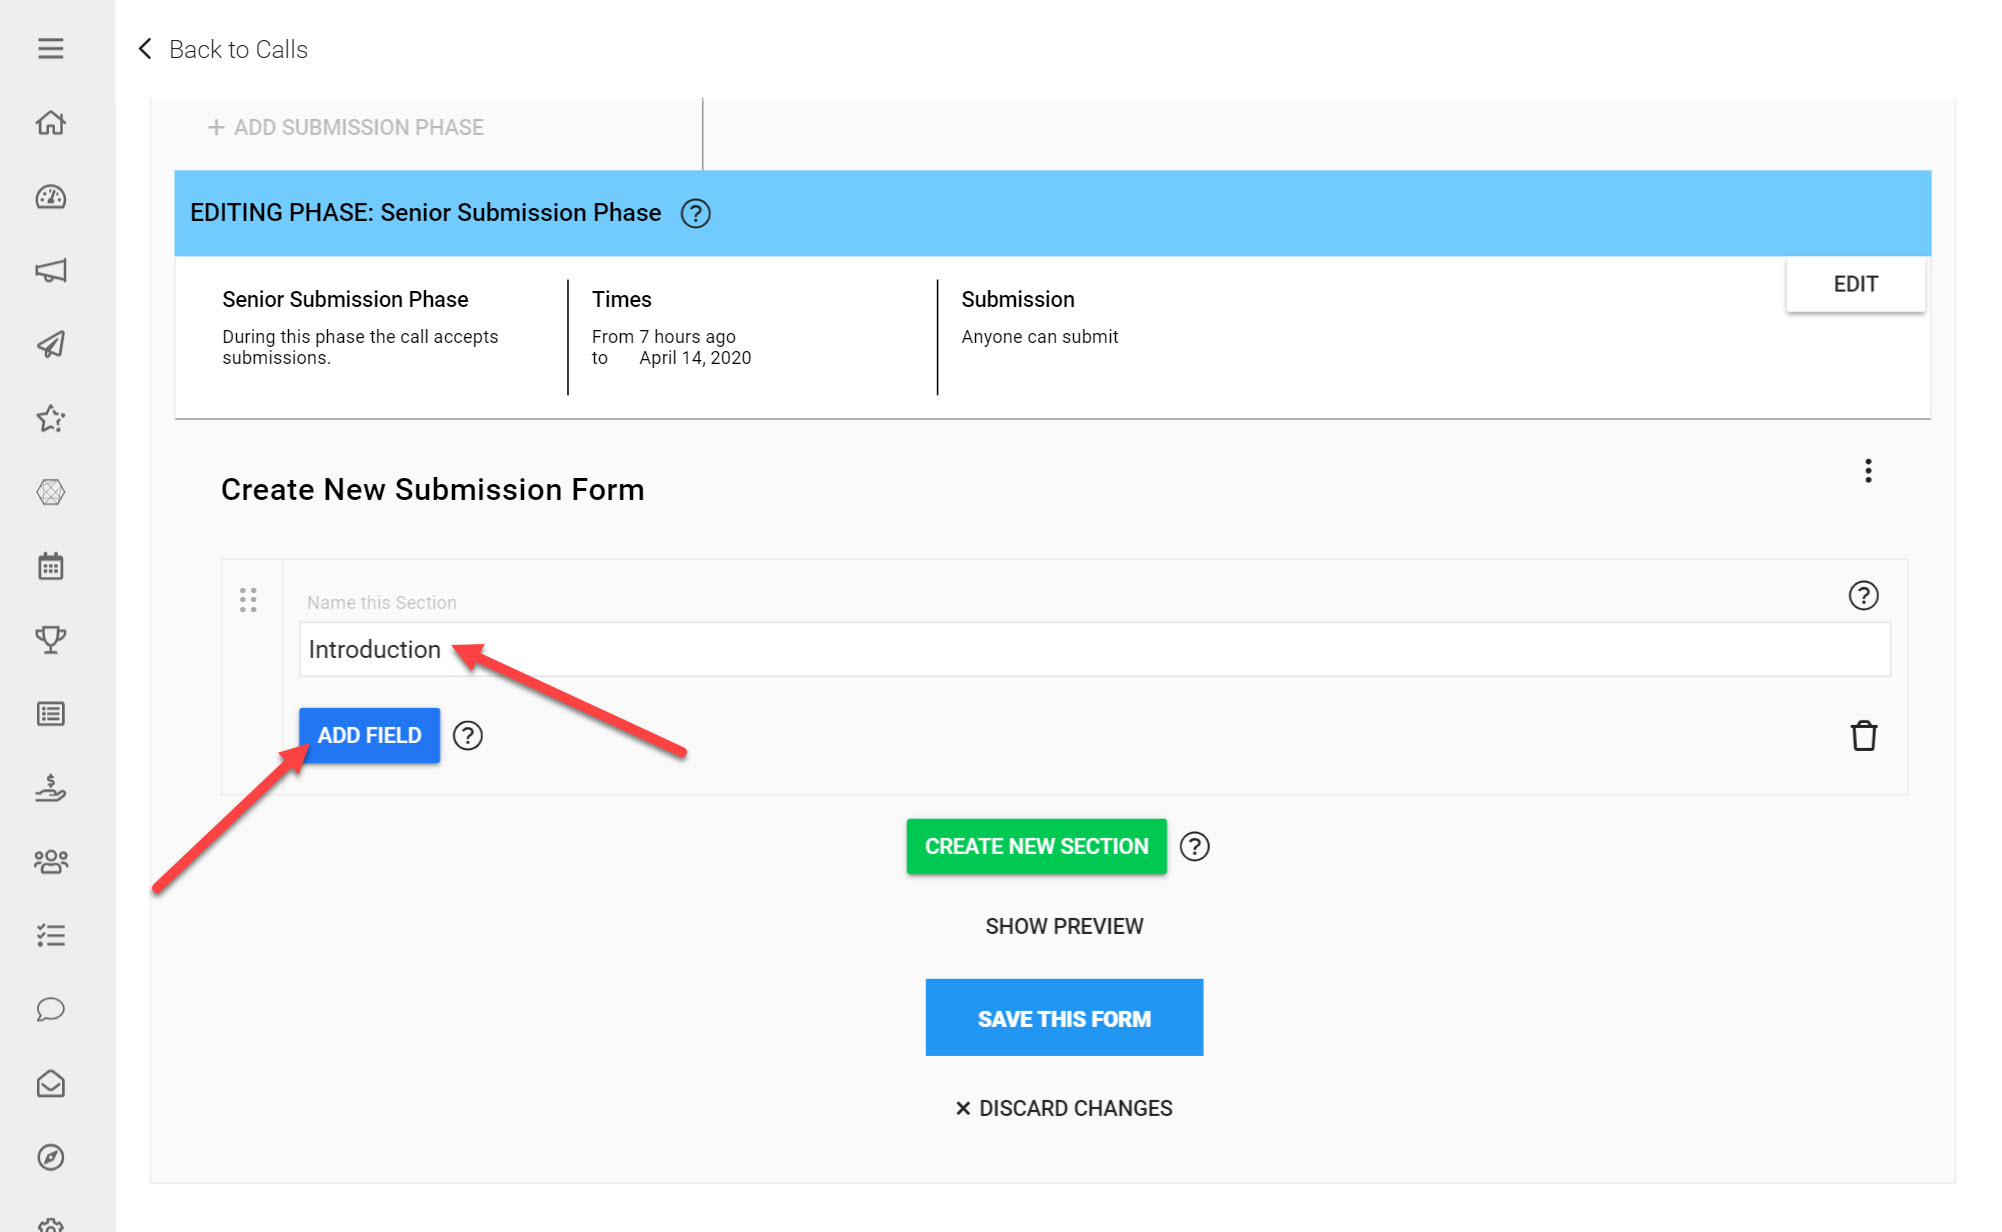
Input Introduction as the Name of this Section
Click Add Field
You can add as many Fields as required to your Submission Form. This article on Submission Form Fields provides more information on which are available to use.
For this example we will add a simple Text Field:
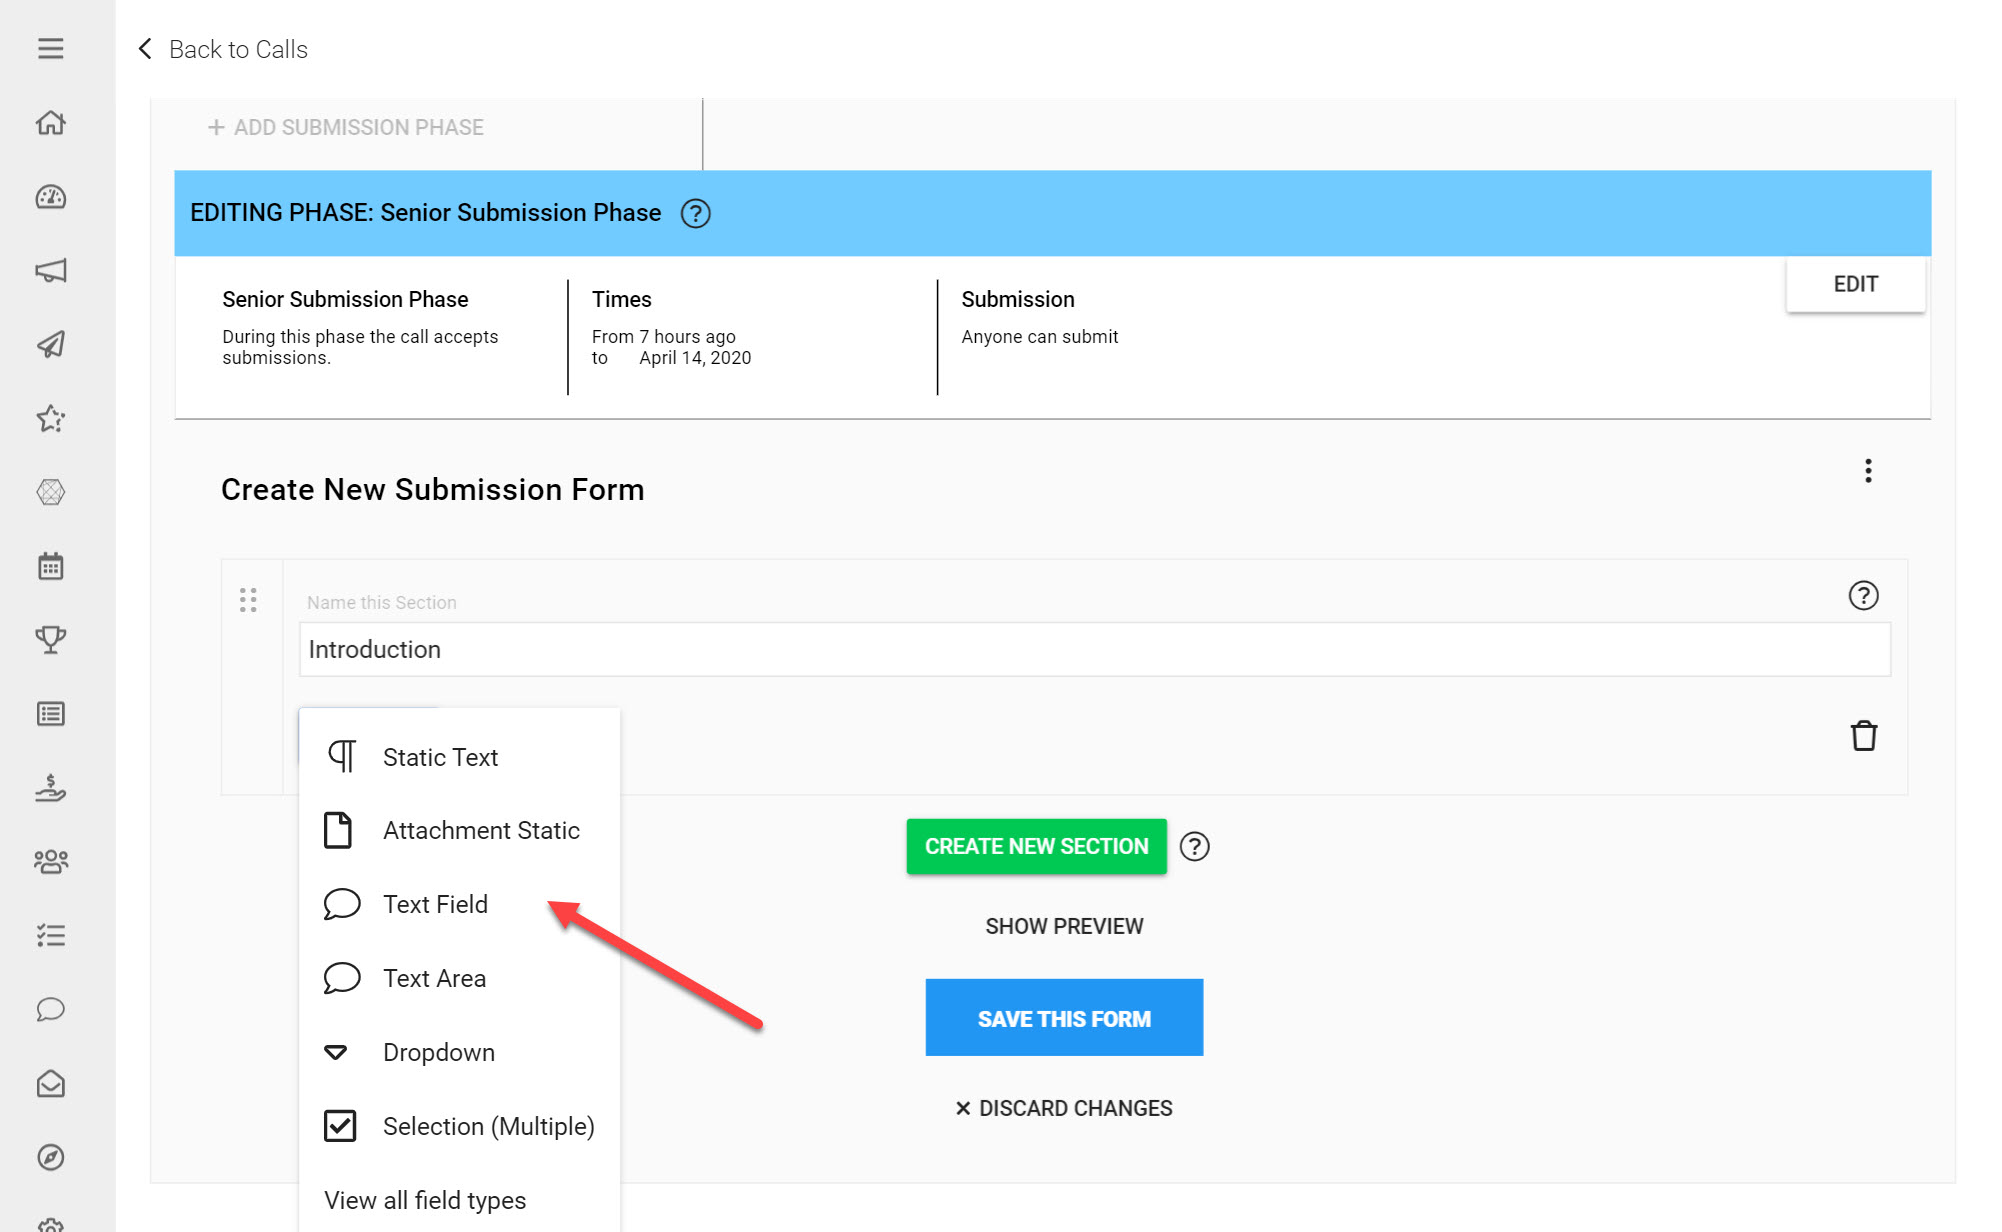
From the list of available Form Fields click Text Field
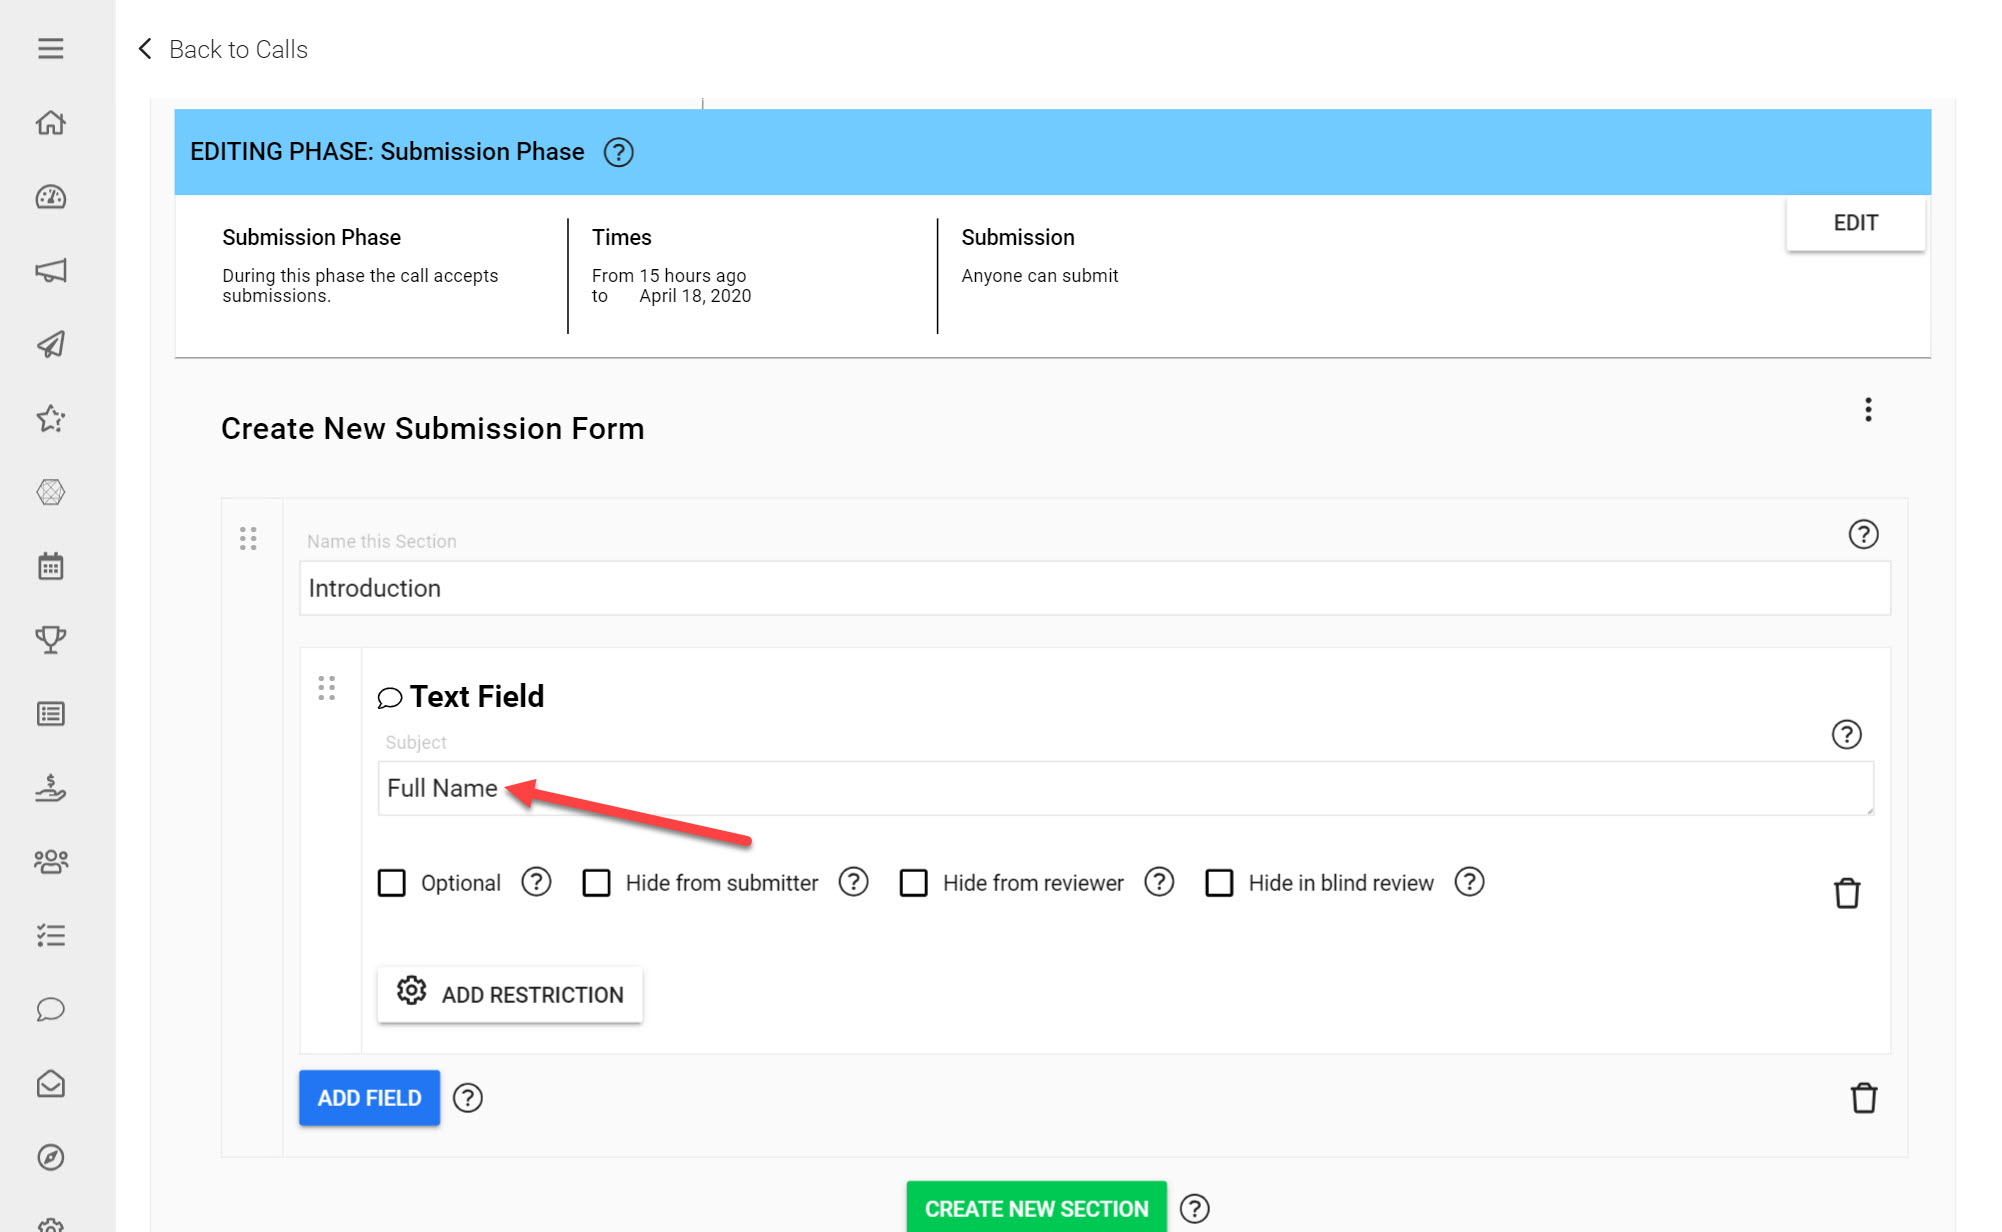
For the Field Subject fill in Full Name
You have now added the first Field that Submitters will answer on your Submission Form.
Modify your Submission Form
You may want to add Sections to your Submission Form to keep questions organized, or re-arrange Fields to change the order of questions on your Submission Form.
Sections allow you to organize Call content into manageable chunks by grouping specific Form Fields together. This ensures you are able to keep relevant Submission questions together to make the process of submitting as straightforward as possible.
Multiple Sections can be added by clicking Create New Section on the bottom of your Form. Finally multiple Pages can be created by using the Page Break separator under Field Types.
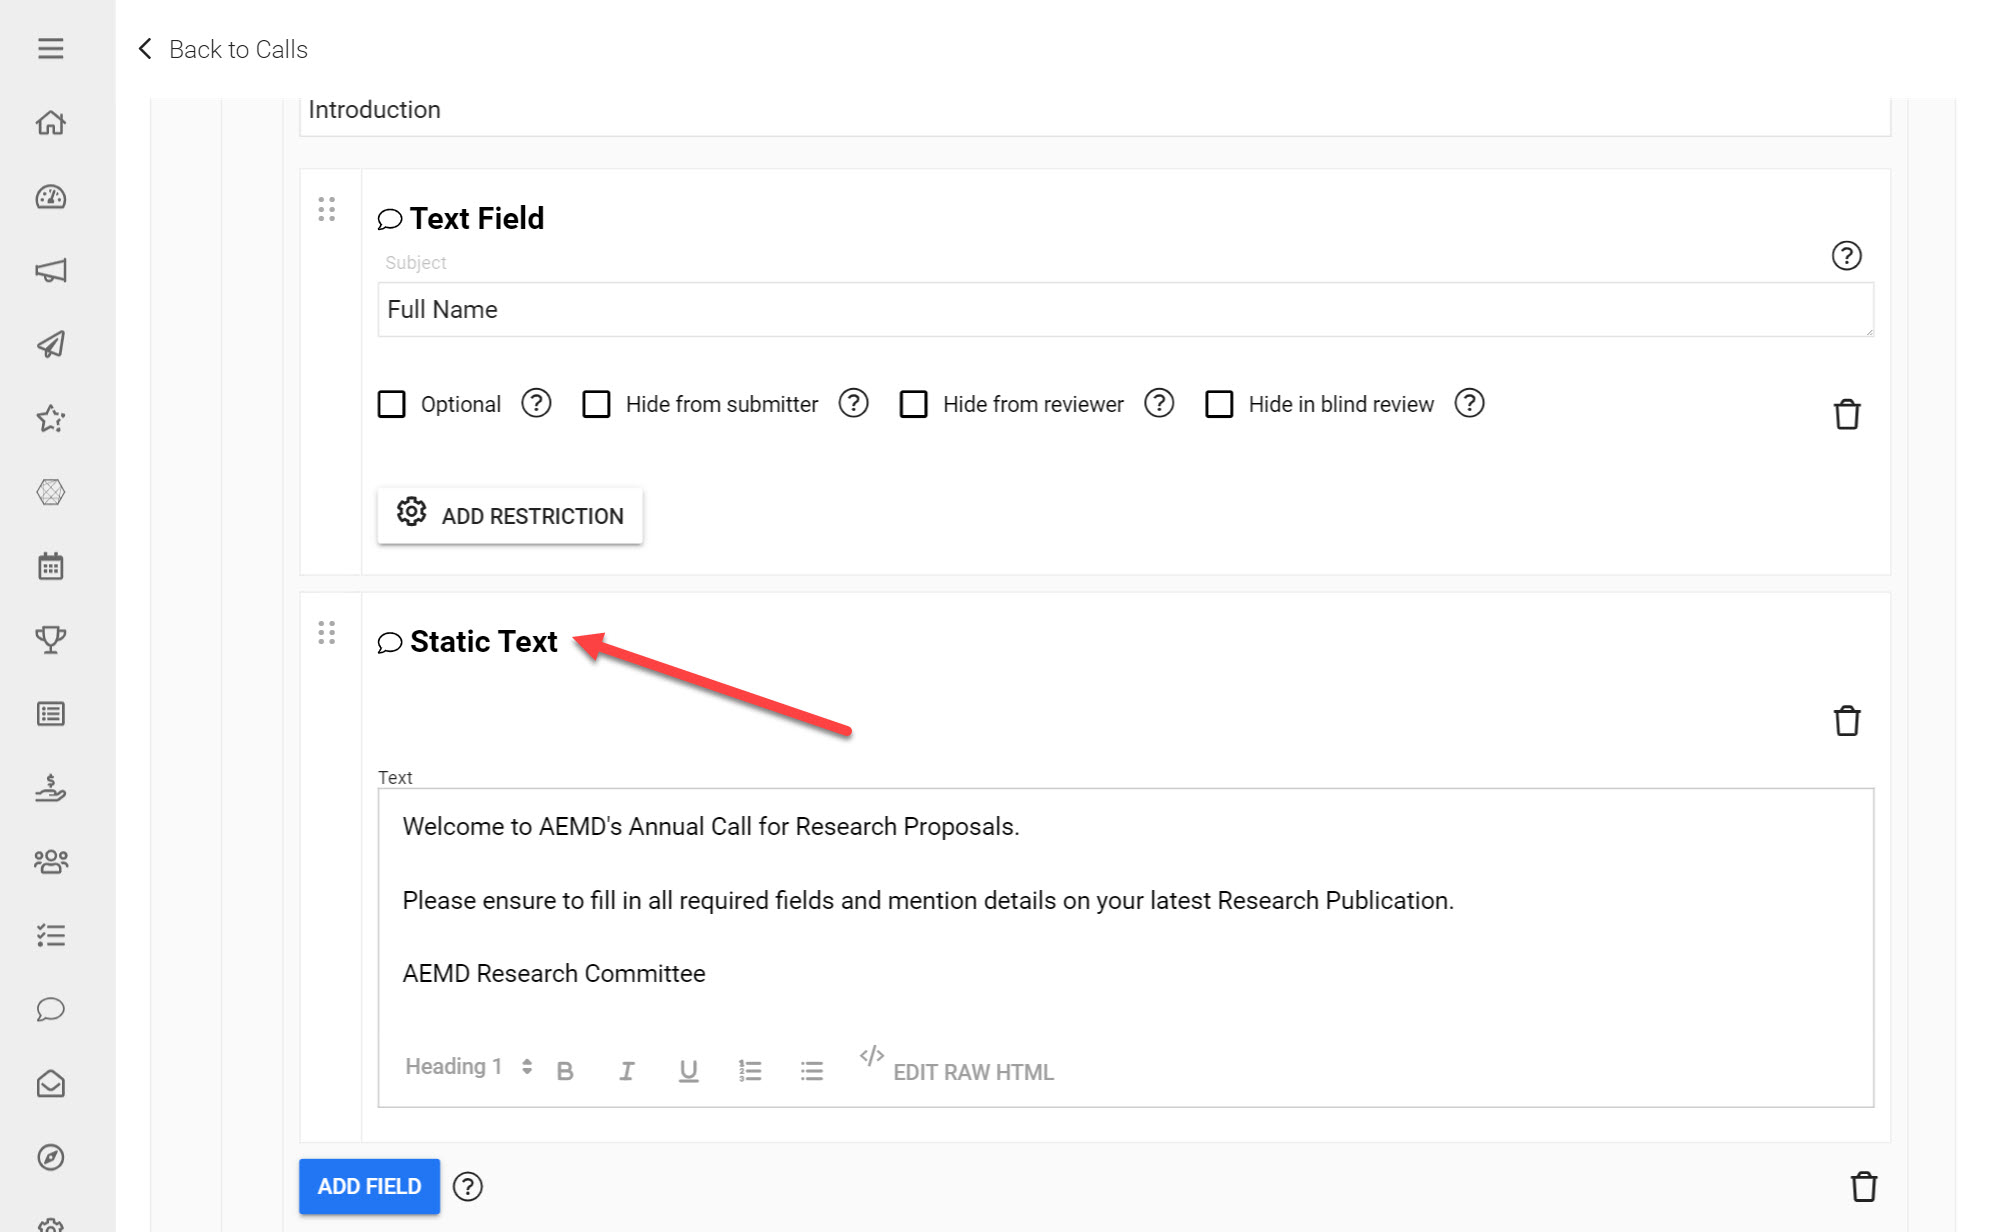
Click Add Field
Click Static Text
Input some instruction text to add in this position
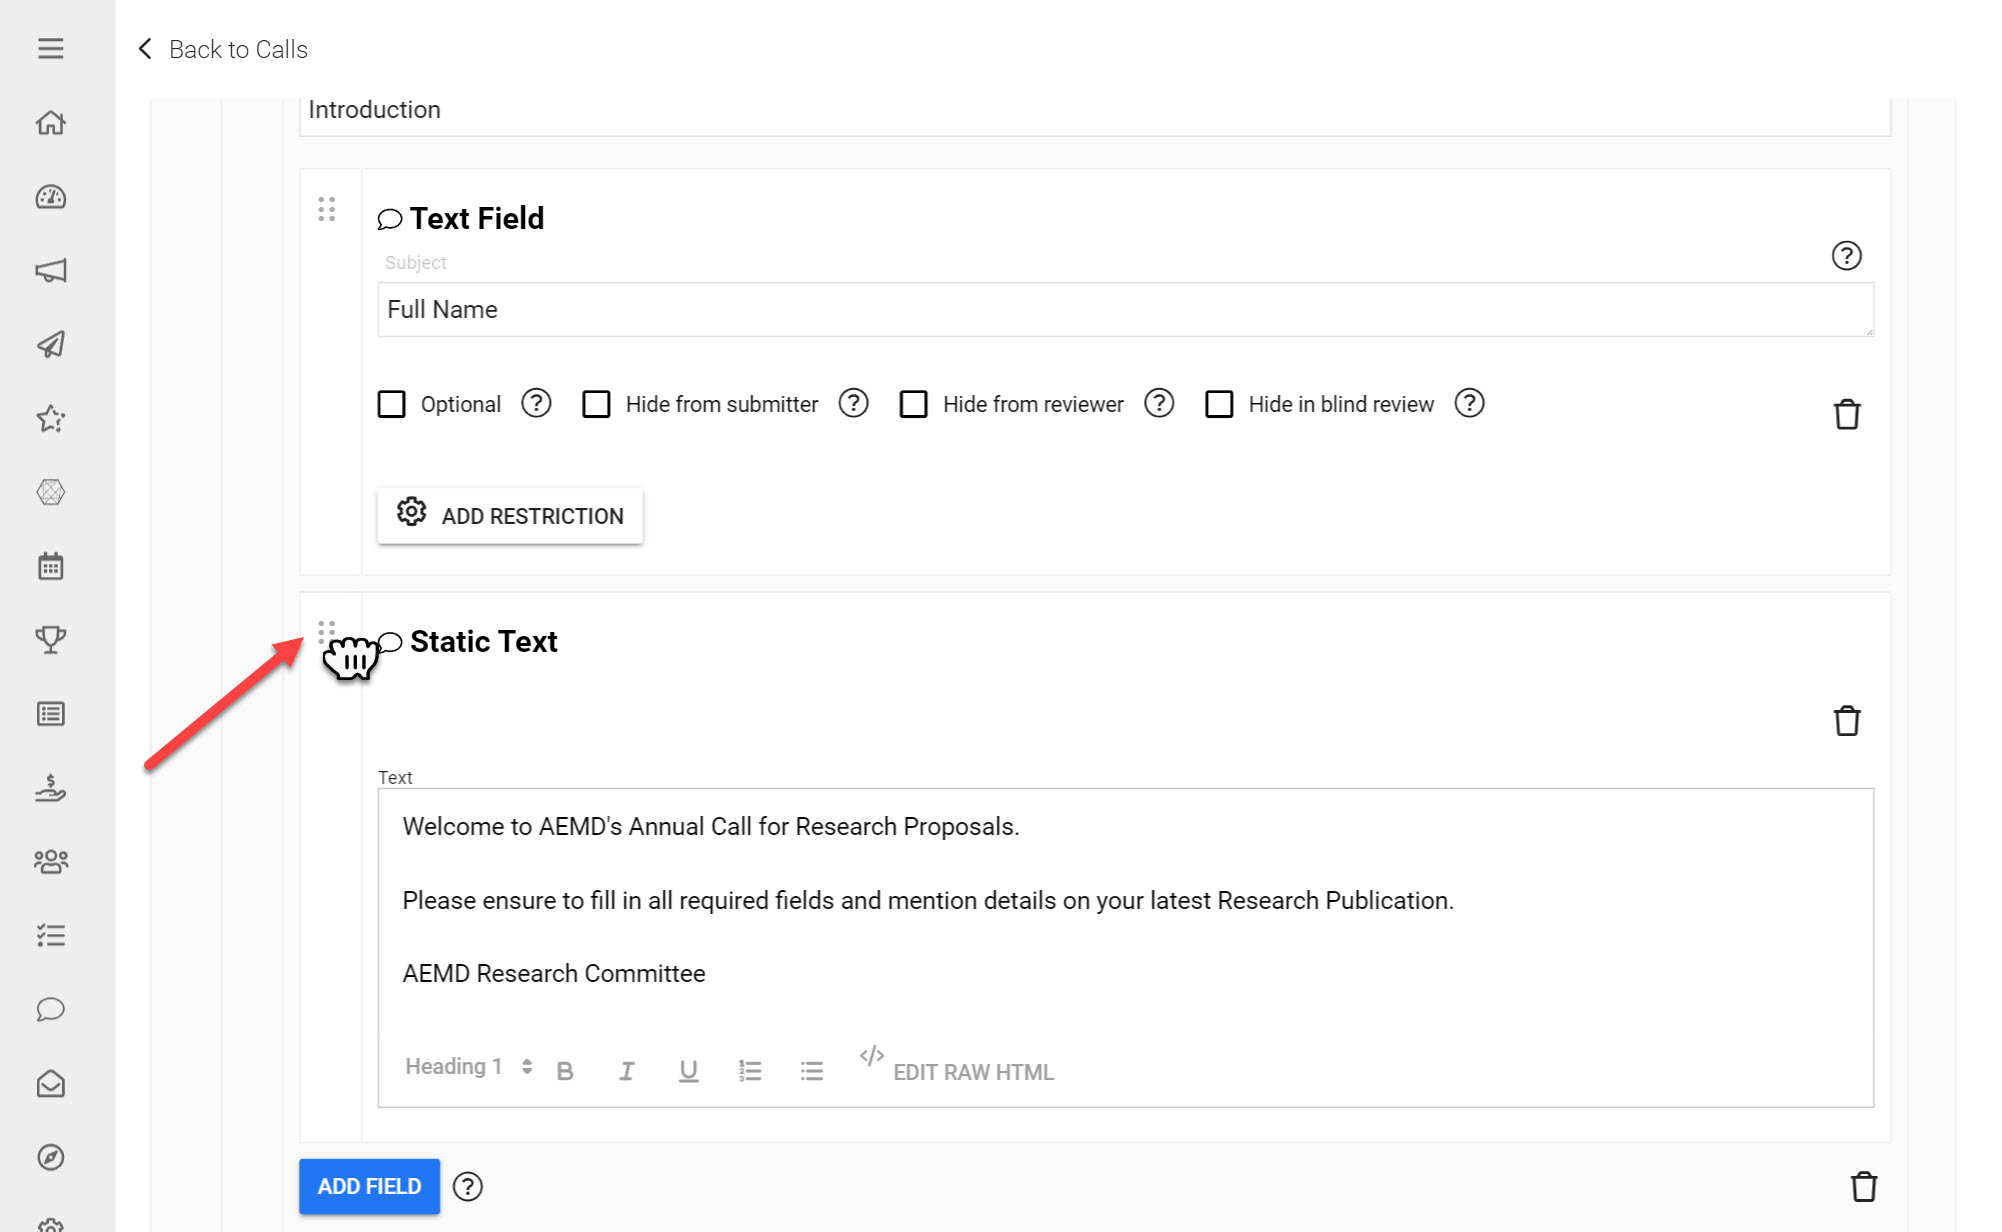
Use the drag and drop feature to re-order this Static Text Field above the Full Name Field
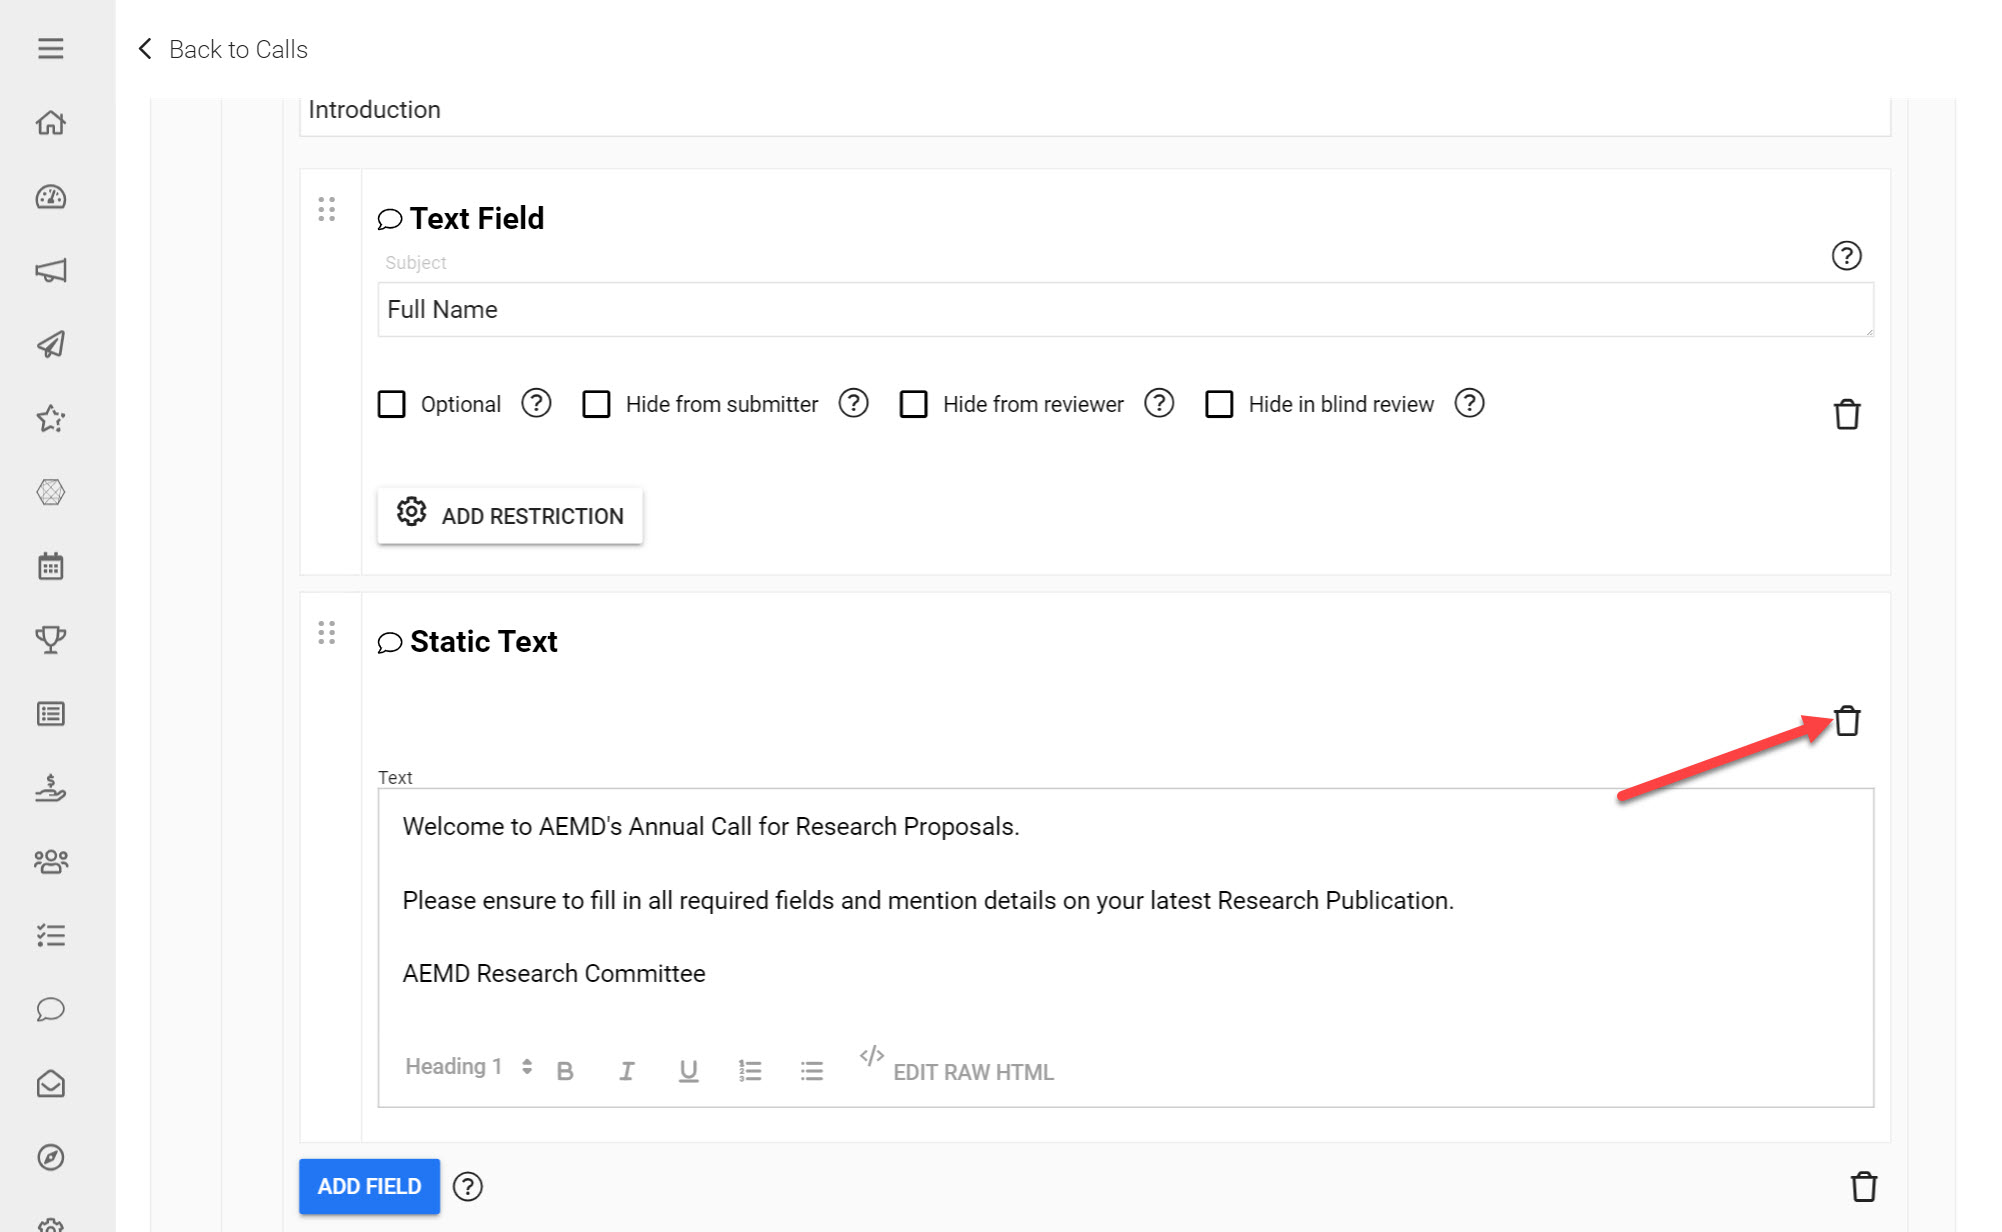
You can delete any added Fields by using the trashcan icon located at the top-right
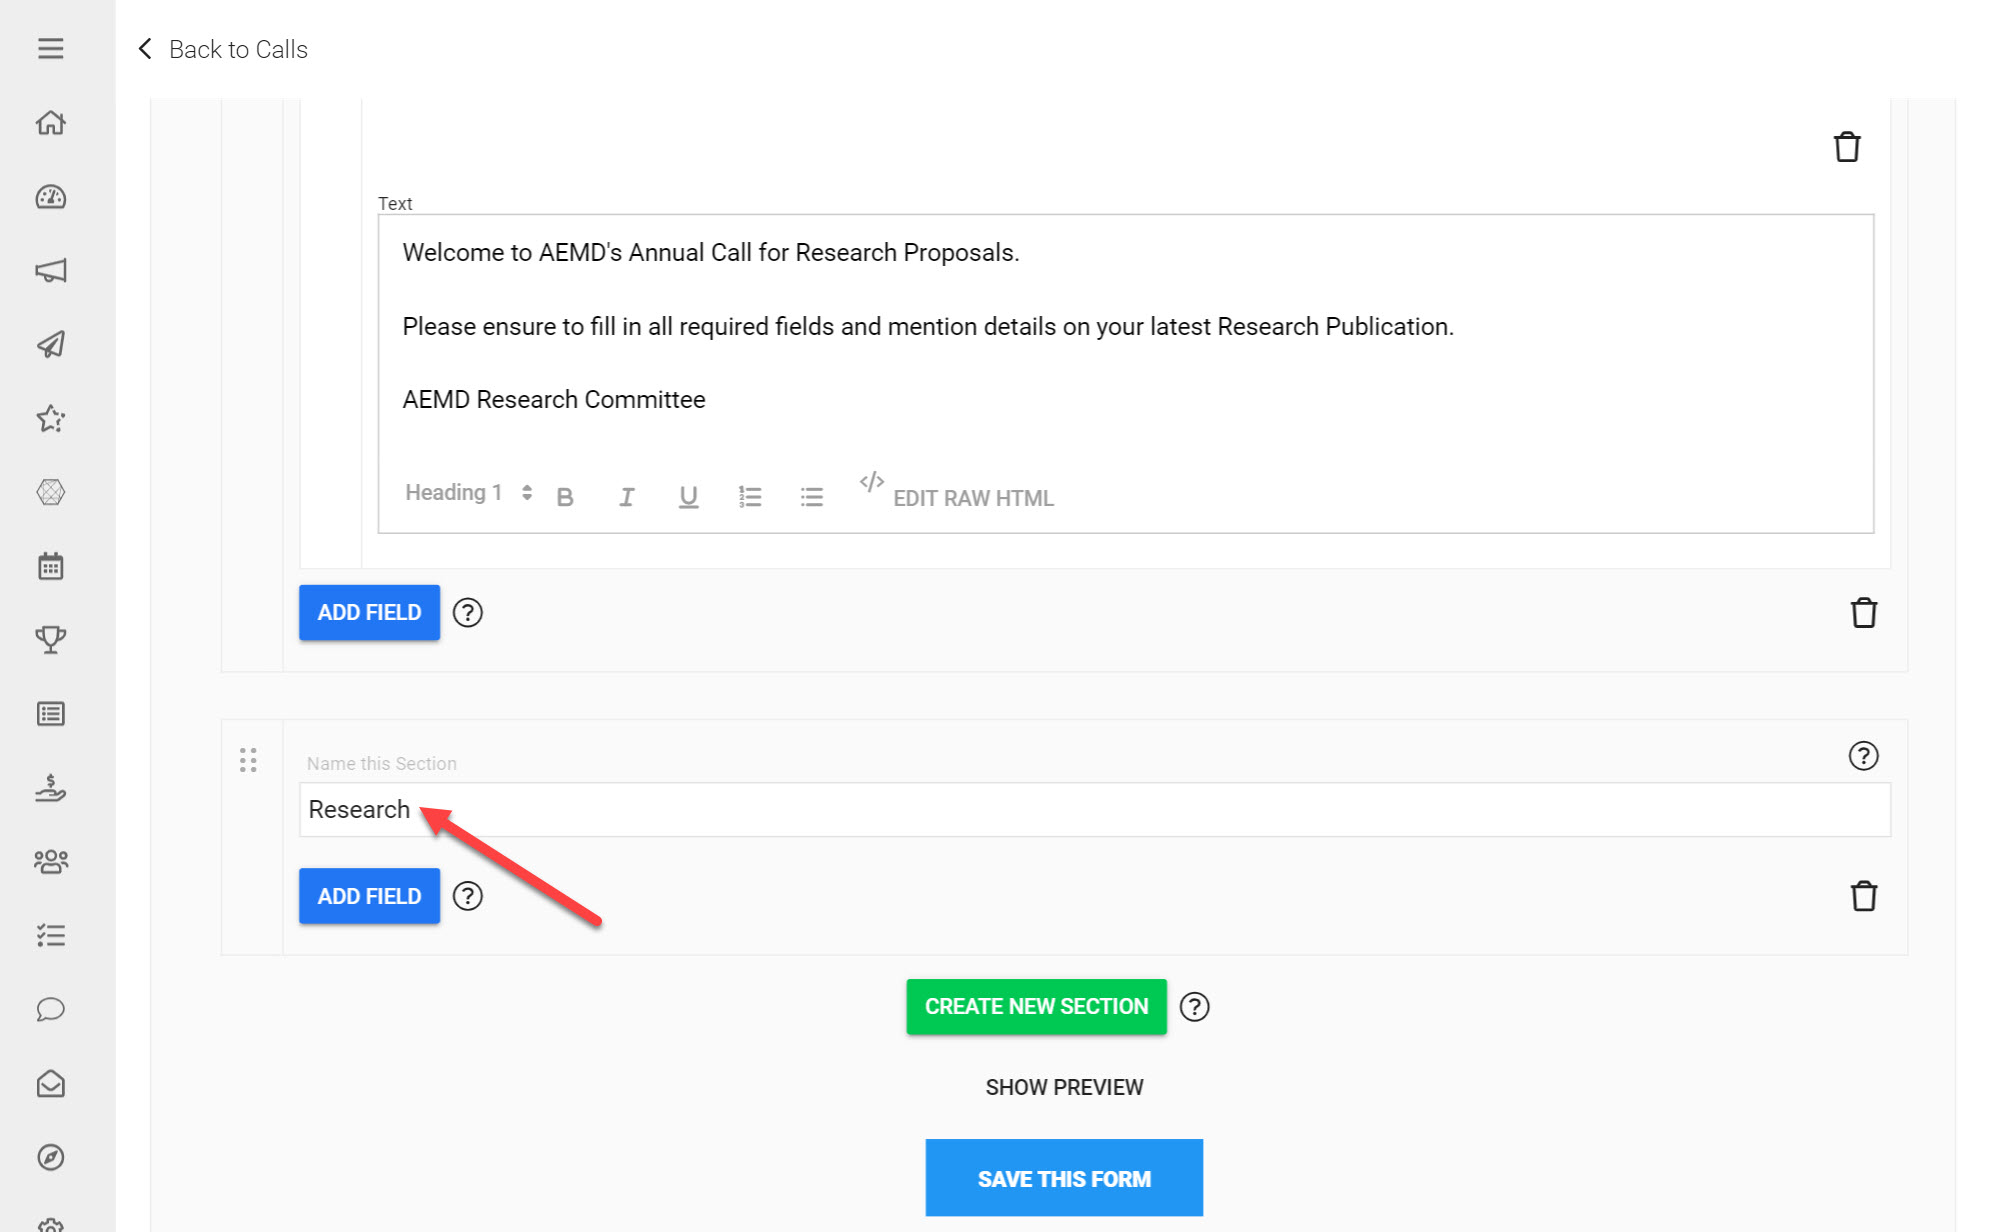
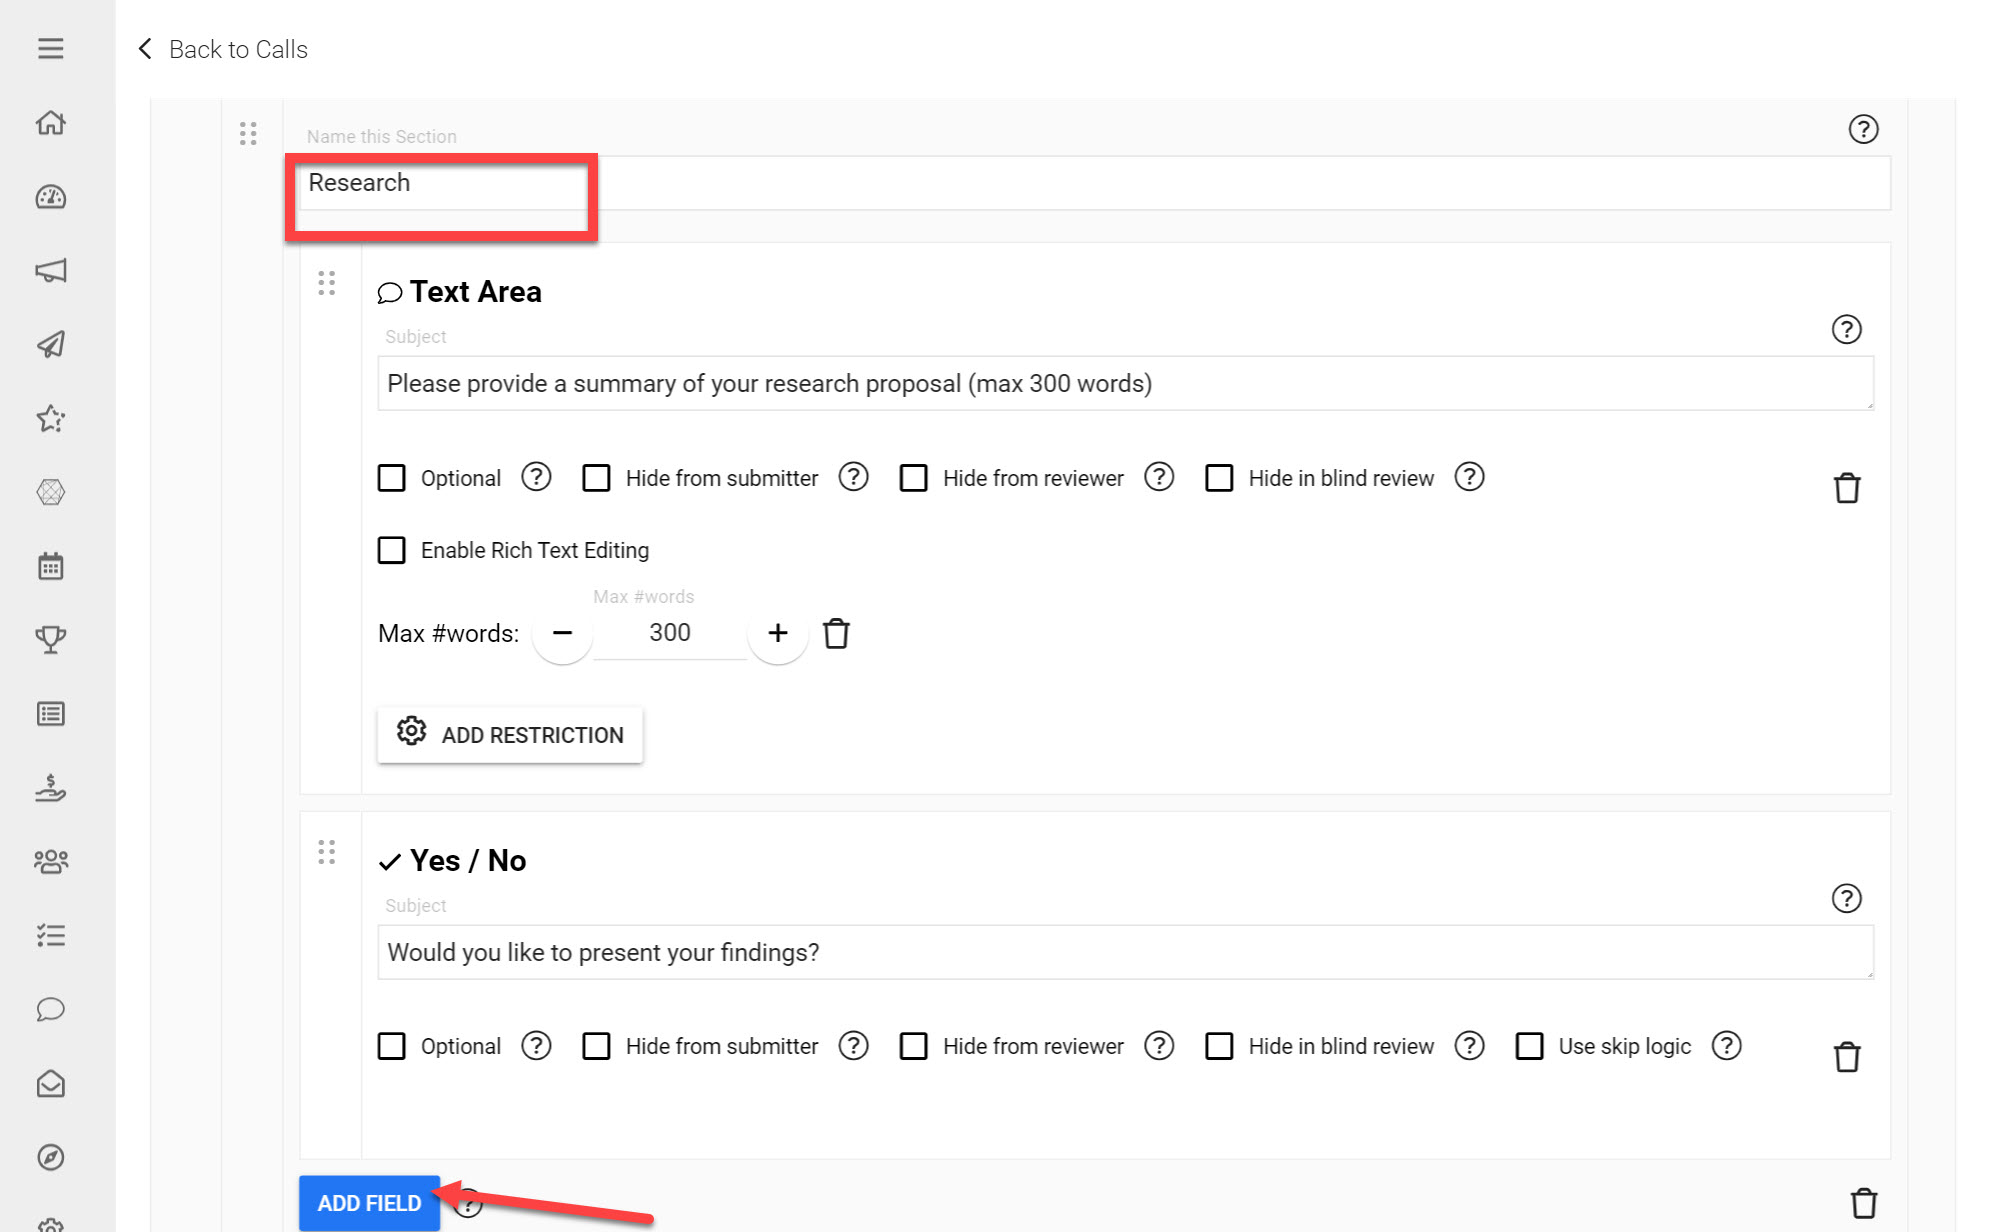
Click Create New Section and label it Research
Click Add Field in the Section you have just added
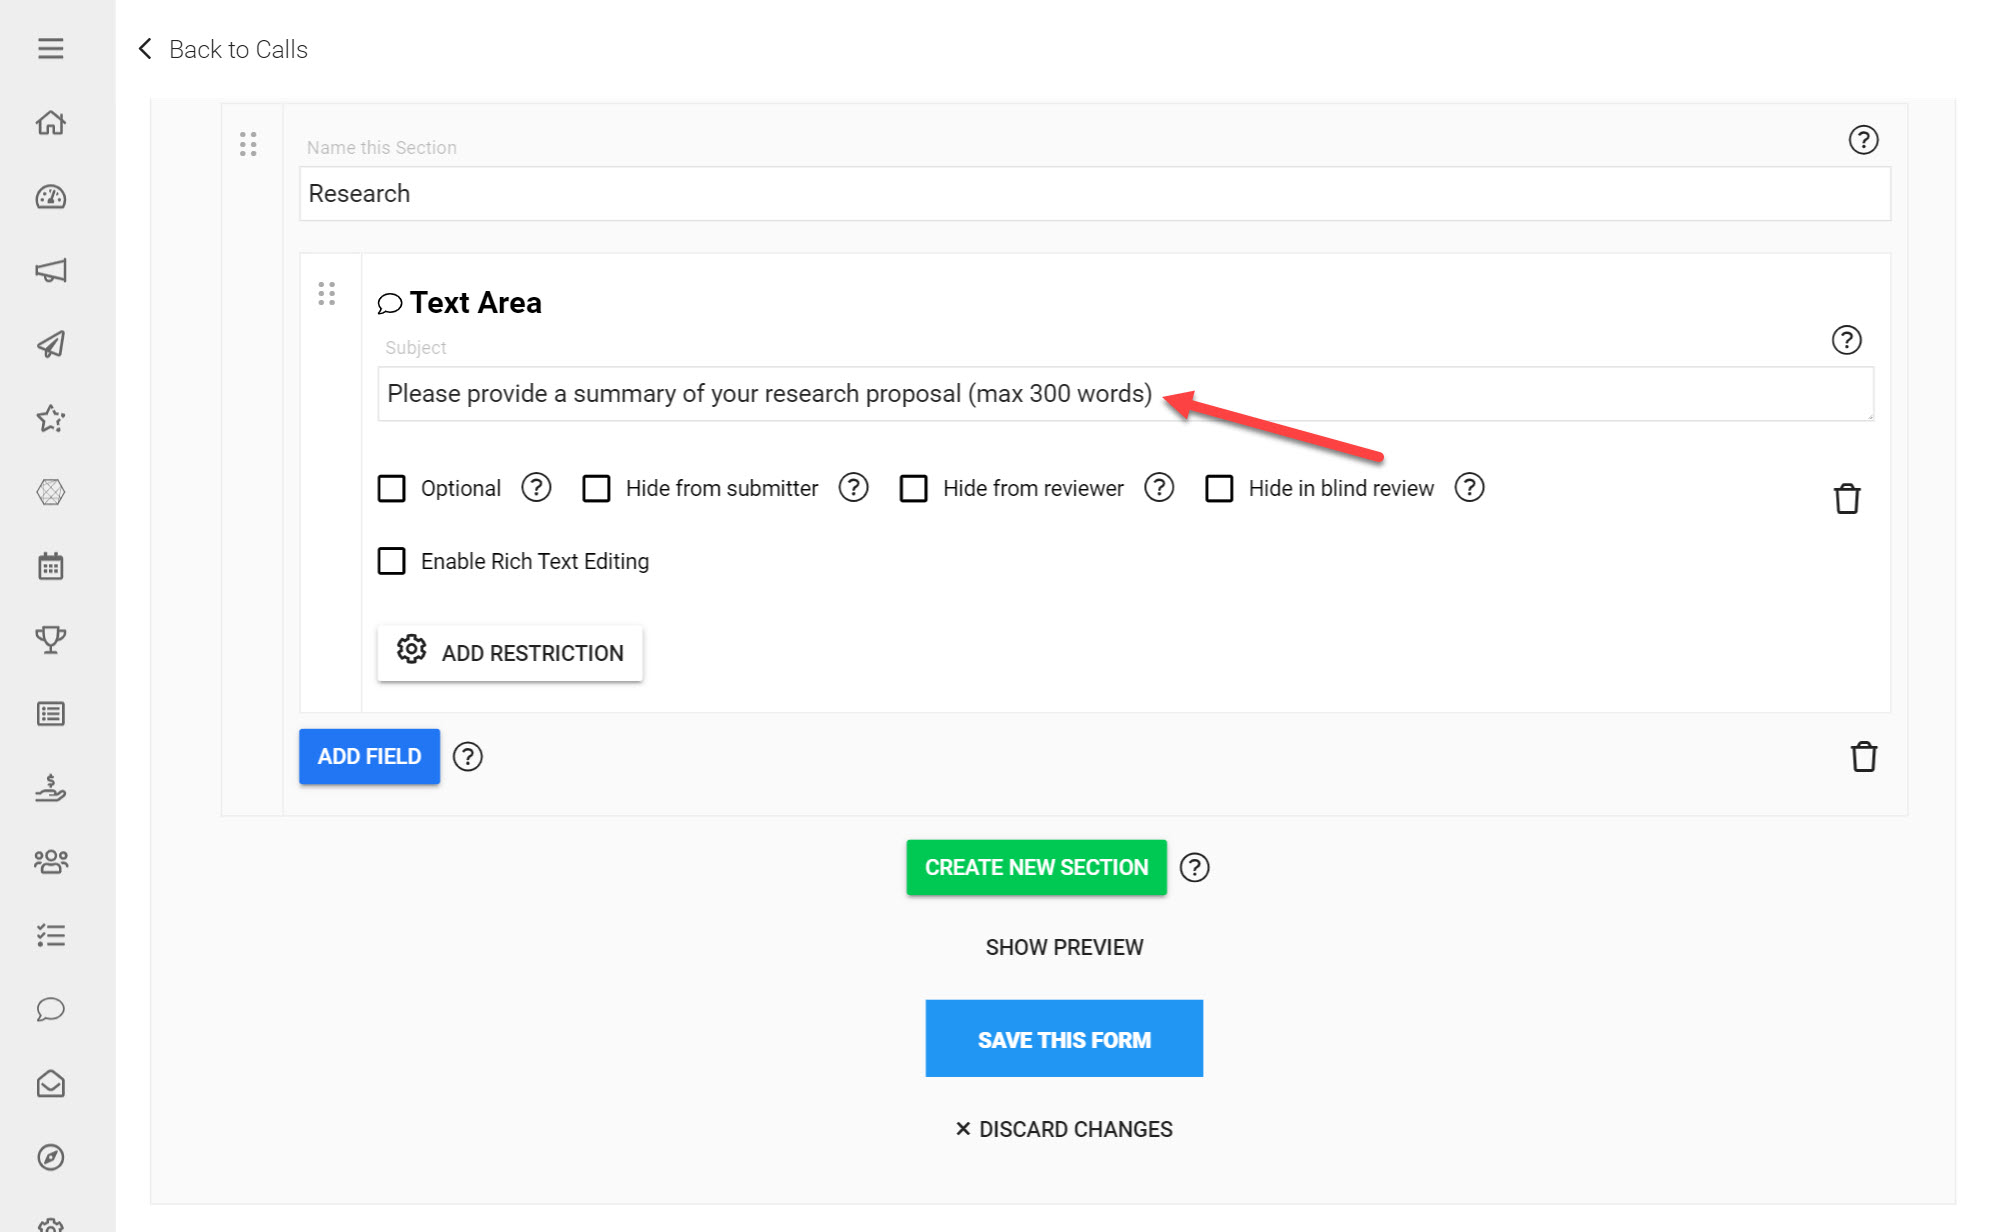
Click Text Area
Fill in 'Please provide a summary of your research proposal (max 300 words)' in the subject line.
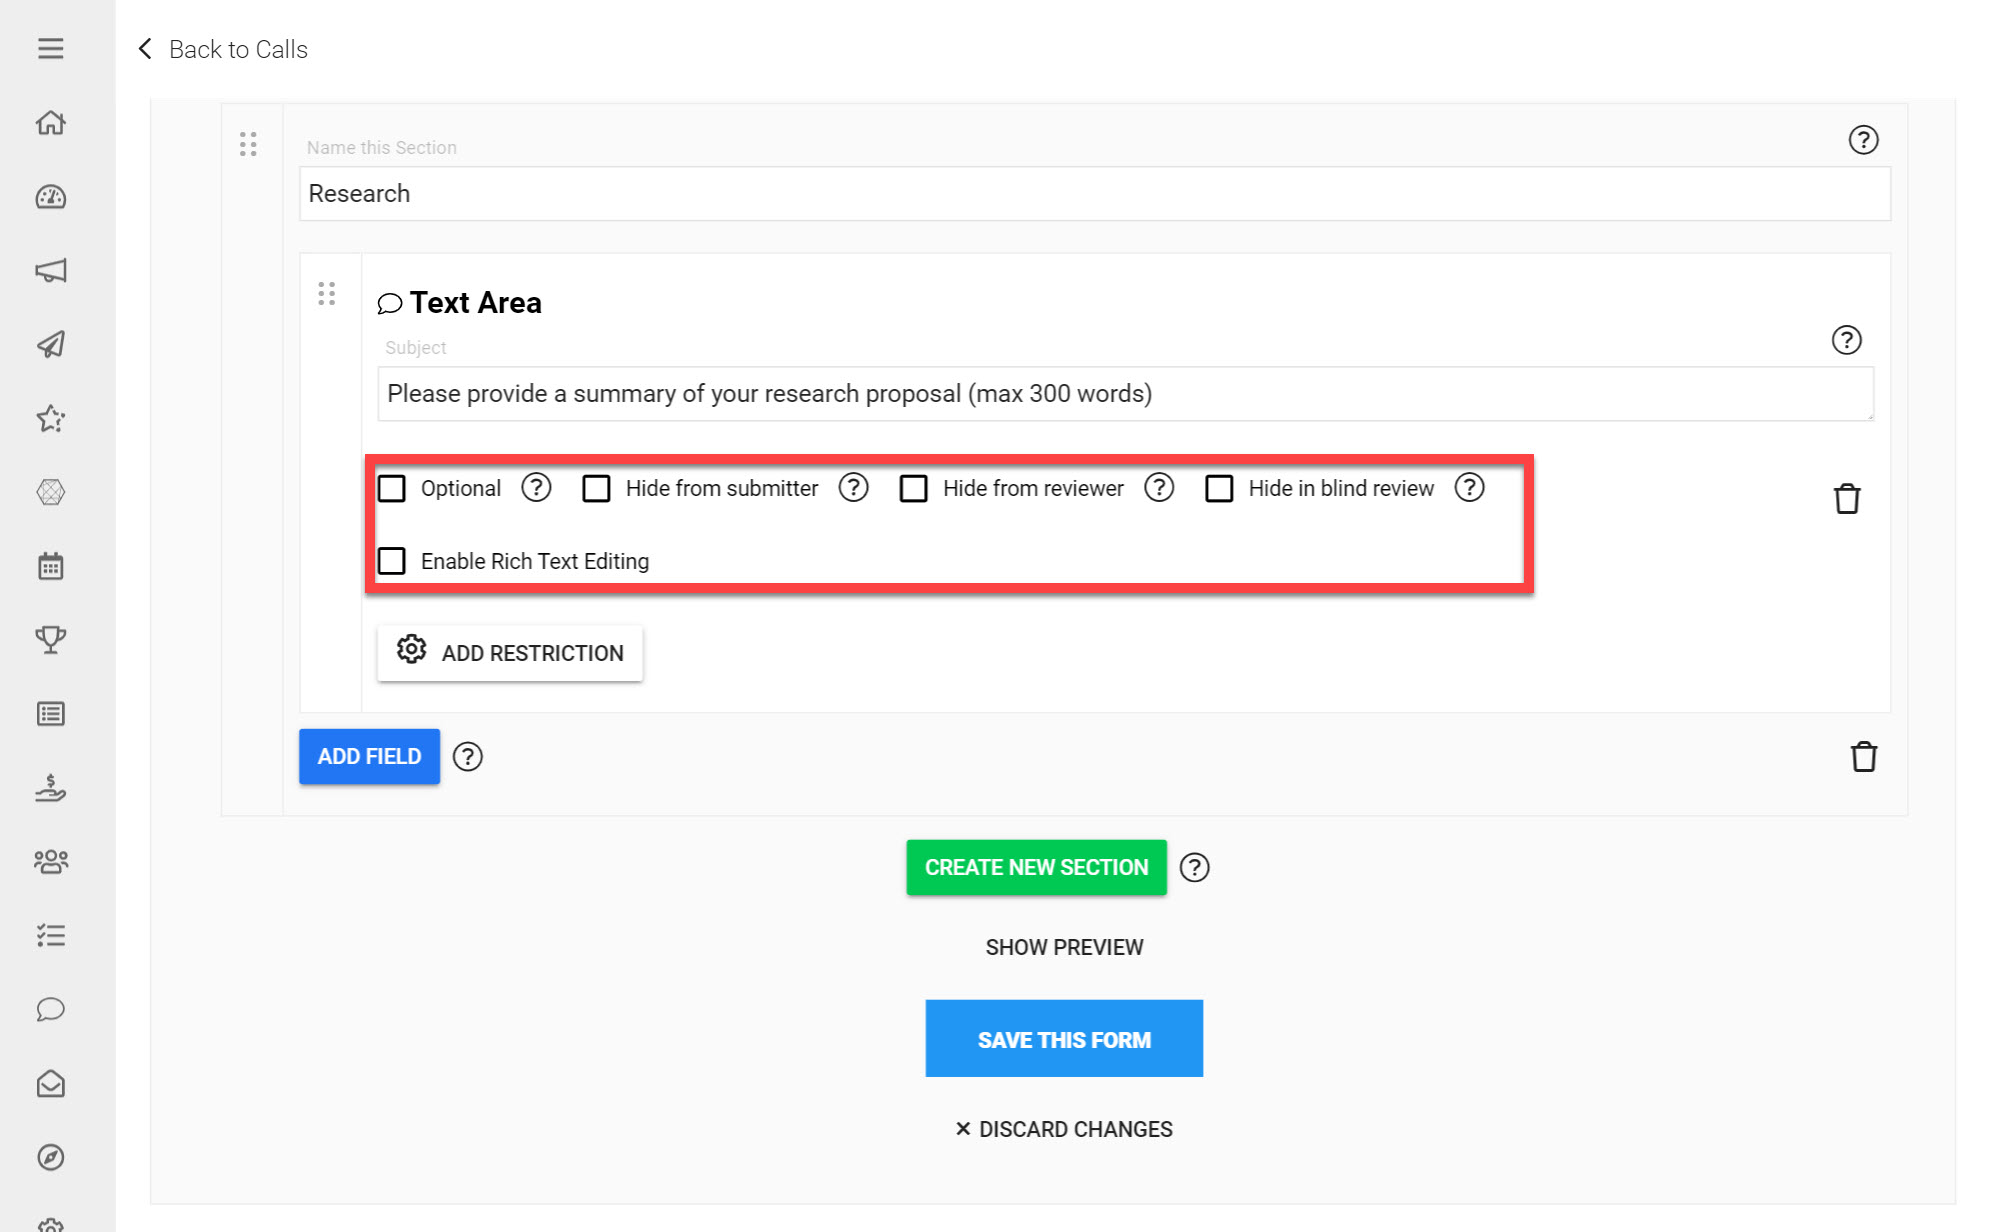
Adjust your Form Field Options
Under each added Form Field, you have a few additional settings to control how the Field appears to users in Slayte. Below you will see the following Field Options:
Optional: If you would not like to enforce Submitters fillling in this Field, tick this checkbox
Hide from Submitter: If you would like this Field to be hidden on the Form from the Submitter, tick this checkbox.
Hide from Reviewer: This option will hide the value captured from the submitter in this field, if checked.
Hide in Blind Review: The value captured from the Submitter will not be displayed to the Reviewer if this option is checked, AND if the Review Settings are set to Blind Review.
Add Restriction: With Fields that require text inputs, you can enforce a minimum or maximum amount of words or characters.
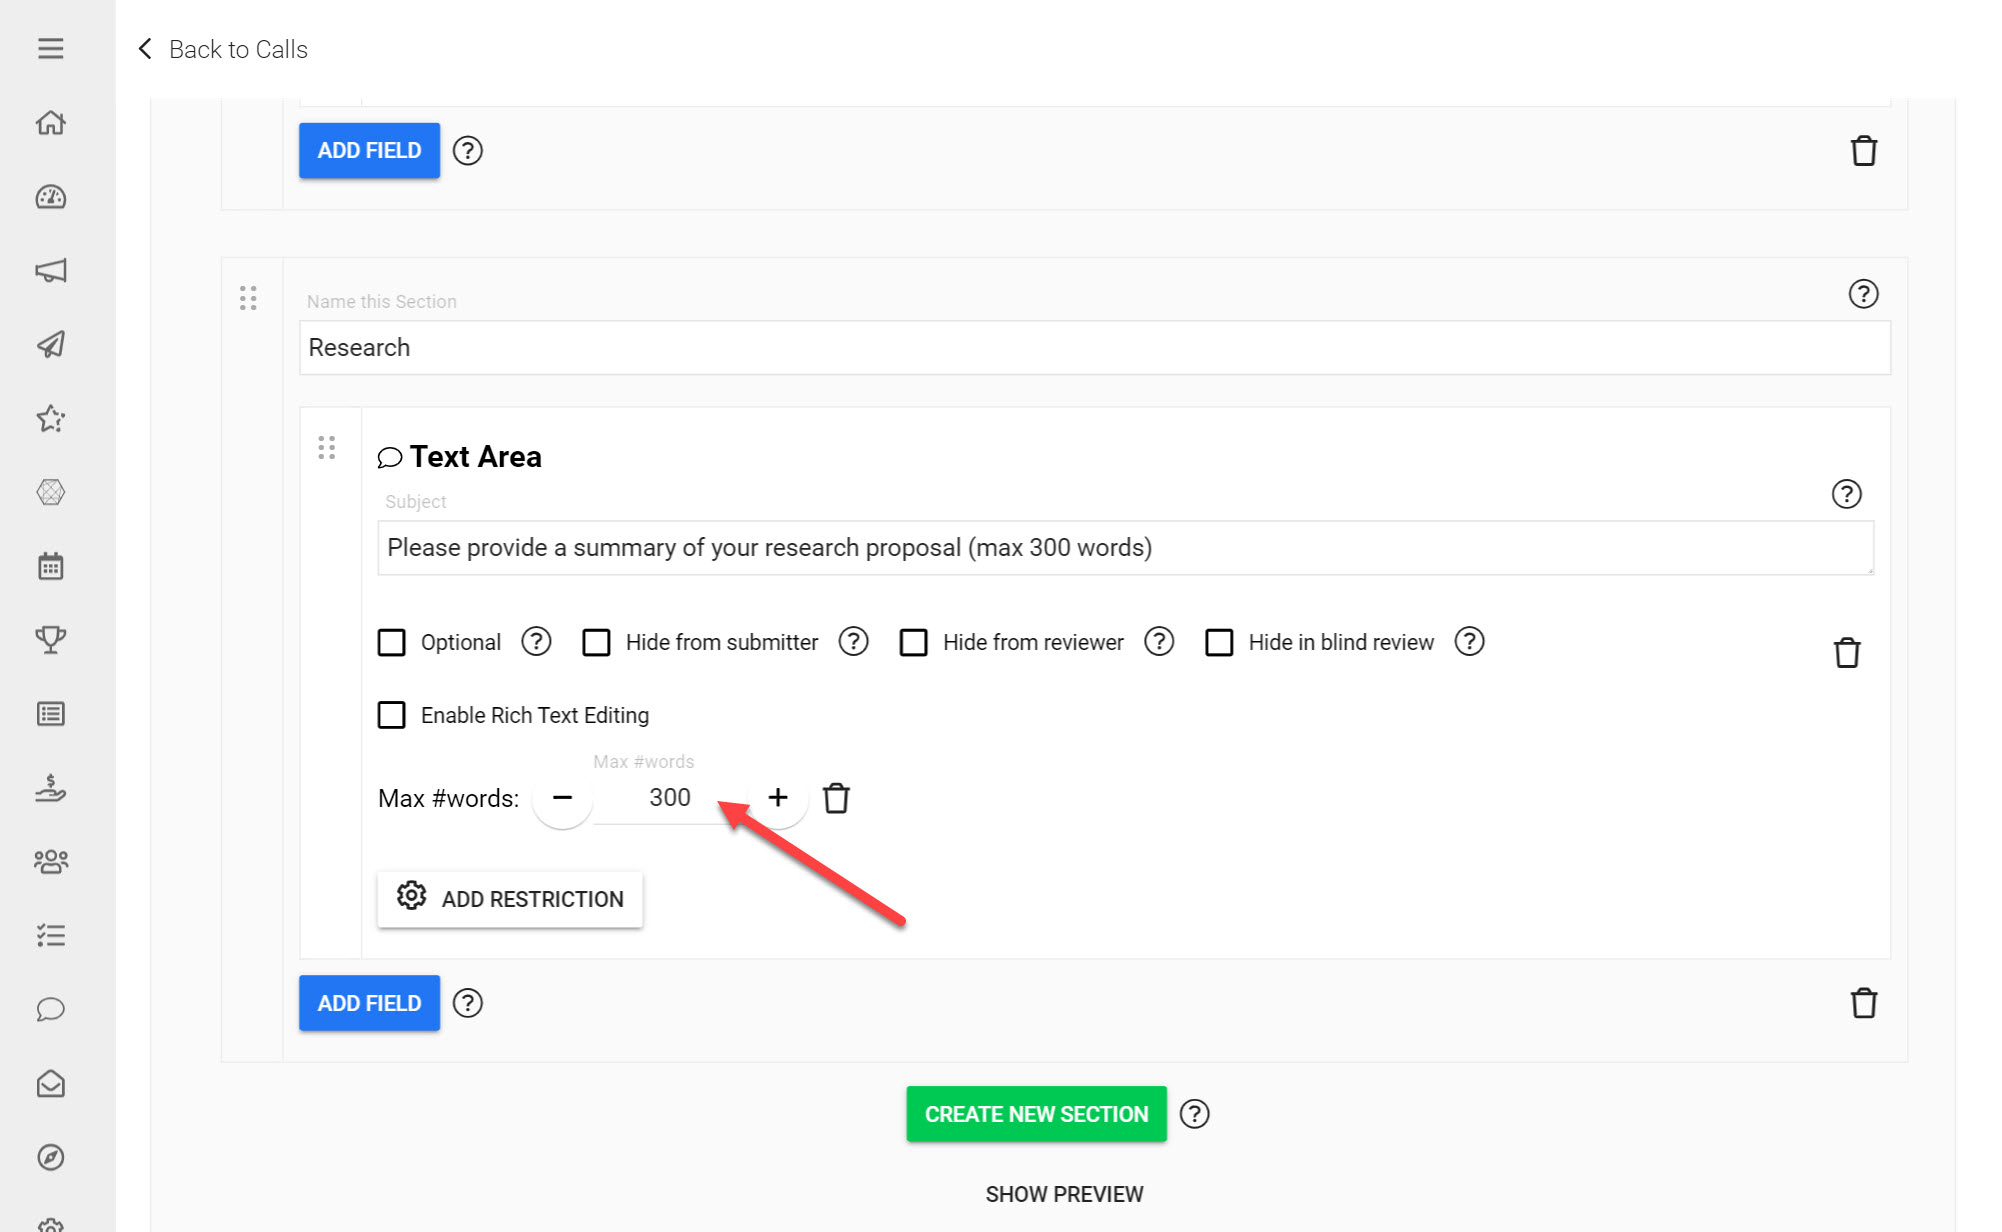
Click Add Restriction
Click Max #words
Input the number 300 to restrict the number of words of this research summary to 300 words.
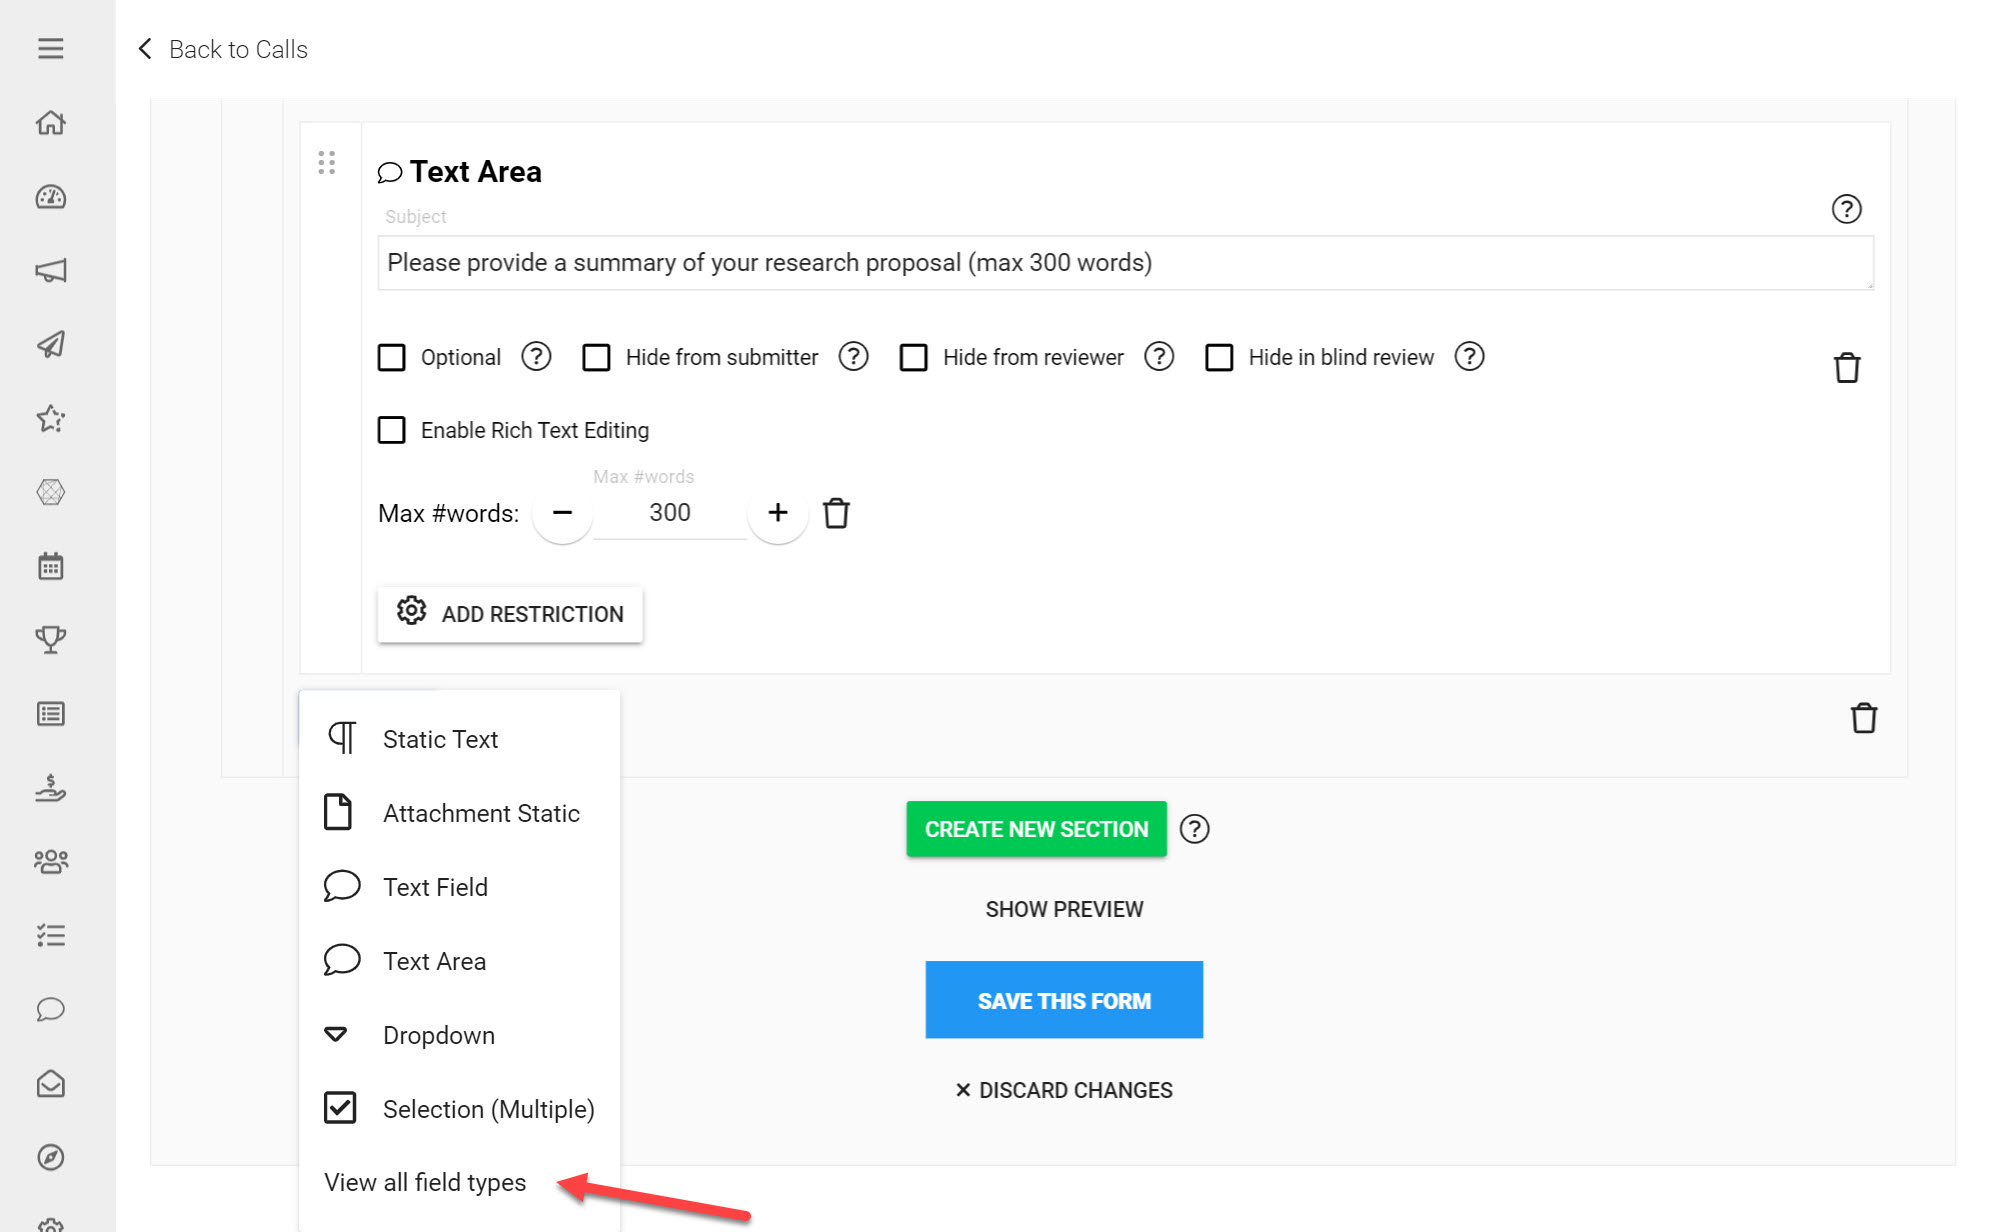
Click Add Field
Click View all Field Types
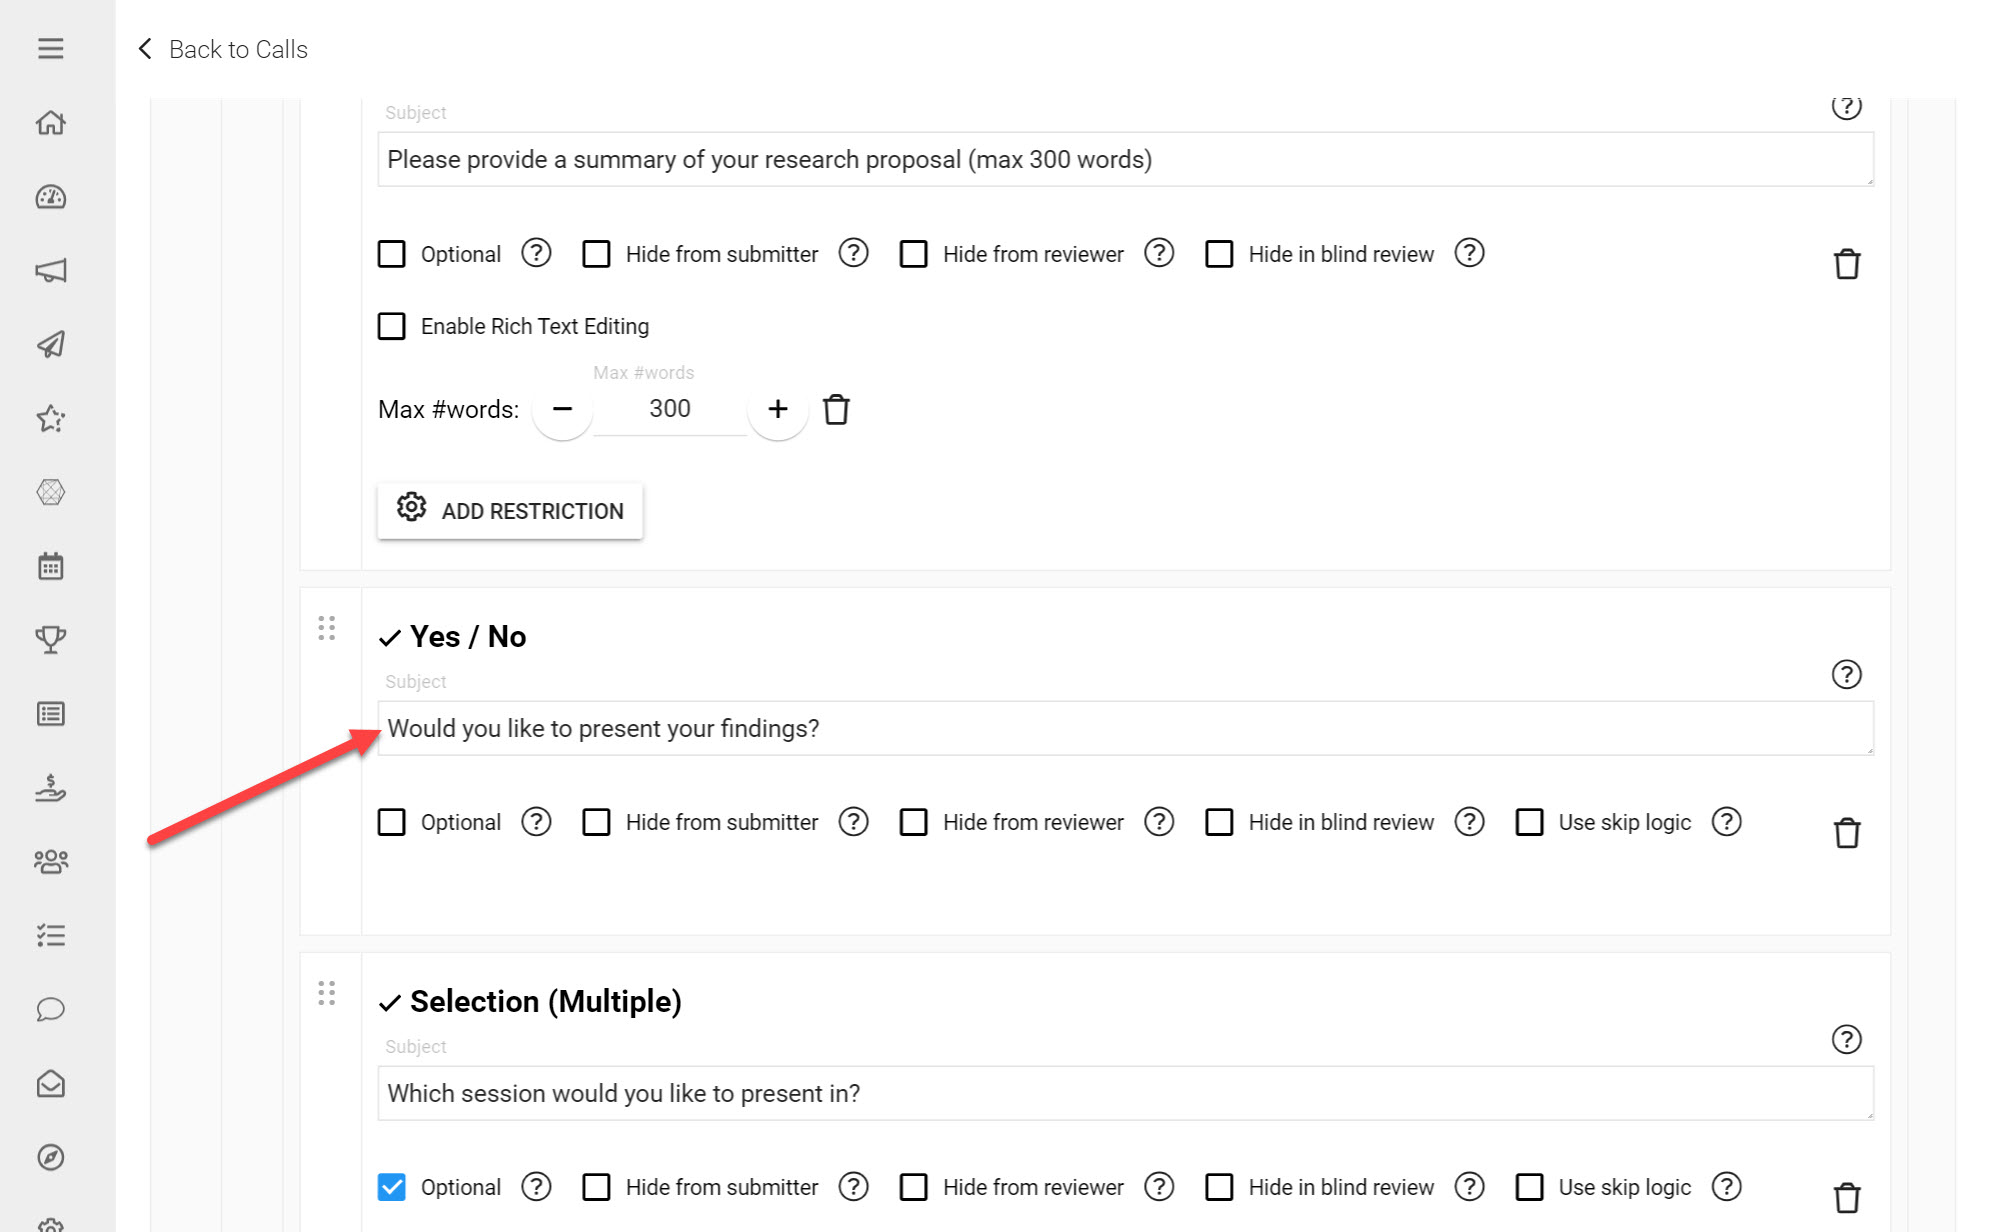
Click Yes/No and type in the subject line 'Would you like to present your findings?'
You can preview how your Submission Form will appear to Submitters at any point by clicking Show Preview at the bottom of your Form.

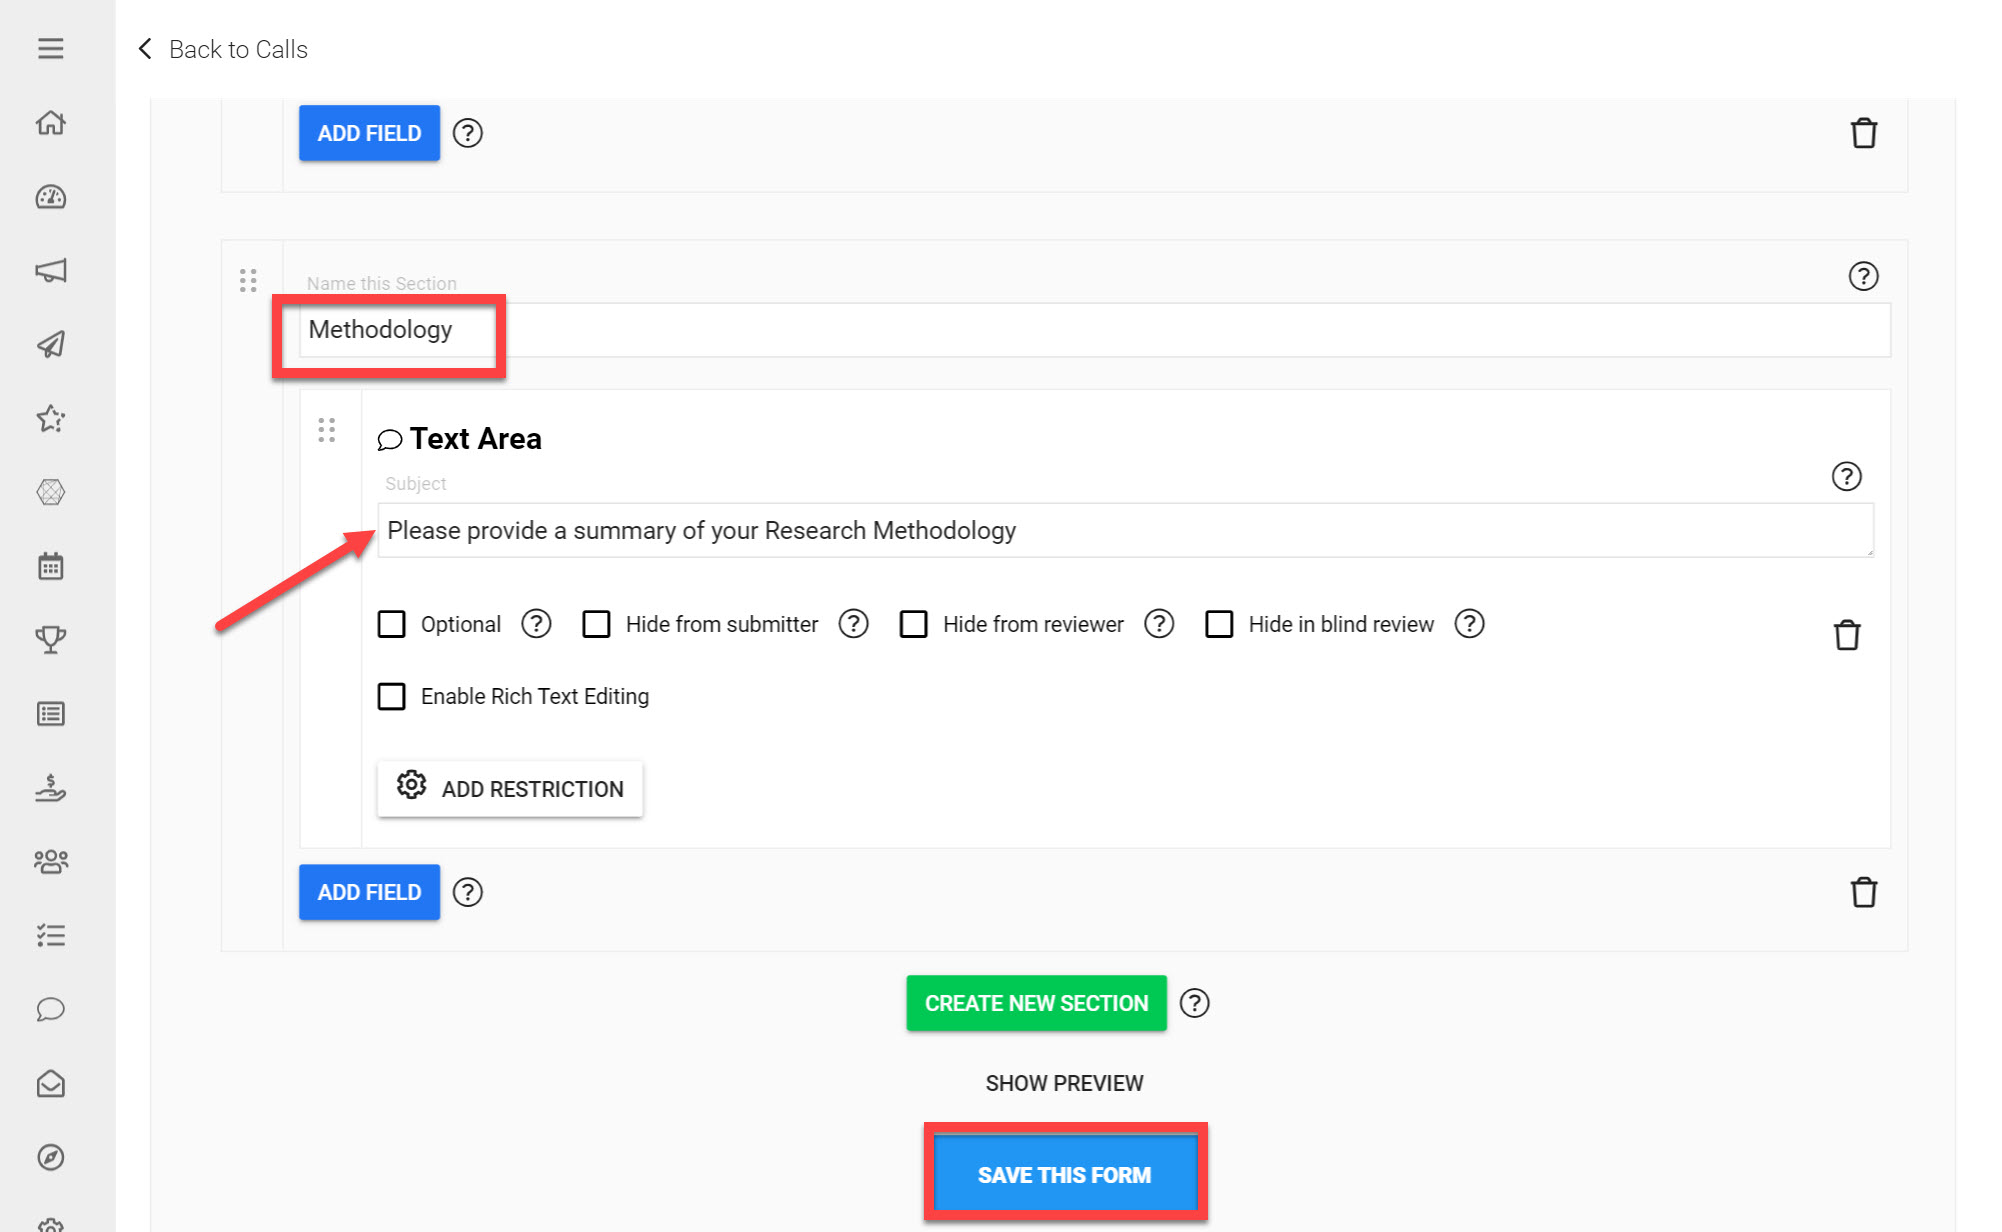
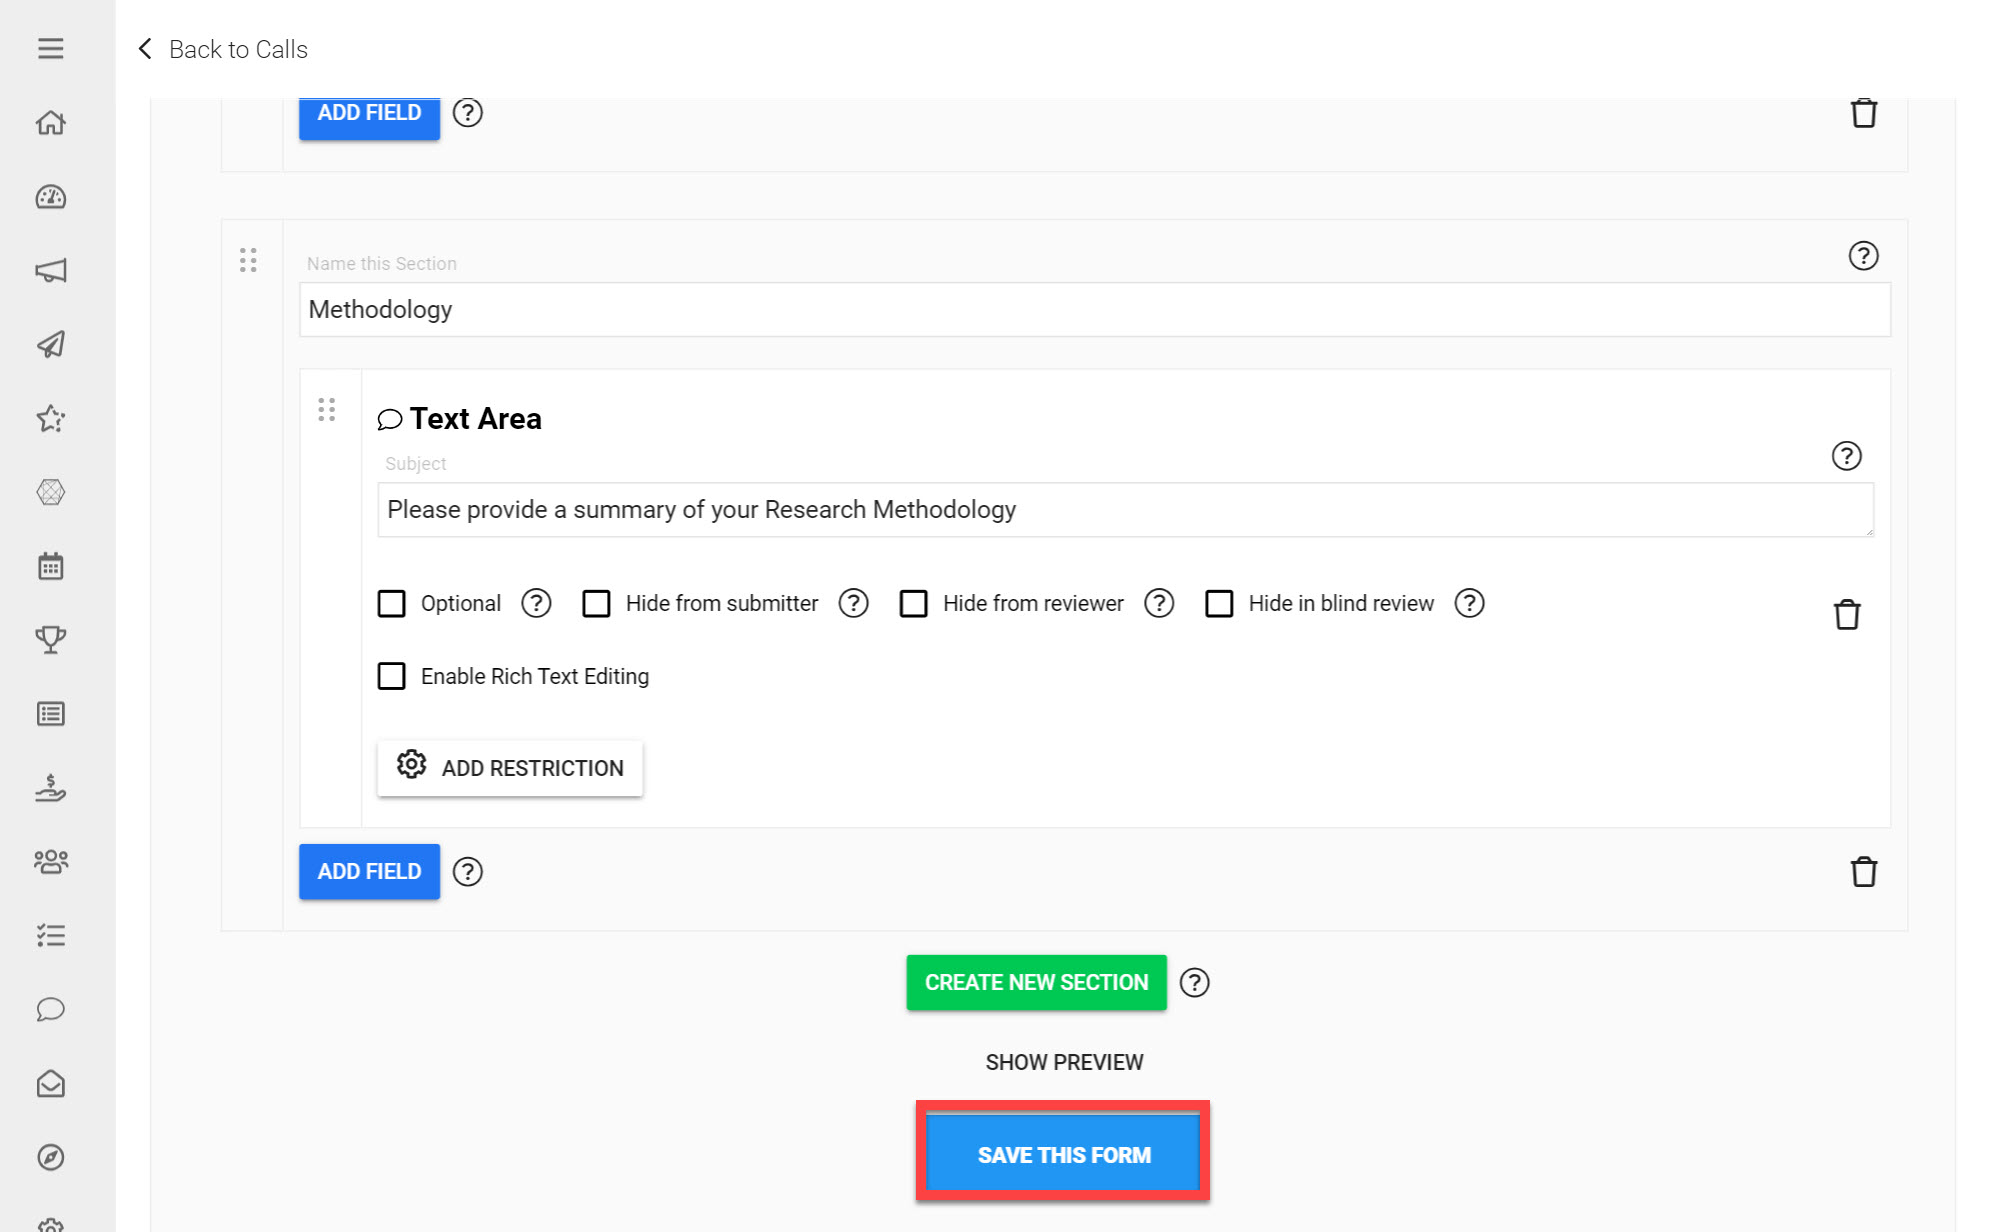
Click Add Section and label it Methodology
Click Add Field
Click Text Area
Input the Subject Line 'Please provide a summary of your Research Methodology'
Scroll to the bottom of your created Submission Form and click Save This Form
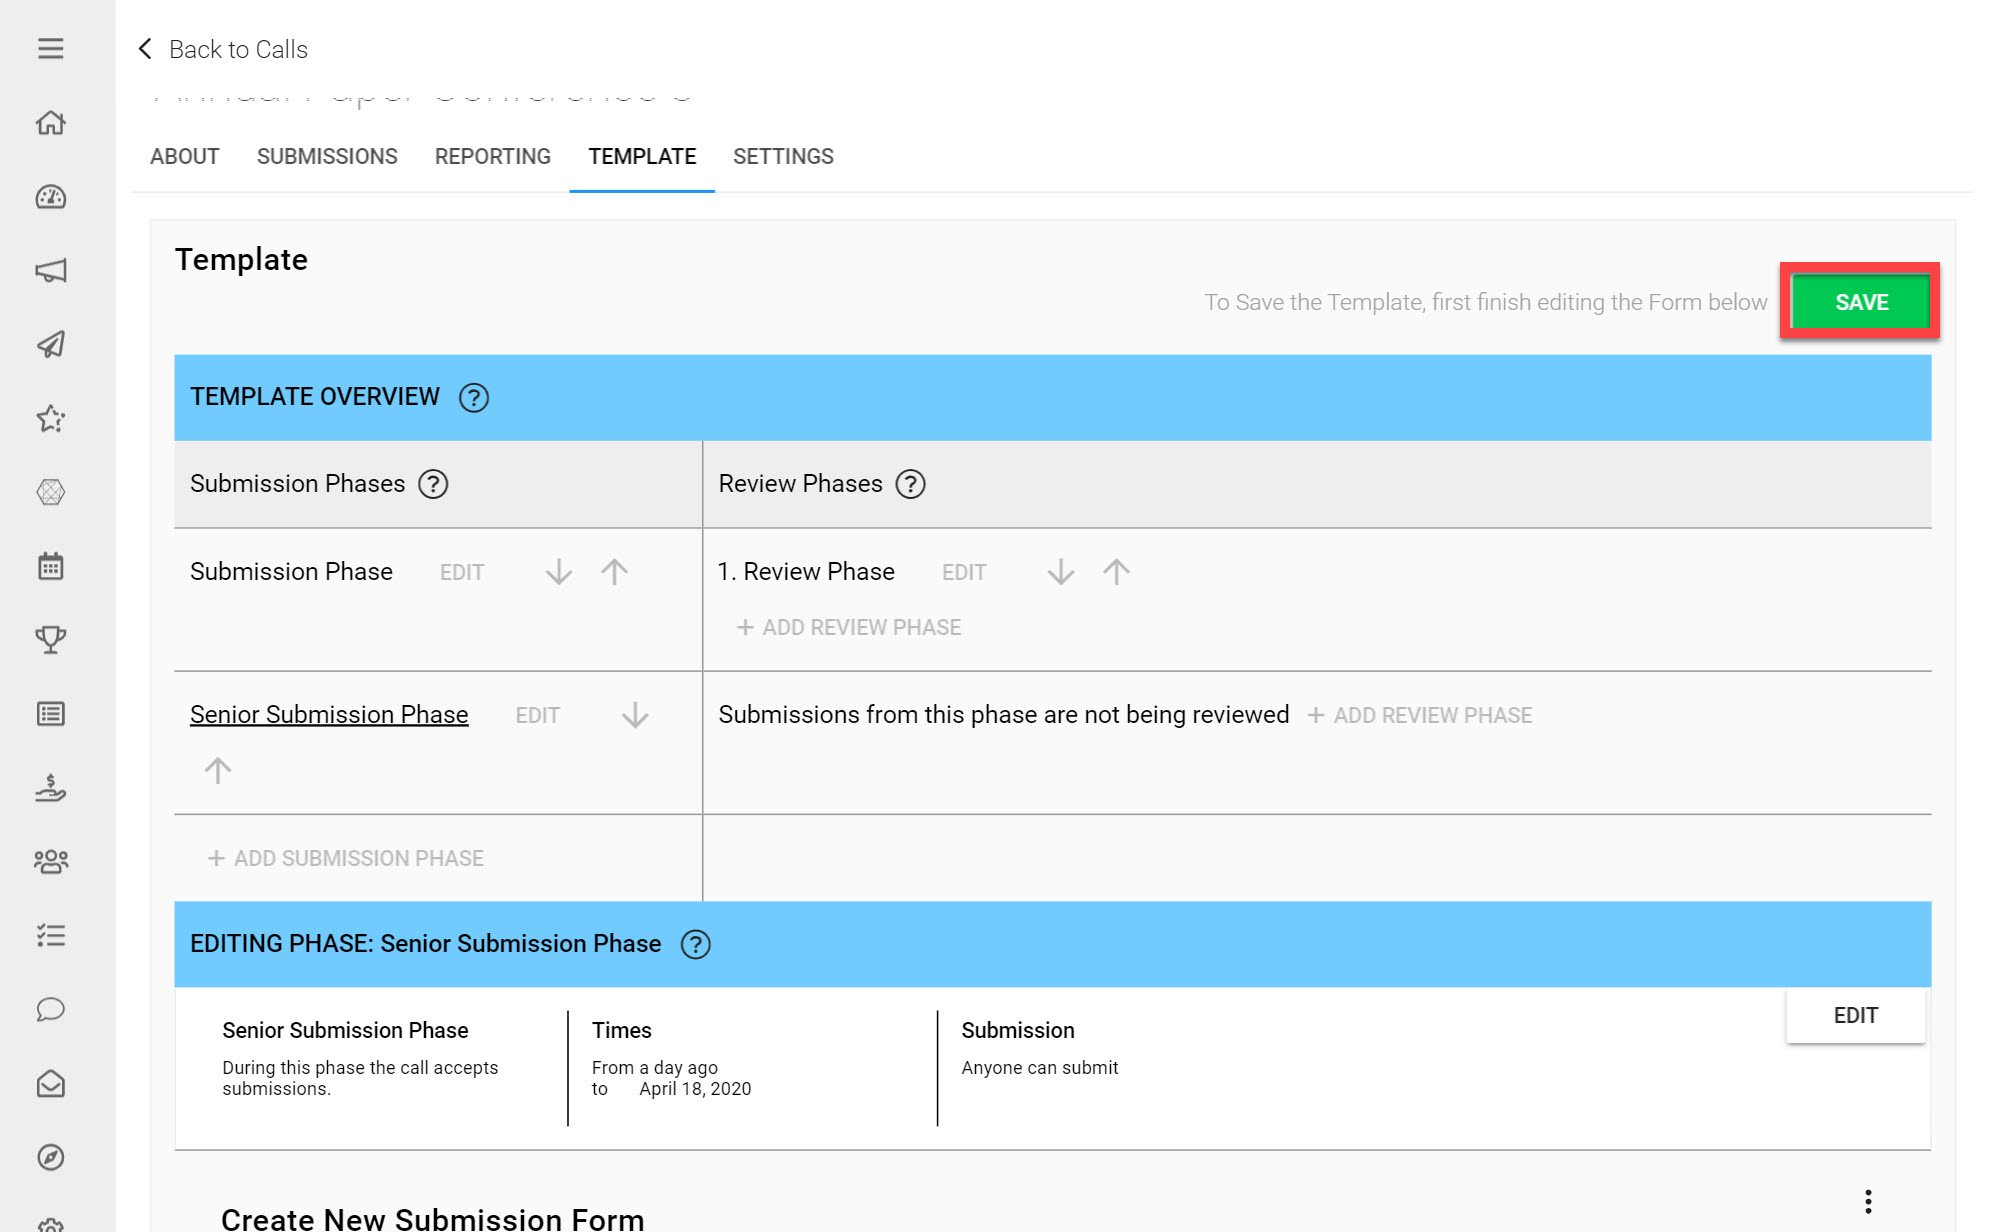
Click Save on the top-right of the Call Template to save the Submission Form to your Call Template.
You have now successfully added a Submission Form to your Call Template.
Add Scenario-based Questions
When creating your Submission Form, you may want to display certain follow-up questions based on previous answers users have selected. Using Skip Logic will help you achieve this.
For our example with the question: ‘Would you like to present your findings?’ you may want to create a follow up question to find out more information from the Submitters that answer 'Yes.'
To use the Skip Logic option to your Call Template:
Click Edit once more on the Submission Phase last added
Click Edit next to the Submission Form added
Under the Research section click Add Field
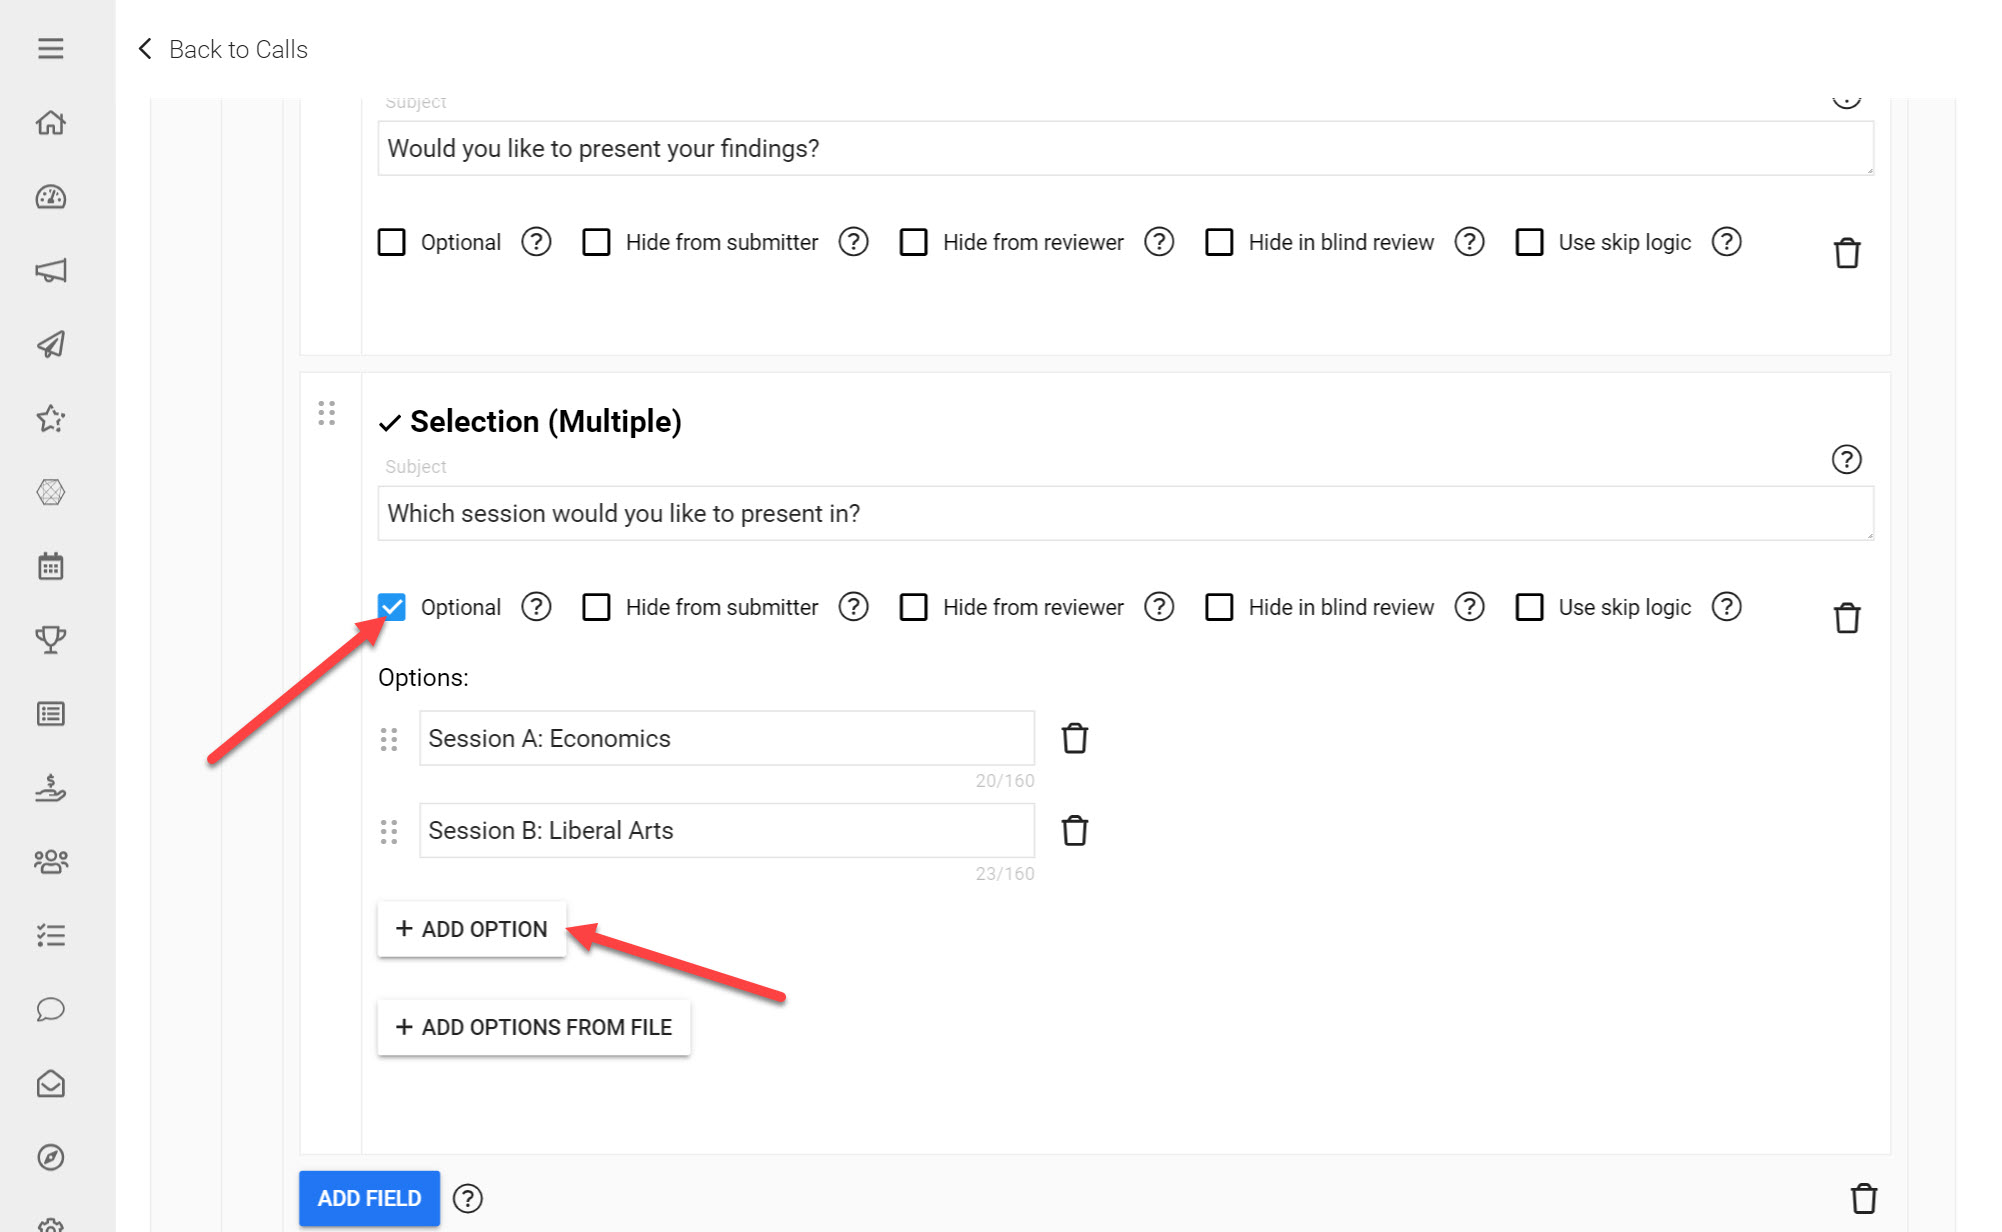
Click Selection (Multiple)
Type in the Subject Line 'Which session would you like to present in?'
Tick the Optional checkbox
Click Add Option and label it Session A: Economics
Add another option and label it Session B: Liberal Arts
Add another option and label it Session C: Chemistry
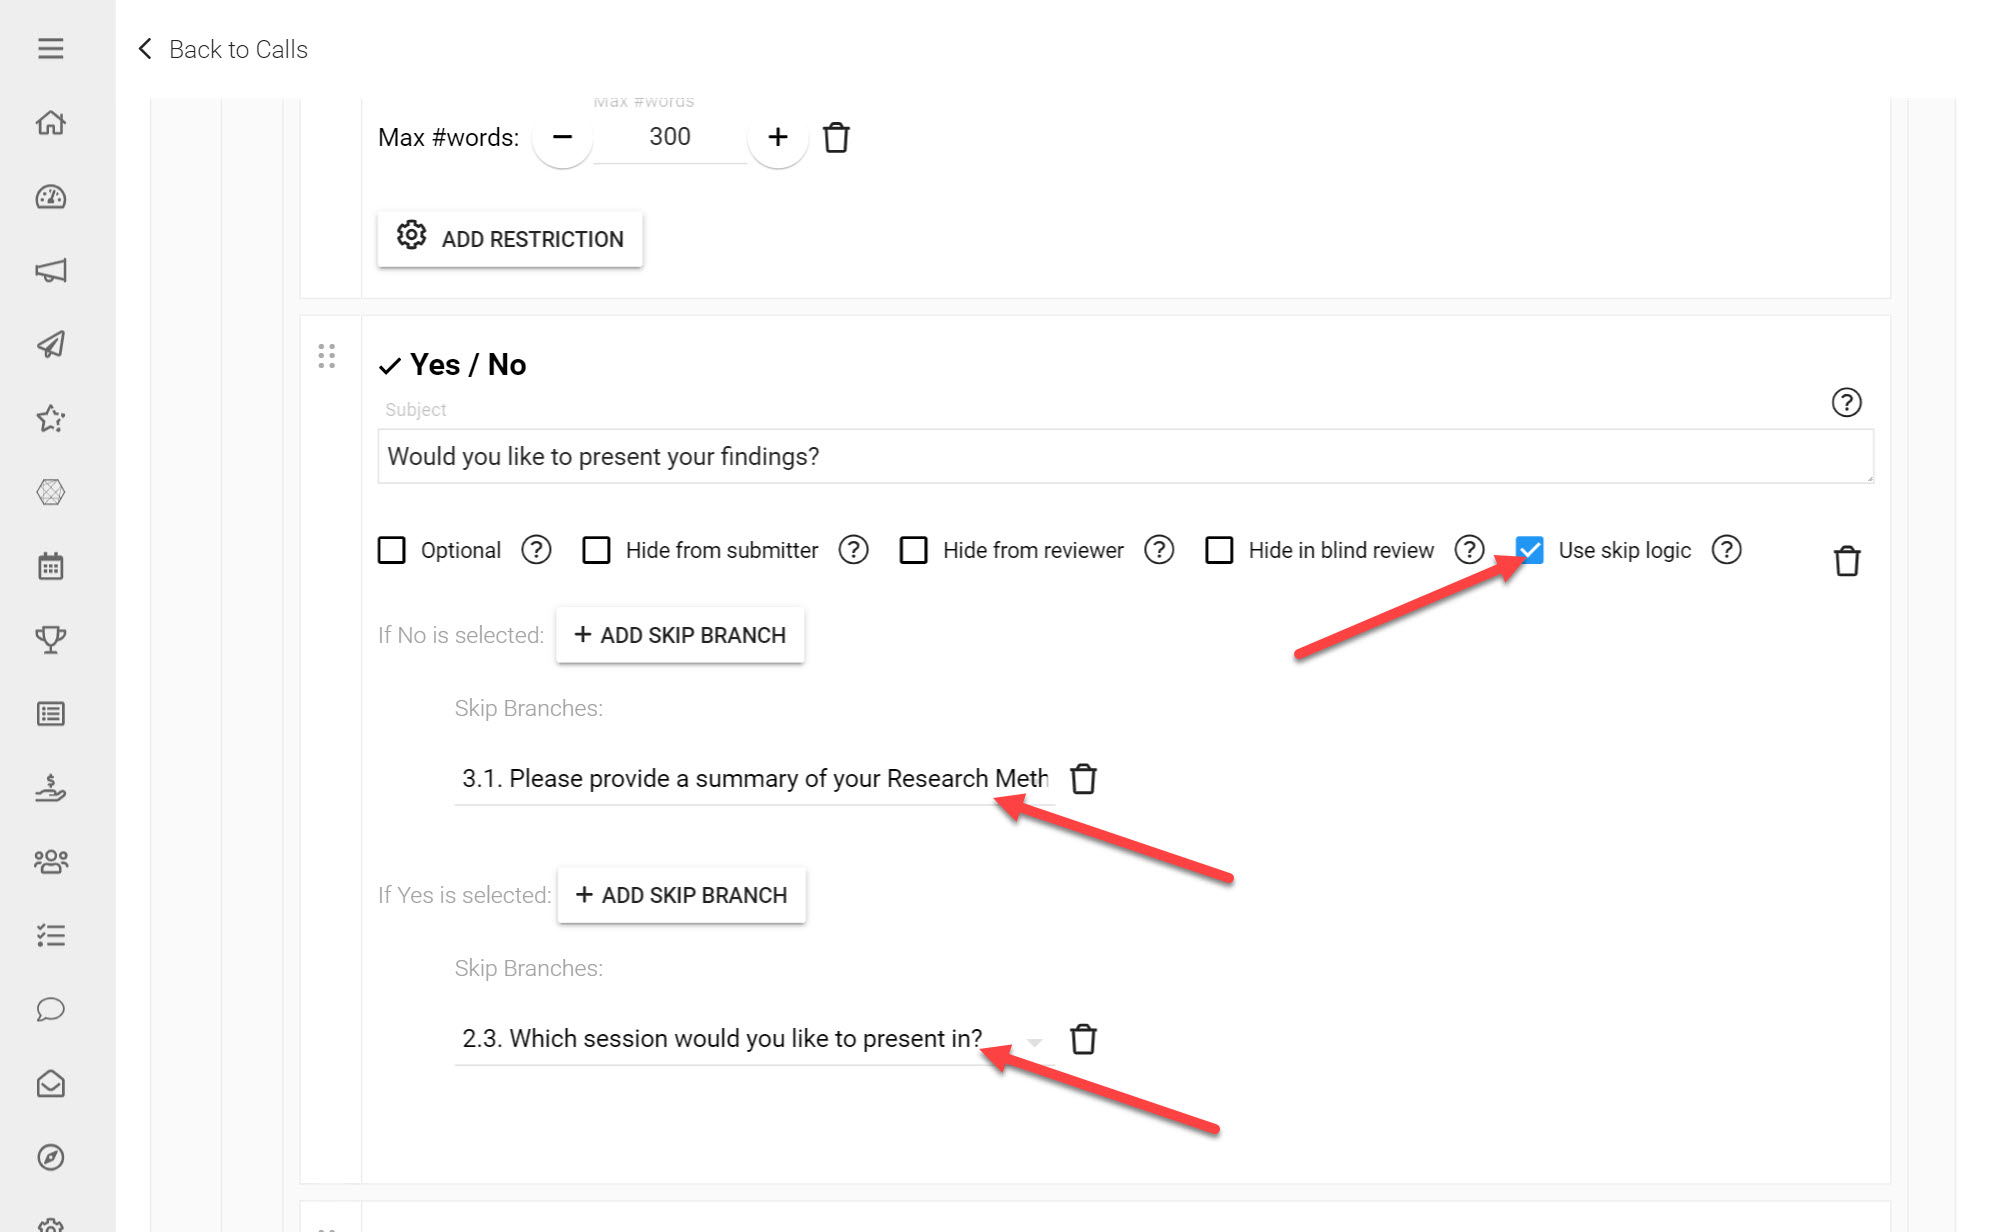
For the question: Would you like to present your findings click Use Skip Logic
Next to If No is selected: Click Add Skip Branch and select 3.1 Please provide a summary of your Research Methodology from the list provided.
If Yes is selected: Click Add Skip Branch and select 2.3 Which session would you like to present in? from the list provided.
Click Save This Form at the bottom.
Here are a few clarifications when it comes to using Skip Logic:
*Note: Skip Logic can only be used with Fields that provide options to choose from (e.g. Selection (single), Selection (Multiple), Dropdown, Yes/No Fields)
If a field in the form is selected as another field's Skip Branch, then this field will only be visible if a Submitter selects the corresponding option of this Skip Logic Field.
If multiple Skip Logic Fields have the same field listed in their branches, then this field will be visible for ANY of the branches selected.
If multiple Fields should be selected if a certain option is selected, all those fields must be added as Skip Branches on that option of the Skip Logic Field.
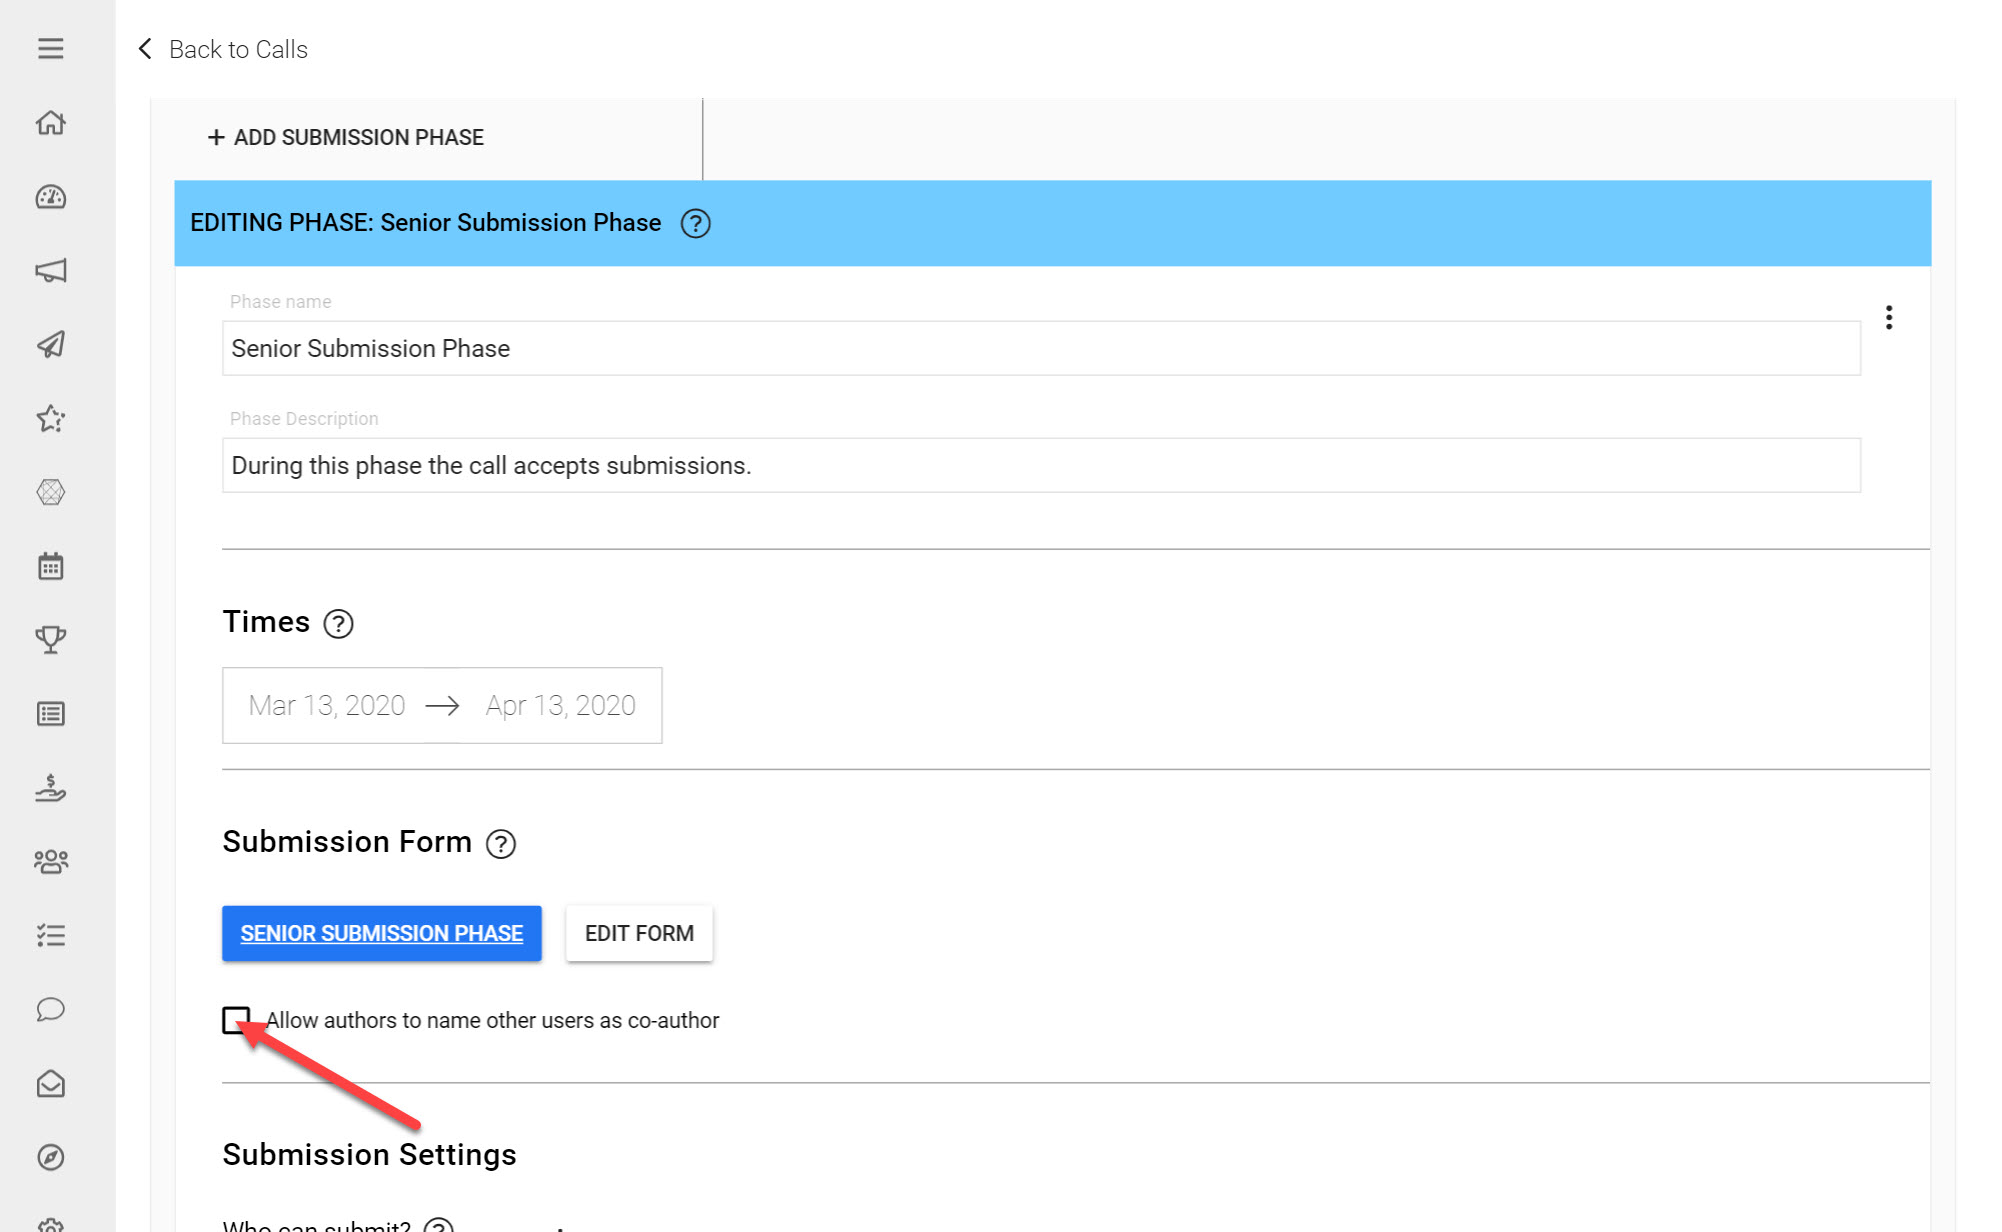
Enable Co-Author Collaboration
Directly below the Submission Form you have just added, you will see a checkbox labelled 'Allow authors to name other users as co-author'. For the cases where more than one user has worked on a Submission (e.g. if two researchers worked together on a Research Proposal), you can tick this checkbox to allow Submitters to list other users as co-authors. More information on our Co-author Feature can be found here.
Edit an Existing Form
Editing a Submission Form can be important to fix typos and make other minor changes once it has been set up. Initially when you create a form, you can modify everything about it - you can change labels and edit options. Once Submissions start being received to your Call however, there will be limited modifications you can make to ensure previously collected Submissions remain valid. This article goes into more detail on why these limitations exist, and which changes will be possible.
To make any changes to your Submission Form before receiving Submissions:

Navigate to the Call you have created
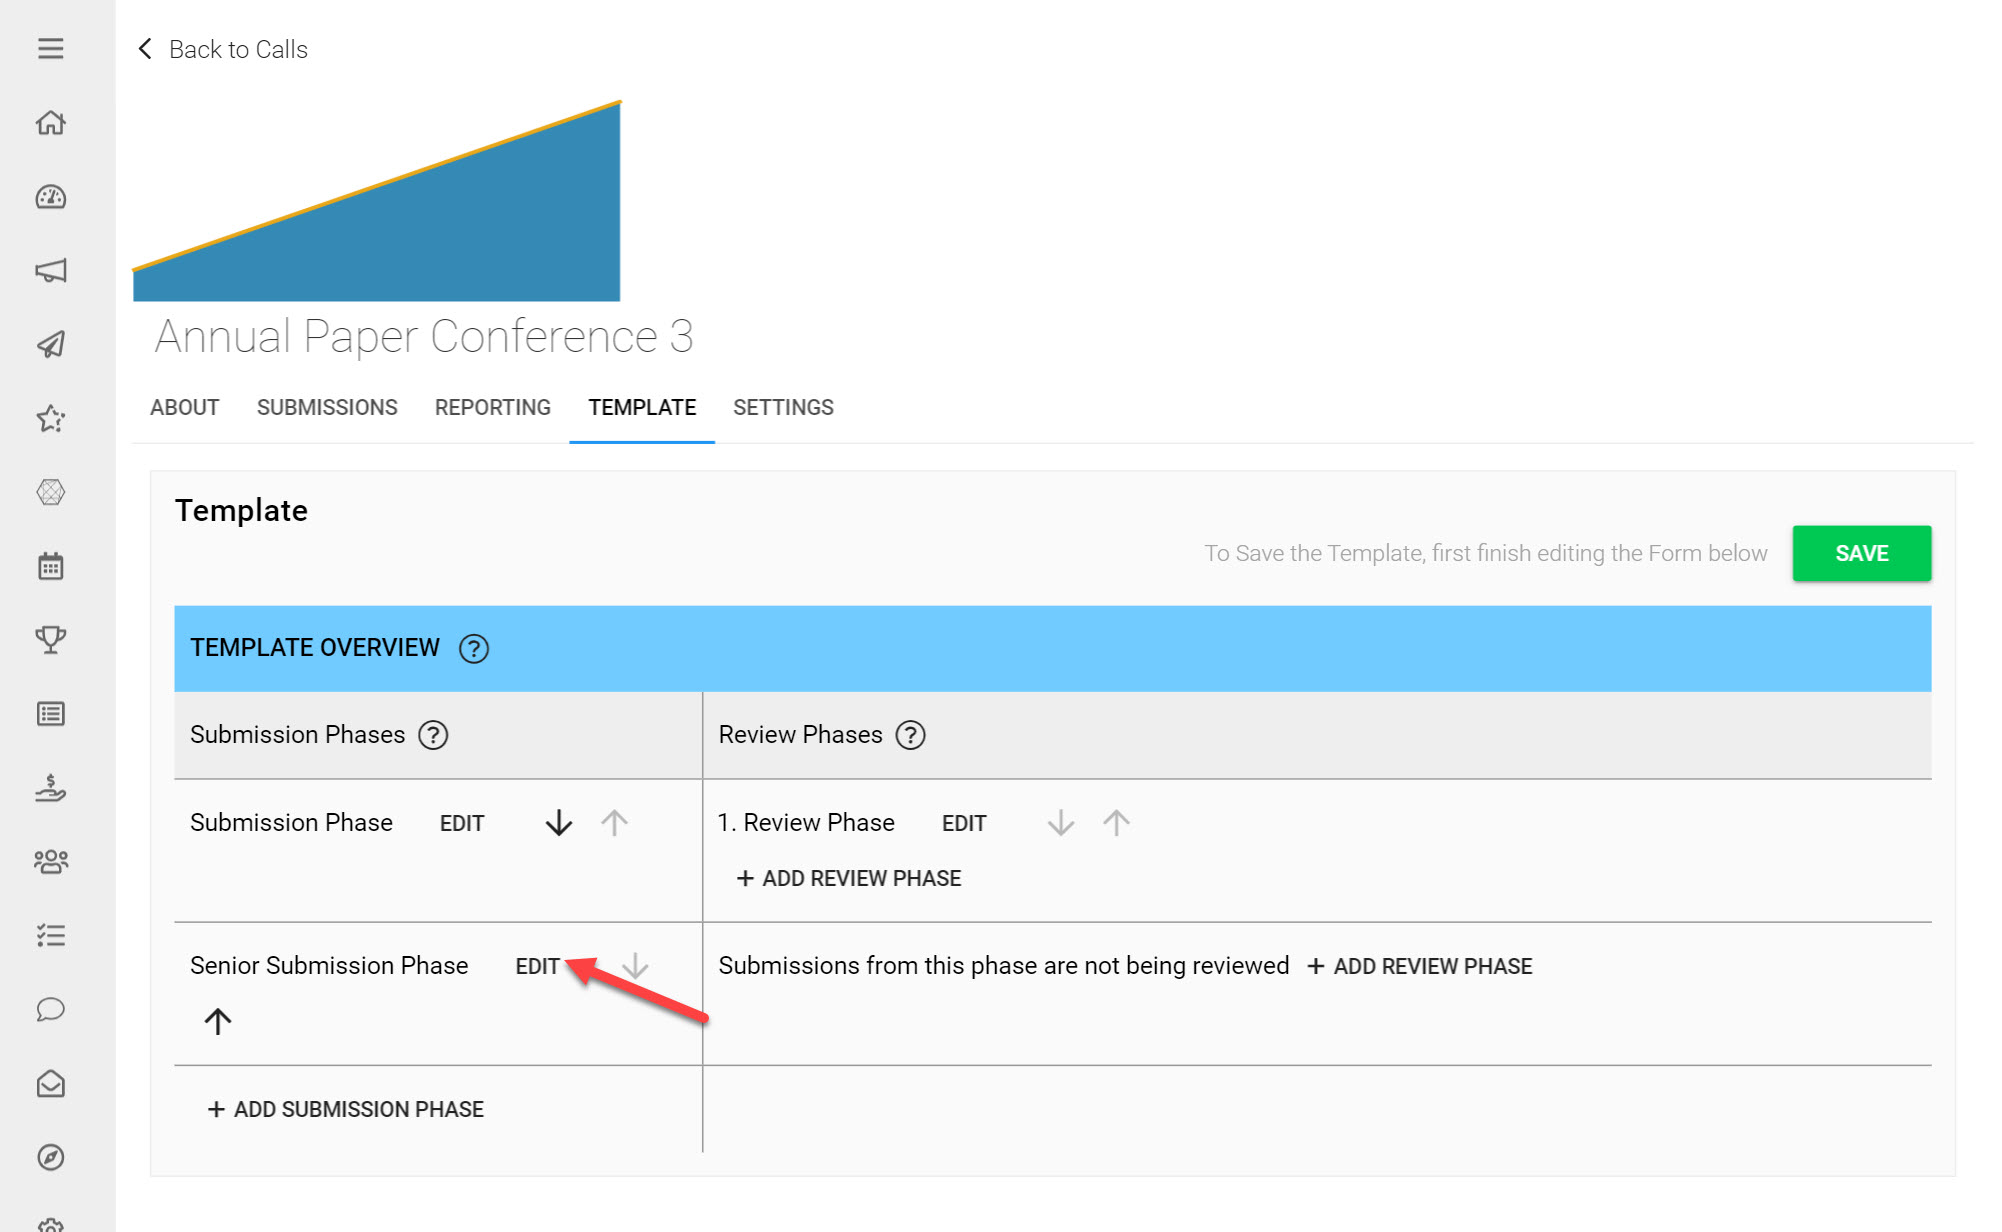
Click the Template tab
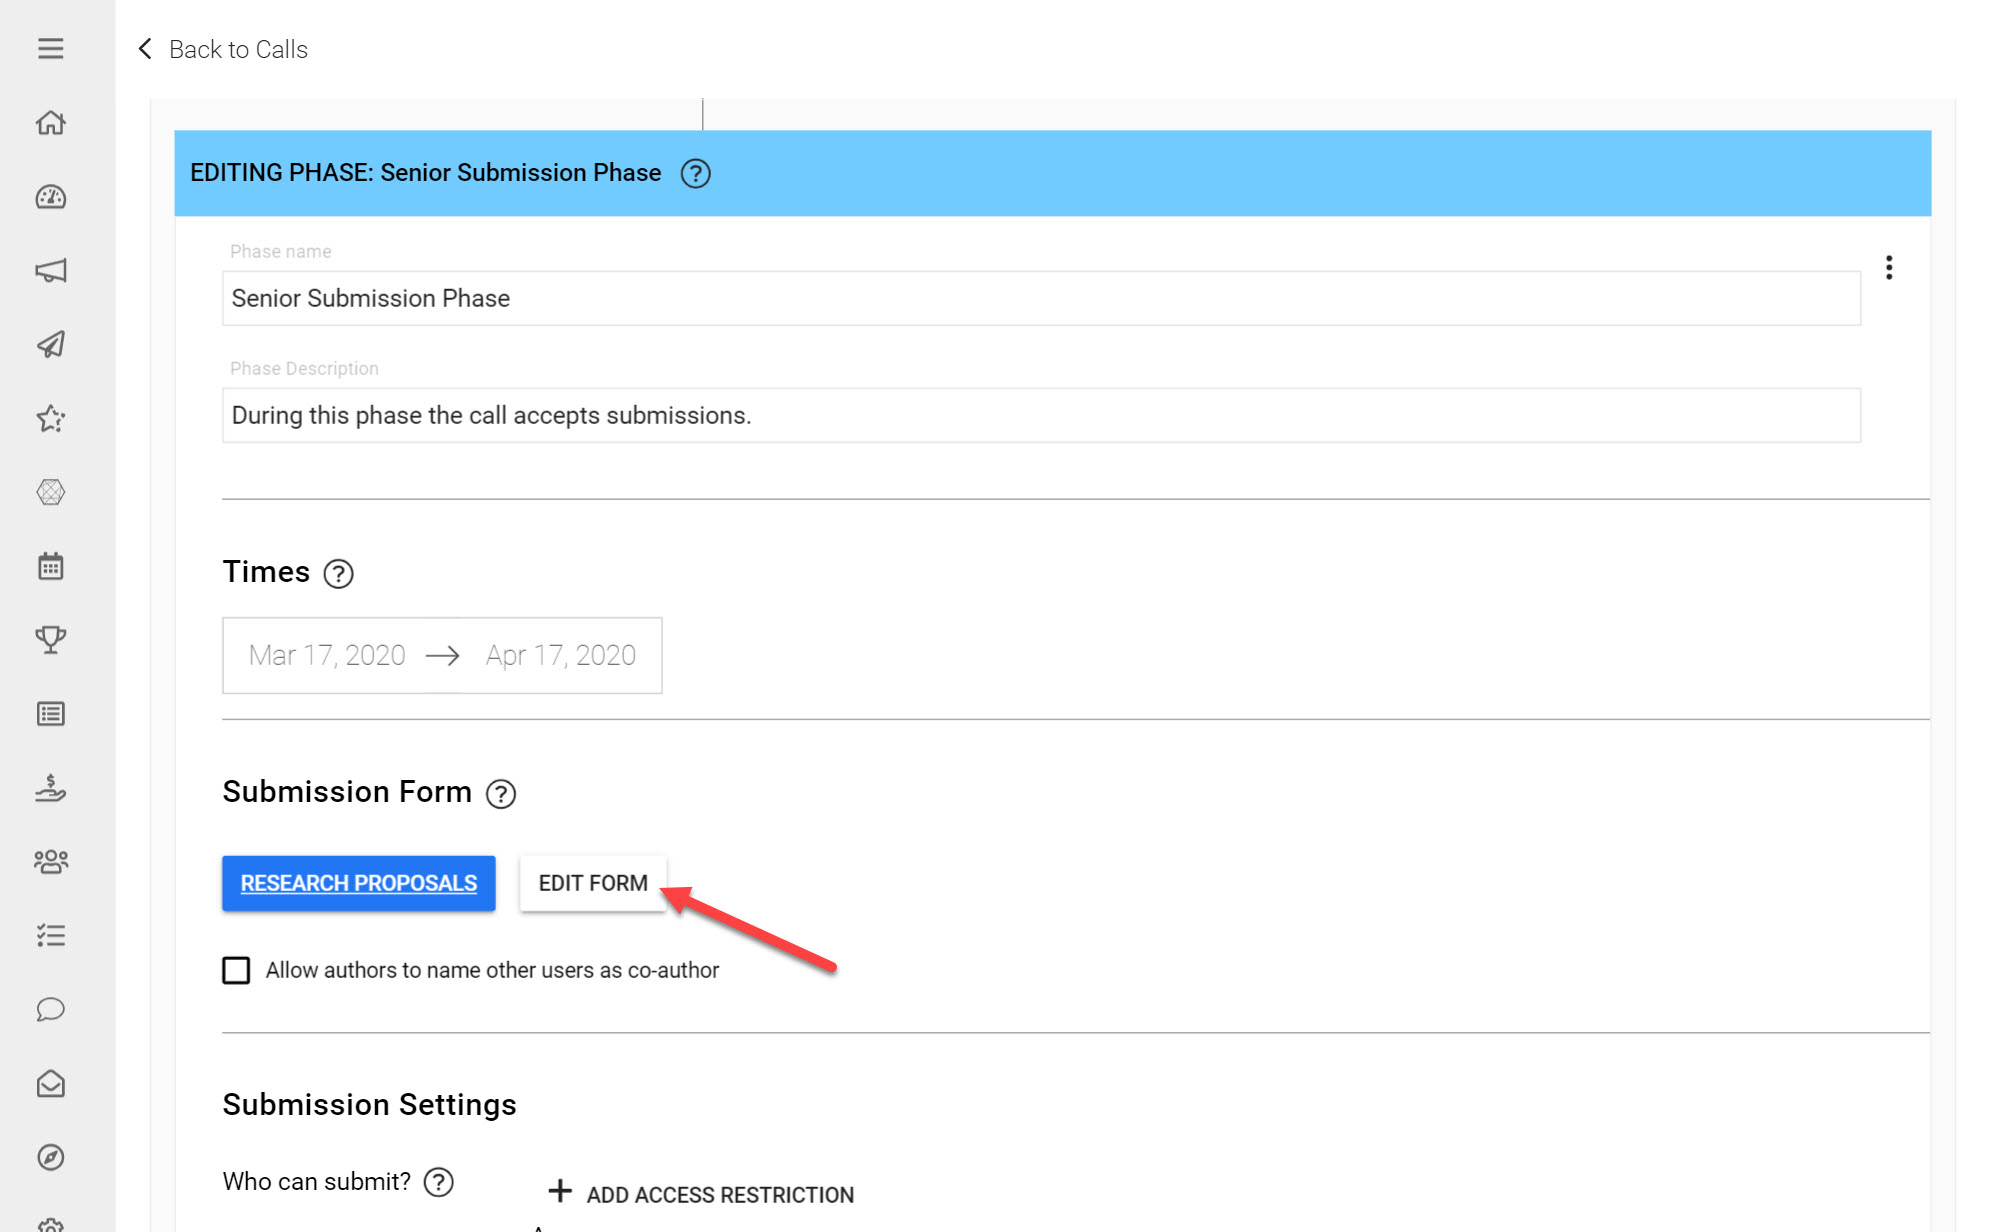
Click Edit next to Submission Phase
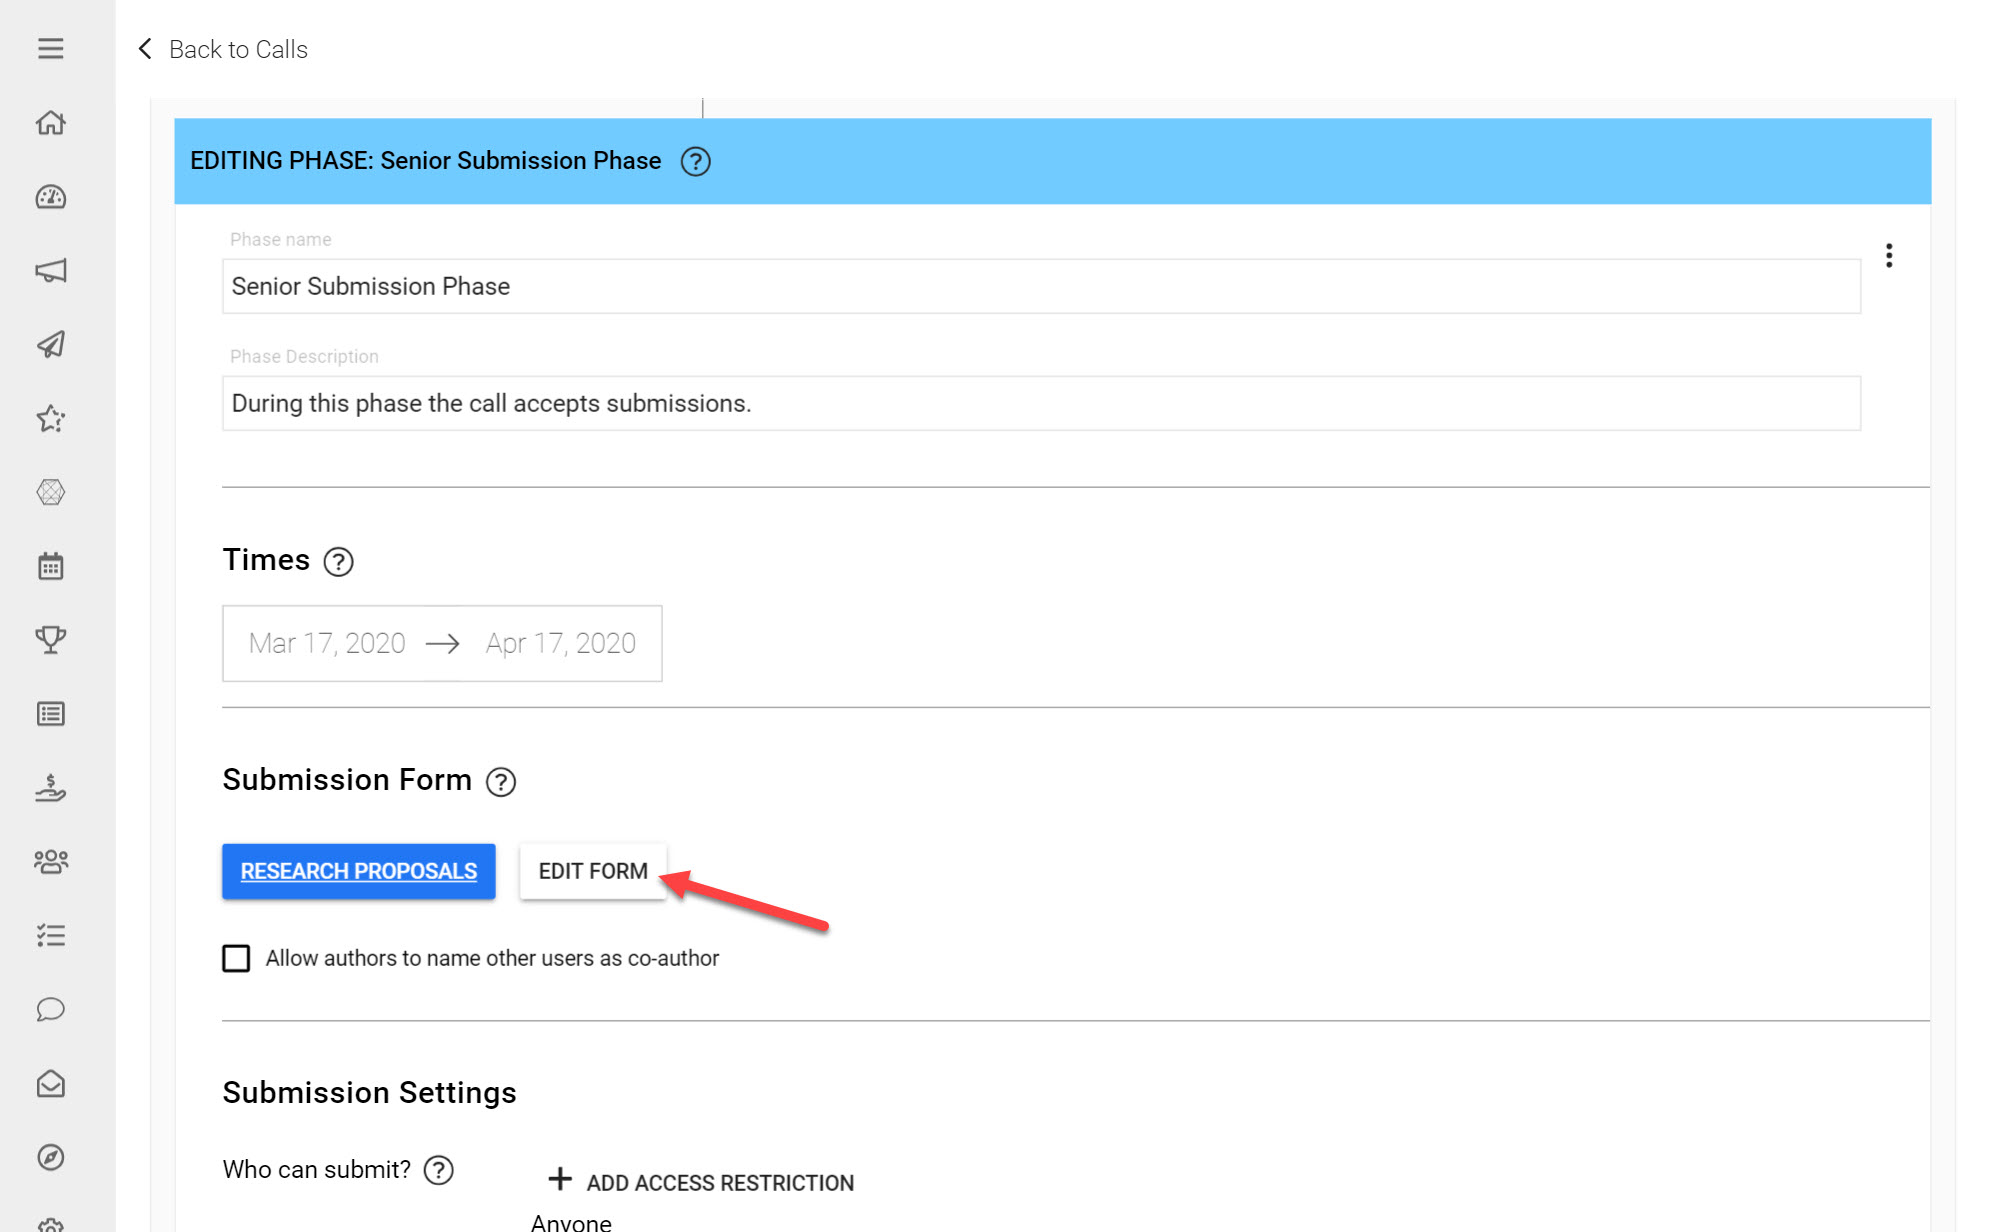
Next to your created Form click Edit Form
Ensure to Save any changes you make to your Form by clicking Save this Form at the bottom of the page, and then clicking Save on the top-right hand side of your Call Template.
